MAINTENANCE
Never enter the bale chamber unless the PTO has
been disengaged, the engine has been stopped,
the key removed and the machine come to a rest.
Always keep your hands away from the edges of
blades - particularly new ones, as they are
extremely sharp. Be aware that even when the leading
edges of the blades appear to be blunt the trailing edges
will remain sharp. Leather gloves will provide some
protection against minor cuts.
BLADES
Extreme care must be taken when carrying out
maintenance work on or around the Blades as they
are incredibly sharp. When replacing Blades use 13mm
ring spanners with long handles to allow the bolts to be
removed whilst avoiding contact with the sharp edges of
the Blades. Always wear heavy duty leather gloves, and
work slowly and methodically.
SILAGE CROSSBEATER BLADES
Enter the Bale Chamber via the Tailgate. Wedge the
Crossbeater and the Rotor to prevent them from turning
and pinching hands and fingers between the Bale
Restraints Fingers and the Crossbeater.
Cover areas of the Crossbeater not being worked on
with old carpet or hessian sacking.
Blades can simply be rotated and repositioned to
achieve a new sharp cutting edge. When both edges
are blunt the Blades themselves will require replacing
altogether.
To achieve further cutting aggression, a selection of
Blades can be positioned using the outer holes on the
Crossbeater rings.
DUAL CHOP BLADES
Disengage the blades by raising the Blade Carrier.
Enter the Bale Chamber and lock the Blade Carrier in
the raised position by placing two bars through the ¾”
diameter holes in the Slides.
Remove the M12 bolt (1) from the Cover Plate located
on the LH Mid Body Panel, as indicated in Figure 4.
Figure 4. Cover Plate closed position, bolt removal.
Rotate the Cover Plate and position as shown in Figure
5.
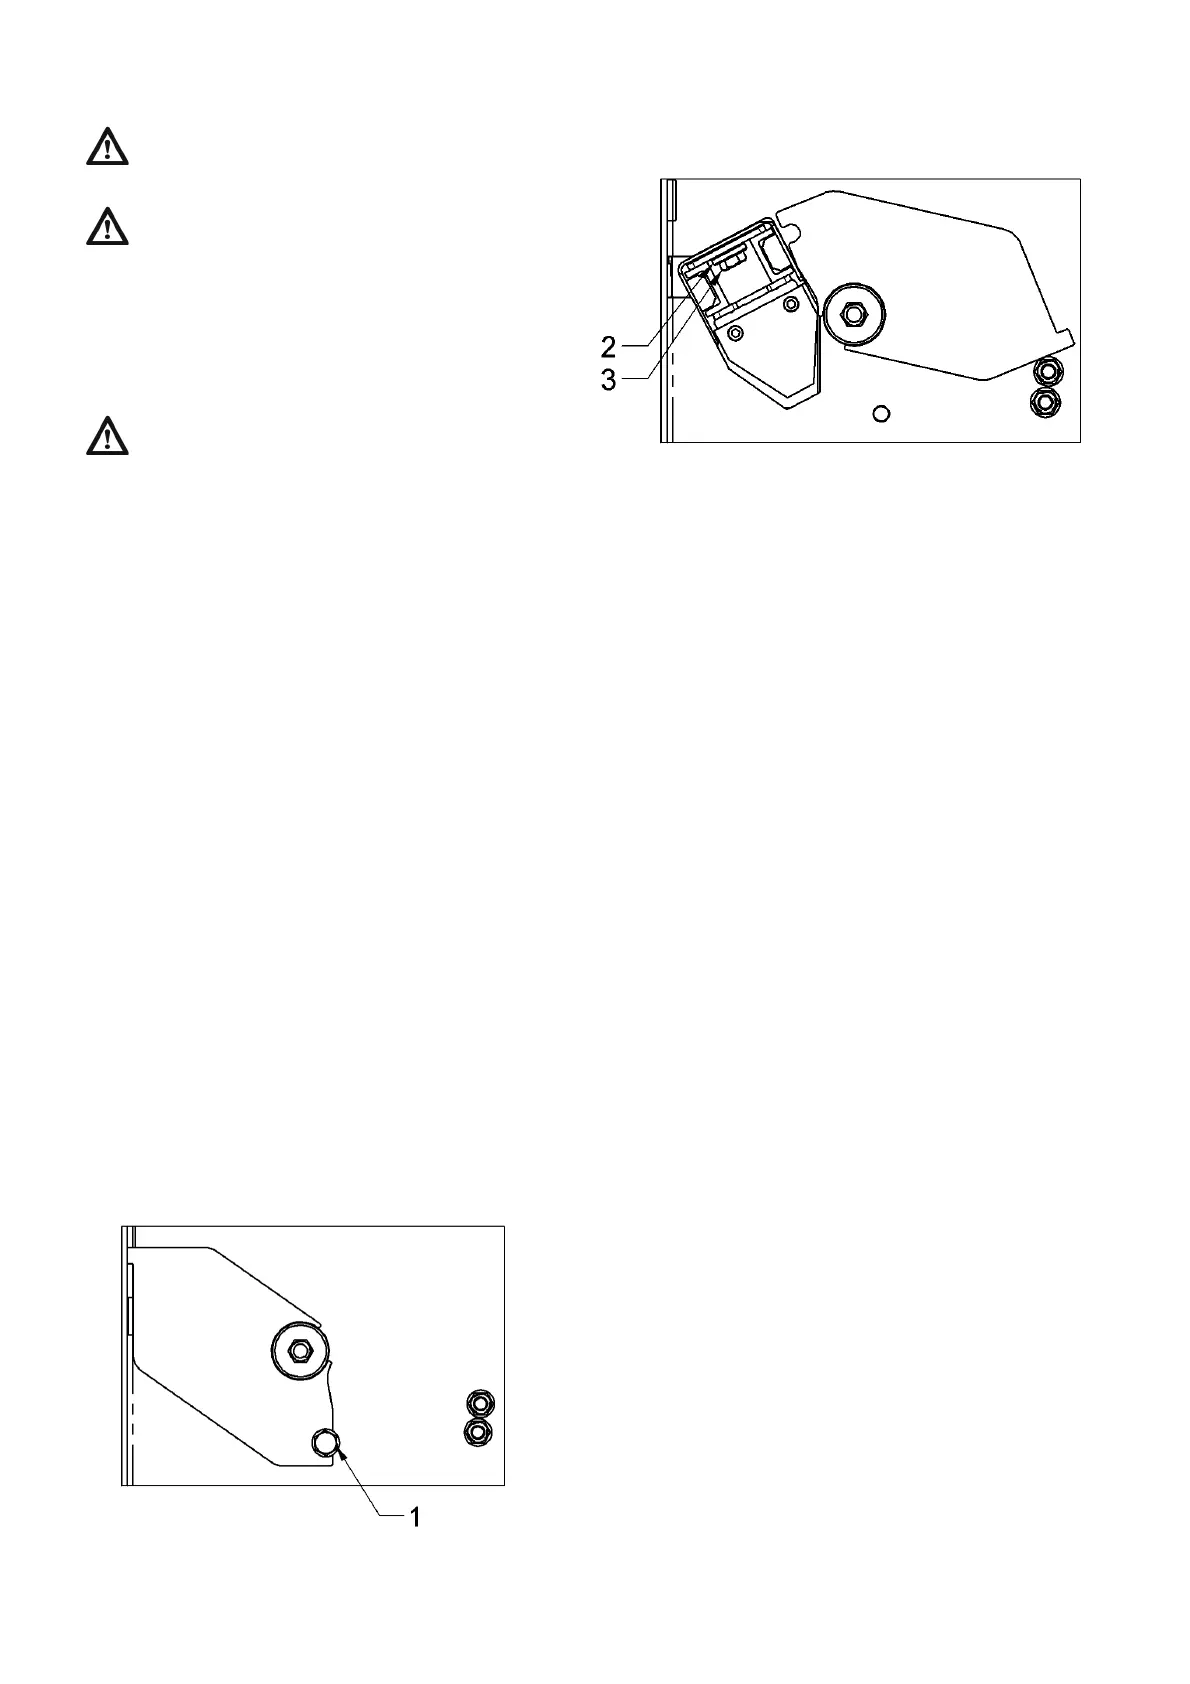
Figure 5. Cover Plate open, bolt and boss removal.
Remove the Blade Bar Boss (2) by undoing the M12 bolt
(3), illustrated in Figure 6. Using the Blockage Removal
Tool, which is stored on the front of the machine, slide
out Blade Beam by hooking the Boss hole.
To obtain fresh cutting edges on the Blades, the Blade
Beam can be fully removed from the machine and
replaced in the opposite direction.
After the Blade Beam has been inserted back into the
machine, replace the Blade Bar Boss but do not tighten
the M12 bolt, this allows the blade position to be
adjusted. Check the Blade clearances on the
Crossbeater by lowering the Sliding Blade Carrier. Align
the Blades centrally between the Crossbeater Rings by
adjusting the Blade Beam Tension Bar on the Sliding
Blade Carrier. Finally tighten the M12 bolt securing the
Blade Bar Boss.
Once both edges of the Blades have become blunt the
individual knives themselves will require replacing. Do
this using a 13mm ring spanner and an allen key, both
with long handles, this will allow the bolts to be removed
whilst avoiding contact with the sharp edges of the
Blades.
8
 Loading...