For operation using an auxiliary leisure battery
where the voltage output is at a static +/-12 volts
Non voltage sensing
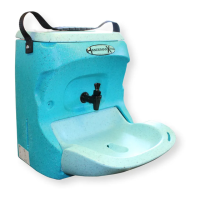
Your Teal sink will have 3 wires connected.
• 12V + Red. To auxiliary battery.
• 0V - Black. To vehicle battery negative.
• White signal wire (W.W.) to 12V +. To auxiliary
battery.
The unit will switch o when less than 11.9 volts are
detected, thus preserving the battery’s integrity.
To control this unit the installing auto electrician must
wire the positive feed (red) via a switch or relay.
24V installation details:
non ‘smart’ charging / traditional vehicles
Voltage sensing
In these systems the alternator will charge the battery
whenever the engine is running.
Your Teal sink will have 2 wires connected.
• 12V + Red. To vehicle battery or auxiliary battery.
• 0V - Black. To vehicle battery negative.
The White signal wire is unused.
The unit will switch on when it detects a voltage above
25.6 volts and switch o below 25.1 volts.
Consult the vehicle handbook as to how to connect the
Red/Black wires to the battery as direct connection to
the battery terminals can defeat the ‘battery
management system’ – if tted.
Vehicle Mounting
This unit has been designed for xing to a motor vehicle
only. It must not be used in any other application.
Before installation check that you have all the parts
listed.
Please ensure that you use appropriate ttings before
commencing.
Before commencing installation check that you have
appropriate tools and a suitable workspace.
Failure to follow these instructions may result in
personal injury, damage to the product or damage to
property.
Check that you will not need to access the area or
elements within it in the position where you intend to
x the Handeman.
If you are unsure consult a suitable qualied installer.
Ensure that the position of the unit allows sucient
space for the opening of the lid and the safe opening of
the bowl.
Using the supplied template identify the locations for
the 4 mounting points.
Fit suitable fasteners in each hole.
Mount the unit using the 4 bolts provided.
Do not overtighten xings as this may damage the unit.
Take care not to drop tools or xings into the unit.
Check that the unit is upright and level before lling.
Electrical Connection
This unit must be connected to a vehicle’s electrical
power supply using cable provided. Do not attempt to
replace this.
Waste Water
All Handeman Xtra models have a removable bowl that
retains all the dirty water.
There is no need for a separate waste pipe or waste
water storage container.
Mounting the Handeman Xtra