EasyManua.ls Logo

Team Assocciated Nitro TC3 User Manual

Team Assocciated Nitro TC3
9 pages
To Next Page IconTo Next Page
Page #1 background imageLoading...
Page #1 background image
T E A M N T C 3 K I T
KIT INCLUDES:
Threaded shocks.
2-speed Transmission.
Pro-Line wheels & tires.
Aluminum MIP CVD's.
Associated steel turnbuckles.
Also includes:
6061 T6 aluminum chassis.
Precision rubber-sealed ball
bearings.
Tuned pipe and manifold.
Thank you for purchasing this
Team Associated product.
This manual contains steps
and instructions you will use
to set up your car. Please
read this entire manual before
attempting to start your car.
Follow the directions in this
manual closely to reduce any
problems on start up. We
hope that you will enjoy your
new Team Asssociated car.
2
YOU WILL NEED THESE TOOLS
TO ASSEMBLE YOUR KIT
Phillips screwdriver #2.
1/8" flat head screwdriver.
5/16" driver or glow plug wrench.
Needlenose pliers.
Thread locking compound (#1596
Locking Adhesive or equivalent)
Super glue or tire adhesive
(#1597).
Hobby knife
WARNING!
This knife
cuts plastic and fingers with equal
ease, so be careful.
Precision ruler.
YOUR ENGINE MAY REQUIRE
TOOLS NOT LISTED HERE.
WARNING! Always
use hand and eye
protection with cyano-
acrylic glue!
R E Q U I R E D E Q U I P M E N T T O R U N Y O U R K I T
WARNING!
Do not use a power
screwdriver to install screws
into nylon, plastic, or
composite materials. The
fast rotation speed can heat
up the screws being
installed. They can break
the molded parts or strip the
threads during installation.
for the
pull start
version of
Team Kit #2030:
Glow plug starter.
Model car fuel.
Fuel bottle.
Receiver battery pack.
Glow plugs (AE #MC-59).
R/C two channel surface
frequency radio system
with two servos.
.12 or .15 c.i. glow fuel R/C
engine.
200mm touring car body.
for the
non pull start
version of
Team Kit #2031
Glow plug starter.
Model car fuel.
Fuel bottle.
Receiver battery pack.
Glow plugs (AE #MC-59).
Starter box or electric hand starter
with car starter donut
12 volt battery for starter system.
R/C two channel surface
frequency radio system
with two servos.
.12 or .15 c.i. glow fuel R/C engine
.
200mm touring car body.
TOOLS SUPPLIED
Allen wrenches (#6950)
, .050", 1/16", 3/32", 5/64"
Clutch nut wrench (#1721)
Molded tools (#6956):
Droop gauge (#3987)
Camber/toe-in gauge (#1719)
Track width/ride height tool (#1719)
0
1
2
3
4
5
6
7
8
Log on to www.rc10.com and get your FREE computer wallpaper!
Question and Answer IconNeed help?

Do you have a question about the Team Assocciated Nitro TC3 and is the answer not in the manual?

Team Assocciated Nitro TC3 Specifications

General IconGeneral
BrandTeam Assocciated
ModelNitro TC3
CategoryMotorized Toy Car
LanguageEnglish

Summary

Nitro TC3 Kit Introduction

Kit Inclusions

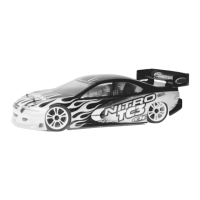
Lists all parts and components included in the Team Associated Nitro TC3 kit.

Required Equipment & Tools for Operation

Equipment for Pull Start Version

Details the necessary equipment for running the pull start version of the Nitro TC3.

Equipment for Non-Pull Start Version

Details the necessary equipment for running the non-pull start version of the Nitro TC3.

Supplied Tools

Lists the tools provided with the Nitro TC3 kit for assembly and maintenance.

Assembly Tools Needed

Lists the tools required by the user to assemble the Nitro TC3 kit.

Assembly Safety Warning

Warns against using power screwdrivers to avoid damaging plastic parts.

Building Preparation and Manual Guide

Pre-Build Instructions

Essential reading and preparation steps before starting the Nitro TC3 assembly.

Manual Format Explanation

Explains the structure and conventions used within the instruction manual.

Bag A: Swing Rack Assembly

Step 1: Swing Rack Assembly

Detailed steps for assembling the swing rack component.

Bag A: Swing Rack to Chassis Mounting

Steps 2-3: Mounting Swing Rack

Instructions for attaching the swing rack assembly to the car chassis.

Bag B: Front and Rear Arm Components

Parts for Steps 1-3 (Bag B)

Lists parts from Bag B required for initial assembly steps.

Front & Rear Suspension Assembly

Front Arm Assembly

Step-by-step guide for assembling the front suspension arms.

Rear Arm Assembly

Step-by-step guide for assembling the rear suspension arms.

Setting Suspension Droop

Procedure for setting the suspension droop using the provided gauge.

Bag C: Differential Construction

Differential Ring Gear Steps

Instructions for preparing and assembling the differential ring gear.

Long Outdrive Assembly Steps

Detailed steps for assembling the long outdrive part of the differential.

Short Outdrive Assembly Steps

Detailed steps for assembling the short outdrive part of the differential.

Bag C: Differential Adjustment & Input Shaft

Differential Alignment & Adjustment

Guidance on aligning and adjusting the differential hubs.

Bag C: Front Input Shaft Assembly

Front Input Shaft Assembly Steps

Instructions for assembling the front input shaft with pinion and drive cup.

Bag C: Two-Speed Transmission Components

Two-Speed Shoe Preparation

Steps for preparing the two-speed clutch shoes.

Clutch Shoe & Input Shaft Assembly

Assembling clutch shoes onto the input shaft and initial adjustments.

Spur Gear & Housing Mounting

Attaching spur gears to the two-speed housing and one-way hub.

Bag C: Drive Components & Brake System

Rear Input Shaft & Brake Disc Assembly

Assembling the rear input shaft, brake disc, and O-ring.

Brake Cam & Bracket Assembly

Instructions for assembling the brake cam and bracket.

Transmission & Brake System Integration

Transmission Case Mounting

Steps for attaching the lower and upper transmission cases to the chassis.

Brake System Installation

Guide for installing the brake cam assembly and center bulkhead.