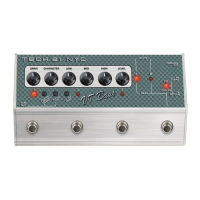
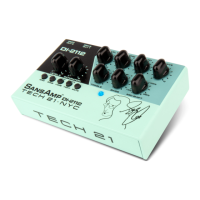
GUIDE FOR INDIVIDUAL CONTROLS
INPUT SWITCH:
LEAD: Marshall
®
-style pre-amp sound, with mid-range and highs emphasized.
NORMAL: Mesa Boogie
®
-style pre-amp sound, with a basically flat EQ.
BASS: Fender
®
-style pre-amp sound (excellent for rhythm as well as bass).
CHARACTER CONTROLS:
#1.
Mid-Boost I
#2. Mid-Boost II
Achieves various pre-amp EQ curves in the mid-range, for example:
#1 and #2 OFF = Brightest Sound
#1 ON = In-Between Sound
#2 ON = In-Between Sound
#1 and #2 ON = Fattest Sound
#3. Low Drive
Achieves different pre-amp EQ curves on the low spectrum.
When ON, it has a flat frequency response.
When OFF, acts as High pass Filter. For fuller body, keep setting ON.
#4. Clean Amp
Cleans up overdrive. Excellent for achieving chunky rhythm sounds.
#5. Bright Switch
Adds brightness when Amp Drive is on lower settings. Best results
are when Amp Drive is half-way up, as there will be no effect when
Amp Drive is on full.
#6. Vintage Tubes
Final sound becomes a touch softer and mellower.
#7. Speaker Edge
Adds extra presence to the final sound.
#8. Close Miking
Duplicates the sound of a microphone being placed closely to the
speaker cabinet, and slightly boosts the bottom end.
IMPORTANT NOTE: The Character Controls were not designed to be
adjusted during live performances. They were developed for extra versatility to
give you total freedom of expression of your individual tonal taste. Once
desired programming is achieved, settings should remain constant. If used during
live performances, amplification should be set WITHOUT distortion.
GUIDE TO KNOB CONTROLS
PRESENCE DRIVE
Shapes pre-amp contours in the upper mid-range. For maximum crunch, set on
full.
AMP DRIVE
Shapes power amp contours. For heaviest distortion, set on full.
OUTPUT
Controls overall volume. Balance with Bypass signal for best sound. For head-
phones, insert jack half-way and boost Output.
HIGH
Balances final EQ. Compensates extra high-end of guitar amplifiers during live
use; suggest setting half-way or less. When recording direct in a studio, recom-
mend setting be on full.
USING SANSAMP WITH EFFECTS
When using SansAmp with effects, remember that EQ can be placed before or
after SansAmp to achieve different results. Otherwise, place the following
effects:
BEFORE SansAmp: AFTER SansAmp:
Compression Chorus
Distortion Delay
Envelope Follower Harmonizer
Wah-wah Reverb
Special Note: SansAmp contains a F.E.T. buffer which improves the guitar signal
even in Bypass mode; your instrument will sound better through SansAmp even
when not using its sound-shaping capabilities.
34

 Loading...
