12
Model: TX-256 Article No. 5088, 12/2023
Default Settings: [Cancel] (default) / [OK]. → Select and press E button
to confirm.
Restore the camera to factory default settings including password, serial
number and so on.
Version: Look up the Firmware information of the camera.
Operation
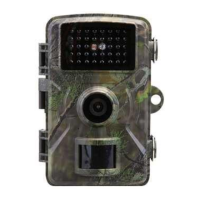
Positioning the Camera
Give careful consideration to where you place the camera. If you leave the
camera unit unattended, it may be removed by other people or even
animals. To avoid potential false triggering do not point the camera at a
heat source such as the sun. Nearby tree branches swaying in the wind
may also trigger the camera unintentionally. The unit can be strapped to a
tree or other fixture using the belt supplied. Alternatively, the unit be
mounted on a tripod.
Set to Real Time Mode
Move the switch to the ON position. The camera will be ready to operate
after 5 seconds. The red LED on the front panel will flash six times. When
it goes out the camera is ready and waiting. When an object enters the
PIR sensor range, the camera will take pictures or video automatically,
according to your settings.
Note: You will not notice the camera capturing images or video. The
operation is completely silent.
If no movement is detected, the camera will power down and remain in
standby mode.
Night Mode
The light sensor will automatically switch the camera between day and
night mode. In night mode the infrared lamps will illuminate the subject
when the camera is activated.
Note: The infrared illumination is invisible. Images and video captured
under infrared illumination will be in black and white.
Reminder: Batteries will drain more quickly when operating in night mode.
It is recommended to insert a full set of new 8 x AA batteries if you intend
to set the camera for extended night time recording.
 Loading...