Do you have a question about the Technics SX-AX7 and is the answer not in the manual?
Guide on how to start playing the Technics synthesizer keyboard easily.
Instructions on how to adjust the main volume level of the synthesizer.
Procedure for resetting all stored memories to factory preset settings.
Explanation of how CONDUCTOR buttons assign voices to the keyboard or split parts.
How to select and use POLY/ACCOMP voices and memory functions on the keyboard.
How to select and use SOLO and BASS voices on the keyboard.
How to adjust the volume levels for different parts of the synthesizer.
Using the ONE TOUCH SYNTH feature to easily modify voice parameters and effects.
How to change the key of the music to suit vocal range or preference.
Applying a pitch glide effect between notes for trombone or violin slide sounds.
Using the pitch bend wheel to create effects like guitar choking or vibrato.
Adjusting the depth of modulated effects like vibrato and tremolo using the modulation wheel.
Applying reverberation effects to the sound using preset types and depth levels.
Using the RHYTHM section for automatic accompaniment with preset rhythm patterns.
Selecting and using different rhythm variations and introduction/fill-in features.
Using drum solos as introductions or to connect song sections.
Playing an ending pattern and stopping the rhythm.
Automatically setting voice and effect registrations for a chosen rhythm.
Turning the keyboard into a band of percussive instruments with special sounds.
Automatically playing chord and bass accompaniment matched to the rhythm using a single key or chord.
List of chords that can be determined in FINGERED mode for accompaniment.
Explanation of the break function with the AUTO PLAY CHORD.
Storing and recalling combinations of voices, effects, and settings using PANEL MEMORY buttons.
Details on optional accessories and connections for the AX3 model.
Details on optional accessories and connections for the AX5/AX7 models.
Guidelines for placing the unit in a suitable environment for safe operation.
Important information regarding the power source and its connection.
Safety precautions for handling the power cord to prevent shock or damage.
Warning against inserting metal objects into the unit to prevent electric shock or damage.
Instructions on what to do if water enters the unit.
Steps to take if the unit exhibits abnormal operation.
Precautions regarding the condition and use of the power cord.
Warning against touching internal components due to high voltage potential.
Tips for keeping the instrument in optimal condition.
Introduction to the storage functions, SOUND EDIT, COMPOSER, and SEQUENCER.
Creating new sounds by combining waveforms and modifying parameters.
Explanation of how instrument sounds are created through synthesis.
Overview of the SOUND EDIT process using PCM attack and body sources.
Step-by-step outline for creating a new sound using the SOUND EDIT feature.
Step-by-step guide for using the SOUND EDIT feature to create new sounds.
Detailed steps for editing various parameters within the SOUND EDIT mode.
Explanation of the first set of parameters for sound editing, including attack and volume.
Adjusting the balance between basic and harmonic components of the sound.
Explanation of the second set of parameters for body source envelope editing.
Adjusting modulation parameters like vibrato and tremolo effects.
Editing parameters like auto bend, detune, and touch sensitivity.
Storing the edited sound into a memory button for later recall.
Simple steps for editing and storing voices using the ONE TOUCH SYNTH feature.
Recording and storing rhythm patterns in real-time using the COMPOSER feature.
Step-by-step guide to storing the drum part of a rhythm pattern.
Step-by-step guide to storing the bass part of a rhythm pattern.
Step-by-step guide to storing the accompaniment part of a rhythm pattern.
How to store rhythm parts step-by-step using the SEQUENCER buttons.
Storing BASS and ACCOMP parts using the step method.
Modifying preset or original rhythms and storing them in COMPOSER buttons.
Storing melody, accompaniment, and changes for automatic playback using the SEQUENCER.
Recording and storing performances in real-time using the SEQUENCER.
Playing back stored sequences automatically.
Modifying stored sequences by editing parts at any point.
Storing ACCOMP/CHORD parts and DRUMS & CONTROL using the step method.
Automatic playback of stored chord sequences with selected rhythms.
Storing voice, effect, and rhythm changes along with chord progressions.
Storing changes in voice, effect, and rhythm in the DRUMS & CONTROL part.
Recording and storing performances in real-time for AX5/AX7 models.
Storing multiple parts of a performance simultaneously.
Information on the storage capacity for different parts of the sequencer.
Method for storing multiple performance parts simultaneously.
Playing back stored sequences automatically.
Modifying stored sequences by editing parts at any point.
Automatic playback of stored chord sequences with selected rhythms.
Storing voice, effect, and rhythm changes along with chord progressions.
Storing changes in voice, effect, and rhythm in the DRUMS & CONTROL part.
Using optional memory cards for storing and retrieving performance data.
Storing and recalling registration data, panel settings, and composer contents using FSC mode.
Steps for storing data onto a memory card in FSC mode.
Steps for recalling data from a memory card in FSC mode.
Important precautions for handling and using the memory card to prevent data loss or damage.
How to enter the function-setting mode to adjust various keyboard functions.
Procedures for setting various functions like POLY and SOLO voices.
Setting the basic MIDI channel and adjusting keyboard tuning.
Adjusting the range of the pitch bend wheel for different parts.
Adjusting the portamento time for POLY and SOLO parts.
Selecting functions for the foot controller 2.
Assigning functions to foot switches on the AX3 model.
Resetting MODE SET functions to their standard settings.
Protecting stored contents from alteration.
How the POLY button functions as the ACCOMP button in function-setting mode.
Storing and recalling panel settings when PANEL MEMORY is on or off.
Procedure to exit the function-setting mode after adjustments are made.
| Sound Engine / Sound Source | PCM |
|---|---|
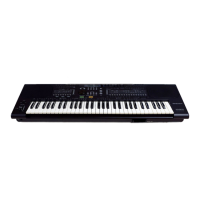
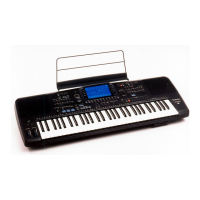
| Keyboard | 61 keys, velocity sensitive |
| Headphone Jack | Yes |
| Effects | Reverb, Chorus |
| MIDI | Yes |
| Sequencer | 16-track sequencer |
| Display | LCD |
| Speakers | Yes |