5
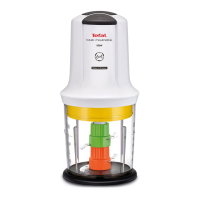
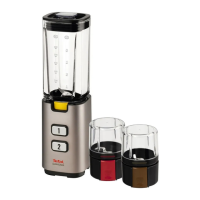
USING THE CHOPPER BOWL
• Place the motor block
(A)
on a flat, stable, heat-
resistant work surface.
• Do not plug your appliance in yet.
• Place the chopper bowl
(B)
on the motor block
(A)
(fig. 1).
• Place the blade
(C)
inside the bowl. Place the
blade on the central axis by pressing the white
button to lock it (fig. 2).
• Place the diced food in the chopper bowl.
• Put the lid
(D)
on the chopper bowl
(B)
(fig.3).
Now you can plug your appliance in.
• Press on the lid
(D)
to start the appliance up
(fig.4).
• To stop the chopper, stop pressing on the lid: the
appliance switches off automatically.
• Do not remove the lid until the blade has
completely stopped.
• To remove the blade, press the white button
while pulling the blade upwards.
RECOMMENDATIONS FOR USE
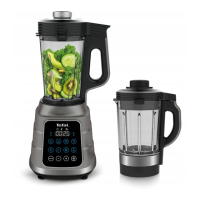
USING THE BLENDER BOWL (E) (*Depending on model)
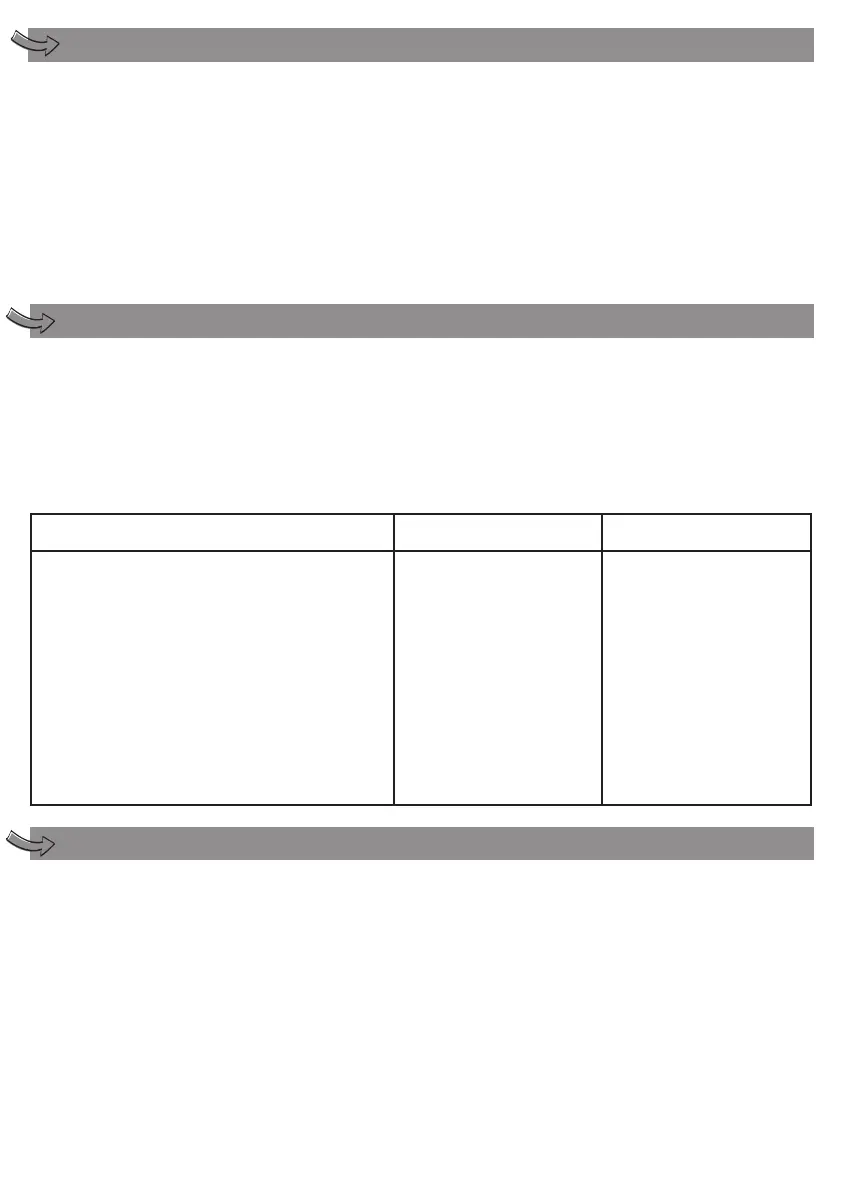
INGREDIENTS MAX. QUANTITY TIME
Parsley
Onions
Shallots
Garlic
Rusks
Almonds
Hazelnuts
Walnuts
Gruyere
Boiled egg
Meat (cut into pieces)
20 g
150 g
150 g
60 g
20 g
200 g
200 g
150 g
150 g
200 g
200 g
6 s
9 s
9 s
5 s
5 s
8 s
12 s
10 s
10 s
5 s
6 s
• Work in short bursts to obtain a fine, smooth
result. If pieces of food stick to the sides of the
bowl (meat, onions, etc.), remove them with the
spatula
(F)
, spread them around the bowl and
press the lid 2 or 3 additional times.
• If pressing the lid does not make the appliance
work, make sure that pieces of food are not
stuck on the inside edge of the lid in contact
with the bowl.
• After prolonged use, if the blade should
become blunt, replace it.
• After use, leave it to cool down for 2 minutes.
• Maximum operating time : 30 seconds.
• Place the bowl
(E3)
on a flat, stable, heat-
resistant work surface. All the operations must be
carried out with the bowl
(E3)
placed on a flat,
stable, heat-resistant work surface, never on the
motor block
(A).
• Put the ingredients to be blended in the bowl
(E3)
(fig. 5). Pour the liquids in first. Never exceed
the maximum level indicated (1.25 L).
• Put the lid
(E2)
on the bowl
(E3)
(fig.6).
• Put the stopper
(E1)
in its slot on the lid and turn
it to lock it (fig.7).
• Place the blender bowl
(E)
on the motor block
(A)
(fig. 8).
• Plug the device in.
• To turn the appliance on: press on the sliding
ring on the blender bowl with your hand (fig. 9).
• To stop the appliance, stop pressing the ring.
•
The cover and its stop must always be in
place properly when the appliance is
operating.
• Never place your fingers or any other object in
the blender bowl while the appliance is working.