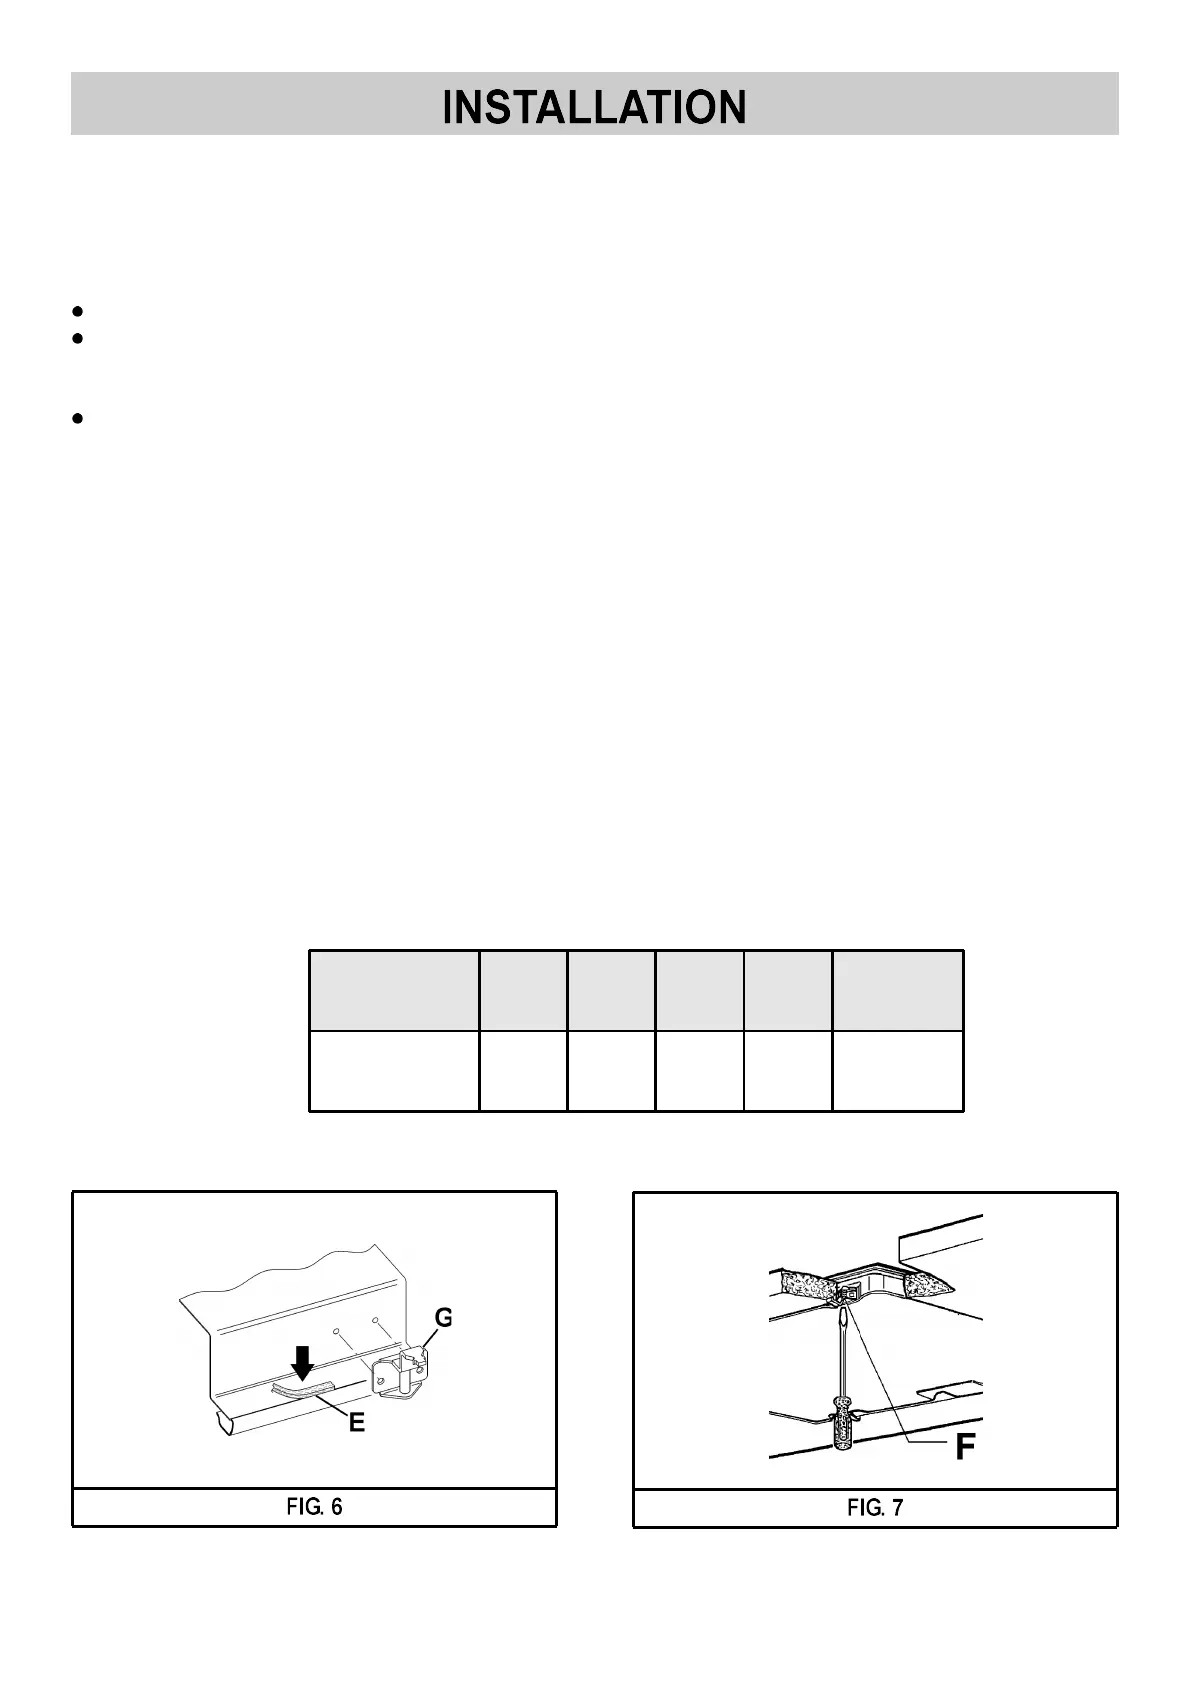
4) SECURING THE FRYER
To secure the fryer to the worktop the fastening
clamps accompanying this booklet must be
assembled. The following procedures must be
carried out to do this:
remove all movable parts from the fryer;
turn the appliance over taking care to place it on
a soft surface to avoid damaging the external
surfaces;
remove the clamps "G" from the package and
install them as in the diagram in fig. 6.
After these steps have been carried out, the
special gasket that prevents liquids from leaking
can be installed. To fit this gasket correctly, please
strictly follow the directions below:
- detach the gasket strips from their support taking
care that the transparent protection remains
attached to the gasket;
- put the gasket "E" (fig. 6) in the correct position
under the edge of the worktop, so that the outer
side of the gasket fits perfectly with the external
perimeter of the worktop. The ends of the strips
must fit without overlapping;
- make sure the gasket adheres to the worktop
evenly all around, press it down with your
fingers, then remove the gasket's protection
paper and position the fryer in the opening made
in the worktop;
- secure the appliance by tightening the clamp
screws "F" (see fig. 7).
WARNING:
note that the adhesive which joins the plastic
laminate to the worktop must be resistant to
temperatures of no less than 150 °C to prevent
the covering from detaching.
The installer is advised that the rear wall,
adjoining and surrounding surfaces of the fryer
must be resistant to a temperature of 90 °C.
21
USEFUL MEASUREMENTS
(mm)
A B C D E
FRYER 282 482 59 59 100 min.