Do you have a question about the Teka NFD 620 and is the answer not in the manual?
Explanation of WARNING, CAUTION, and other signs for safe appliance use.
Detailed warnings and cautions for safe operation, power cord handling, and grounding.
Precautions for power cords, installation on wet floors, loose plugs, and water spraying.
Cautions for medicine, servicing, flammables, children, and storing liquids.
Safety steps for placing the refrigerator and connecting the power supply.
General safety advice for using the refrigerator to prevent injury or damage.
List of optional and standard accessories included with the refrigerator.
How to adjust freezer and refrigerator temperatures for dispenser models.
How to adjust freezer and refrigerator temperatures for basic models.
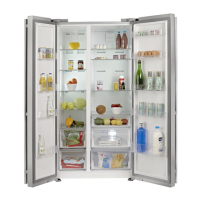
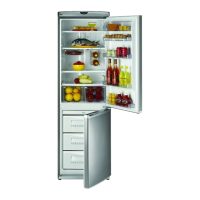
Description and illustration of interior compartments for basic models.
Description and illustration of interior compartments for dispenser models.
Guidelines for optimal food storage, including washing, dividing, and placement.
Guidance on icemaker function, ice stuck issues, and power failure scenarios.
Instructions for cleaning the dispenser water shelf and ice storage case.
How to remove and clean various pockets and door compartments.
Procedure for removing and cleaning refrigerator and freezer shelves.
Cleaning advice for interior surfaces using detergent.
Cleaning instructions for door seals and the rear machine room.
How to remove and clean the vegetable and fruit cases.
Checkpoints and actions for common issues like no cooling or food freezing.
Explanation of causes for warm surfaces, sticky doors, water sounds, and condensation.
Ensuring the refrigerator fits through doorways and entrances.
Advice on selecting a location with proper ventilation and avoiding direct sunlight.
Step-by-step guide to safely remove the freezer door.
Step-by-step guide to safely remove the refrigerator door.
Instructions for raising or lowering the freezer door for proper balance.
Instructions for raising or lowering the refrigerator door for proper balance.
Securing the front cover after installation or door leveling.
Identification of parts included in the water supply kit.
Steps for removing substances and attaching the filter box.
Procedure for connecting the water tube to the refrigerator's water valve.
Ensuring the water tube is secure and checking for leaks after installation.
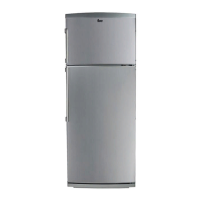
This document provides comprehensive instructions for the installation, operation, and maintenance of a Teka refrigerator, available in both basic and dispenser models. The manual emphasizes safety precautions throughout, ensuring users can operate the appliance effectively and without risk.
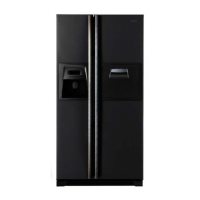
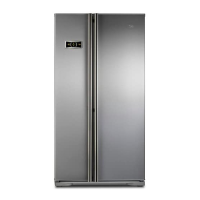
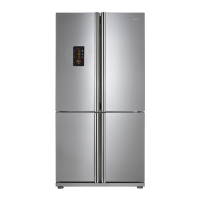
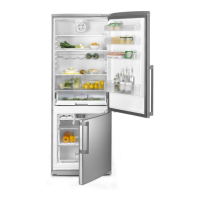
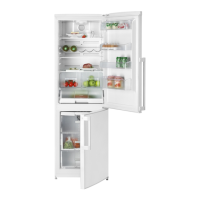
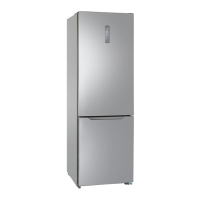
The Teka refrigerator is designed to preserve food items by maintaining optimal temperatures in its various compartments. It features a freezer compartment for long-term storage of frozen goods and a refrigerator compartment for fresh foods. The dispenser models offer additional functionality, including a water and ice dispenser, providing convenient access to chilled water, cubed ice, and crushed ice. Some models also include a "Magic Cool Zone" with adjustable temperature settings for specific food types like vegetables, fish, or meat, allowing for precise preservation.
The refrigerator's temperature can be easily adjusted using the control panel. For dispenser models, the "FREEZER SET" and "REFRIGERATOR SET" buttons allow users to cycle through sequential temperature changes. A "SUPER FREEZER" button enables faster freezing, while a "SUPER REFRIGERATOR" button facilitates quicker cooling or refrigeration. Basic models feature similar "FRZ. SET" and "REF. SET" buttons for temperature adjustment and "SUPER FRZ." and "SUPER REF." buttons for accelerated cooling. Users are cautioned that foods in the refrigerator may freeze if the ambient temperature is below 5°C.
The dispenser offers three options: WATER, CUBED ICE, and CRUSHED ICE, selectable via the control panel. A rectangle line around the chosen icon indicates the active selection. To dispense, users simply push a cup against the pad. The manual advises against placing the rim of the glass too close to the pad to prevent spills and notes a brief delay for ice and water dispensing. An "ICE MAKER LOCK" button is available to prevent accidental dispensing or to lock settings, particularly useful for households with children. The icemaker produces approximately 10 ice cubes 7-8 times a day, stopping when the storage case is full. Regular cleaning of the ice storage case is recommended to prevent odors. In case of power failure, users should remove ice cubes from the storage case to prevent melting into the freezer room.
The refrigerator is equipped with various compartments and shelves designed for organized food storage:
The manual provides practical advice for optimal food preservation:
Detailed instructions are provided for installation, including checking if the refrigerator can pass through doorways and selecting a suitable installation location. The appliance should be installed on a level, dry floor, away from direct sunlight and heat sources, with adequate ventilation space (more than 5cm) behind it.
If the refrigerator cannot pass through a door, the manual provides steps for removing and replacing both freezer and refrigerator doors. This involves unscrewing hinge covers, disconnecting harness wires, and carefully lifting the doors. Special attention is given to the water tube for dispenser models.
Instructions are given for leveling the refrigerator and adjusting the doors if they appear unbalanced. This involves using a flat-tip screwdriver to turn the wheels at the bottom of the freezer and refrigerator doors clockwise or counterclockwise to raise or lower them. The front of the refrigerator should be slightly higher than the back for easy door closing.
A comprehensive guide for installing the water line is included, detailing the parts required (water supply kit) and the steps for connecting the water tube to the tap water line and the refrigerator. It emphasizes checking water pressure, avoiding hot surfaces, and regularly replacing the water filter. After installation, users should dispense water for 2-3 minutes to remove air from the pipes.
Regular cleaning is essential for hygiene and optimal performance:
The manual states that the interior light bulb should only be replaced by a service agent or similarly qualified person. However, it provides visual instructions for removing light covers in both freezer and refrigerator compartments to access the bulbs.
A detailed troubleshooting section helps users diagnose and resolve common issues:
The manual strongly advises users to read all safety instructions thoroughly before use and to keep the guide handy for future reference. It highlights warnings regarding electric shock, fire hazards, and personal injury, emphasizing the importance of proper installation, grounding, and handling of the appliance.
| Category | Refrigerator |
|---|---|
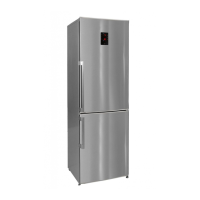
| Type | Freezer Bottom |
| Energy Efficiency Class | A+ |
| Dimensions (HxWxD) | 1880 x 595 x 630 mm |
| Weight | 67 kg |
| Color | Stainless steel |
| Number of Shelves | 4 |
| Number of Door Bins | 3 |
| Freezer Star Rating | 4 stars |
| Net Freezer Capacity | 100 liters |
| Freezer Capacity | 100 liters |