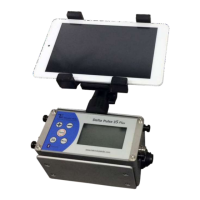
3 – The meaning of the buttons and icons on the screen of
the detector
1 - metal with Part numbers this is to enable a distinction to be made. The precious metal are likely to be higher
than the figures contained in this section. There is no way to represent each figure of another metal. In general,
the value of the figures if it is below 30, the metal iron and its derivatives, staying on if it is non-ferrous in the form
of can be classified.
2 - This section refers to the perceived strength of the metal. Depending on the power of perception contained in
this section bars the increase.
3 - a magnet for the separation of metal that holds or does not hold for this part. Holding the magnet FERRO
metals, NONFERRO metals in the magnets and it does not hold writes. After a certain period of time from the
instant of detection of this paper, i.e., the detection of the metal seems to be when you get to a certain level.
Consider the distinction in logic of the detector in the form of allocate valuable working area. Instantly detection
the distinction on the distinction therefore should not be expected.
Attention! The discrimination capability of the detector of 60% -70 order. 100 %accurate should not be expected
to perform metal separation.
Attention! So the class holding the magnet Ferro metals Iron NONFERROUS aluminum derivatives and the part
that says " includes gold, copper, tin, lead, etc. includes metals.
4 - the soil of this section relates to the setting of the detector. The setting of your soil in good condition are seen
as the exclamation mark in this section if it is not continuous. In this case, the detector setting of the soil must be
made. I don't get out while the case to be considered is the necessity to detect this metal sign. Detects metal while
the point does not bear the meaning demanding setting.
Attention! The fields off the metal detector, high voltage near the base station, near industrial zones and relatives,
near areas such as radio relays if you run the product due to electrical noise, it constantly tells you that you can
make it work by removing the mark, and the soil does not hold the setting.
5 - This shows the status of the battery charging section. Depending on the occupancy rate of the battery, fill the
inside of the shape.
Attention! The detector is first turned on and the battery indicator will show empty when the setting is made of
soil that will come to the level of measurement and should be again. This is a symptom that is related to a problem
with the battery or the battery is low.
6 - settings of the detector is made in this section. Figure 1 also sens adjustment made in line with the part to be
found under the section are selected. This button is used to process the menu selection. When it comes to the
part to be adjusted with the MENU button The – and + buttons to change the parameter is provided.
 Loading...