EasyManua.ls Logo

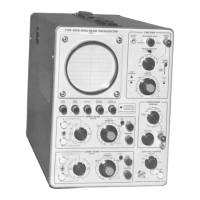
Tektronix 502A

Tektronix 502A
110 pages
To Next Page IconTo Next Page
To Previous Page IconTo Previous Page
Loading...
Calibration
Procedure
Type
502A
19.
.2MV/CM
GAIN
Apply
a
.5
millivolt
signal
from
the
calibrator
to
input
A
of
the
vertical
amplifier.
Place
the
SENSITIVITY
switch
in
the
.2
mVOLTS
PER
CM
position.
Set
the
.2MV/CM
GAIN
control
for
2.5
centimeters
of
vertical
deflection.
Repeat
steps
18
and
19
until
both
adjustments
are
correct.
Both
of
the
above
gain
adjustments
should
also
be
checked
in
the
B-DC
position
of
the
Input
Selector
switch.
At
this
time
the
other
positions
of
the
SENSITIVITY
switch
should
be
checked
for
proper
attenuation.
Disconnect
jumpers.
20.
Adjusting
R429,
VAR
DC
BAL
Set
the
SENSITIVITY
switch
to
.2
VOLTS
PER
CM
and
the
TRIGGERING
LEVEL
to
RECURRENT.
With
the
vertical
POSITION
Control,
position
the
trace
to
the
appropriate
graticule
center
line.
While
rotating
the
VARIABLE
SENSITIVITY
Control
through
its
range,
adjust
R429
until
the
trace
no
longer
moves
as
the
VARIABLE
SENSITIVITY
Control
is
rotated.
The
trace
should
now
show
no
movement
when
it
is
sitting
on
the
appropriate
graticule
center
line
and
the
VARIABLE
SENSI
TIVITY
Control
is
rotated.
Refer
to
figure
5-15
or
5-17
for
the
location
of
R429.
21.
Vertical
DC
Shift
Turn
the
Input
Selector
to
A-DC
and
the
SENSITIVITY
switch
to
.2
VOLTS
PER
CM.
Now
vertically
deflect
the
trace
with
enough
d
c
voltage
to
move
it
about
8
cm.
A
V.O.M.
is
a
convenient
source
of
voltage.
After
deflecting
the
trace
observe
the
drift,
if
any.
The
drift
should
not
be
more
than
about
1
mm.
22.
High
Frequency
Compensations
Reset
the
following
controls.
Input
Selector
B-DC
SENSITIVITY
.2
VOLTS
PER
CM
TIME/CM
50
SEC
From
a
Type
105
apply
10
kc
square-waves
to
the
B
input
of
the
vertical.
The
cable
should
have
a
5
0
termination
connected
at
each
end.
Adjust
the
oscilloscope
for
a
stable
display.
Adjust
the
amplitude
of
the
Type
105
until
a
dis
play
of
3
cm
is
observed
on
the
screen.
The
bottom
of
the
square
wave
should
rest
on
the
graticule
center
line
for
the
amplifier
you
are
calibrating.
Now
adjust
C470,
C480
and
C478
for
the
best
possible
square-wave
bottom.
After
adjusting
for
a
square
bottom
reset
the
Input
Selector
to
A-DC
and
connect
the
cable
and
termination
to
the
A
input.
Line
up
the
top
of
the
square
wave
with
the
proper
graticule
center
line
and
adjust
C469.
C469
is
adjusted
for
an
optimum
square
top
on
the
square
wave.
It
will
be
necessary
to
recheck
the
adjustment
of
C470,
C480,
C478
and
C469
as
the
adjustment
of
one
of
these
capacitors
may
affect
the
adjustment
of
the
others.
R462
C469
Fig.
5-9.
Location
of
C469
and
R462
in
Vertical
Amplifier.
23.
Adjusting
Common
Mode
Rejection
Ratio
From
the
sine-wave
generator,
whose
qualifications
are
described
in
the
Equipment
Required
list,
apply
1
volt
of
200kc
sine-wave.
The
waveform
will
be
applied
to
both
the
A
and
B
inputs
of
the
vertical
amplifier.
Also
apply
the
waveform
to
the
horizontal
amplifier
EXTERNAL
con
nector.
The
one
volt
of
signal
may
be
measured
by
setting
the
Input
Selector
switch
in
A-DC
and
the
SENSITIVITY
switch
to
.2
VOLTS
PER
CM.
The
cable
which
leads
from
the
gen
erator
to
the
oscilloscope
should
be
terminated
at
both
ends
with
50
terminations.
With
the
properly
terminated
cable
connected
to
the
oscilloscope
adjust
the
output
ampli
tude
of
the
sine-wave
generator
until
a
deflection
of
5cm
is
obtained
on
the
crt.
Set
the
Input
Selector
switch
to
A-B
(DIFF)-DC,
the
vertical
SENSITIVITY
switch
to
1
mVOLT
PER
CM
and
the
HORIZON
TAL
DISPLAY
switch
to
.1
EXT
VOLT/CM.
A
lissajous
wave
form
should
now
be
displayed.
While
observing
this
wave
form
adjust
the
lead
dress
of
the
covered
lead
running
from
the
end
of
R462
(5meg)
to
pin
5
of
V414
for
minimum
opening
of
the
loop.
Elimination
of
the
eye
of
the
loop,
a
straight
line
would
result
in
a
rejection
ratio
of
10,000
to
1.
The
opening
of
the
loop
must
be
less
than
2
cm
to
give
an
acceptable
rejection
ratio.
To
check
the
adjustment
change
the
generator
frequency
to
100
kc.
Now
change
the
SENSITIVITY
switch
to
.2
mVOLTS
PER
CM
and
check
to
see
that
the
opening
in
the
loop
does
not
exceed
5cm.
It
should
be
noted
that
there
may
be
some
interaction
between
the
High
Frequency
Compensations
and
the
Com
mon
Mode
Rejection
Ratio.
Disconnect
the
input
signal
and
all
cables
to
oscilloscope.
NOTE
At
this
time
the
vertical
which
has
not
been
cali
brated
up
to
now
must
be
done,
up
to
this
point,
before
proceeding
with
the
calibration
procedure.
5-7

Related product manuals