Do you have a question about the Teledyne Cetac Technologies ASX-560 and is the answer not in the manual?
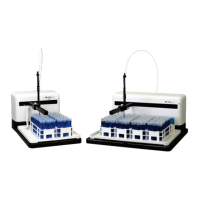
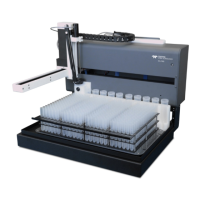
General introduction to the autosampler's capabilities and design.
Lists and describes the main physical parts of the autosampler.
Specifies necessary external hardware for operation.
Lists available add-ons for enhanced functionality.
Details material resistance to various chemicals.
Provides resources for further assistance.
Guidance on selecting an optimal installation site.
Dimensions and footprint needed for the autosampler.
Criteria for the stability of the mounting surface.
Information on the necessary rinse agent setup.
Guidelines for proper disposal of waste liquids.
Details on power supply and connections.
Steps for safely removing the unit from its packaging.
Procedures for attaching key components to the base.
Steps for attaching the vertical movement assembly.
Detailed instructions for securing the Z-drive.
How to connect the rinse station to fluid sources.
Setup for draining waste using the peristaltic pump.
Setup for draining waste via gravity.
Configuration for gravity drain with dual rinse.
Configuration for pumped drain with dual rinse.
How to set up sample racks.
Steps for fitting the sample probe.
Linking the autosampler to the main instrument.
Electrical connection procedures.
Establishing communication with the control PC.
Steps for serial connection.
Steps for USB connection.
Essential checks after installation.
Procedures to confirm correct installation.
Checking all shipped items are present.
Verifying environmental conditions are met.
Checking for shipping damage.
A list of installation steps to verify.
Verifying data link between autosampler and computer.
Testing probe movement and positioning.
Verifying pump operation.
How to record test results.
Checking for obstructions.
Assessing system performance against method requirements.
Verifying consistent system performance.
A detailed checklist for Installation Qualification.
A detailed checklist for Operational Qualification.
Setting up the environment for best performance.
Guidelines for lab conditions.
Information on periodic part replacement.
Guidance on acquiring necessary consumables.
How to organize sample racks in the tray.
Procedures for initiating sample analysis.
Steps for properly powering off the unit.
Cleaning procedures for the fluidic system.
Steps to install the control software.
Launching the software interface.
Adjusting operational parameters.
Settings for enhanced rinsing cycles.
Configuring rinse cycle timing.
Setting the pump speed for dual rinse.
General cleaning procedures.
Routine daily cleaning tasks.
More thorough weekly cleaning.
Specific cleaning for the sample probe.
Inspecting fluid connections for leaks.
How to replace worn pump tubing.
Procedures for re-aligning the instrument.
Verifying the probe's home position.
Adjusting the vertical movement range.
Instructions for replacing the Z-drive assembly.
Steps to uninstall the current Z-drive.
Steps to install a replacement Z-drive.
Procedures for replacing the rinse station unit.
Instructions for replacing the sample tray.
How to replace the home flag component.
Diagnosing issues related to power supply.
Troubleshooting connection issues.
Specific issues with serial connections.
Specific issues with USB connections.
Issues arising from incorrect software setup.
Troubleshooting issues with the Z-drive assembly.
Addressing sample contamination issues.
How to extract system logs for support.
Using command-line interface for diagnostics.
Steps to install the terminal program.
Launching the C-Term application.
Description of the C-Term interface.
Setting up C-Term for communication.
List of commands for autosampler control.
Procedures for product returns.
Guidelines for safely shipping the unit.
Details of the product warranty.
Steps for returning products.
Process for warranty claims.
General overview of product characteristics.
Operating and storage environment conditions.
Power and connector specifications.
Details on power input/output.
Description of ports.
General safety advisories.
Specifics about the power cord.
Care for the power cord.
How to safely disconnect power.
Procedures for cleaning the instrument exterior.
Identifying potential pinch/puncture points.
Warnings related to operating conditions.
How to interpret safety symbols.
FCC and Canadian compliance information.
FCC compliance details.
User modification warnings.
Cable requirements for compliance.
Canadian interference standards.
Meaning of symbols like WEEE and CE.
| Brand | Teledyne Cetac Technologies |
|---|---|
| Model | ASX-560 |
| Category | Laboratory Equipment |
| Language | English |