Eclipse 8/16/32/99 Series - Installation Manual
39
Enter end time for the timeslot.
Select the active days for timeslot.
Submenus for individual setting for every
day of the year.
Menus for settings of the built-in digital communicator of the system (PSTN).
1.Enable Dialer/2.TLM Enable/3.TLM Alarm/4.Pulse-Tone Dial/5.Tone-Blind Dial/
6.Alternative-All/7-8.Report Channels: PSTN MAIN-GPRS/LAN MAIN
Enter a number of communication attempts 1-9. Default: 4
Menus for setting of options for test messages.
Enter the hour for transmitting of the test message 00:00-23:59. Default: 00:05
Enter the period between two test messages 000-255 hours. Default: 024
Enter time delay is case of telephone line fault 000-255 min. Default: 000
Menus for setting of phone numbers options.
Enter a telephone number for communication with central station.
Select the communication protocol CID/SIA. Default: CID
1.Alarm&Restore/2.Tamper&Restore/3.Panic&Ambush Code/4.Fire/5.Arm, Disarm,
Bypass/6.Medical Alarm/7.Trouble&Trouble Restore/8.Special Messages
Menus for remote up/download settings via built-in digital communicator.
Enter a unique PC identification number for up/download.
2.Answering Machine/3.Modem Enabled
Enter the number of incoming rings 00-99. Default: 04
Menus for settings of the voice dialer communicator.
1.VD Report Enable/2.VD Manage Enable/4.Skip Site Name
Enter the number of times for voice message repetition 1-9. Default: 3
[00]-EN;[01]-PT;[02]-IT;[03]-RO;[04]-GR;[05]-Farsi;[06]-FR;[07]-TR;[08]-RS;[09]-ES
Menus for setting of Voice Dialer phone numbers options.
Enter a telephone number for communication via Voice Dialer.
1.Alarm&Restore/2.Tamper&Restore/3.Panic&Ambush Code/4.Fire/5.Arm, Disarm,
Bypass/6.Medical Alarm/7.Trouble&Trouble Restore/8.Special Messages
Menus for Main PCB options. The PCD is always the first device in the system.
Review the identification number of the Main PCB.
Review the hardware resources of the Main PCB.
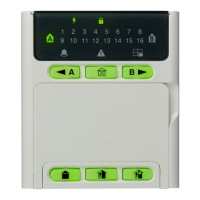
Review the identification number of the LCD Keyboard.
1.Chime/2.Hiding zone information/3.Confidential Mode/
4.Exit Confidential Mode/5.Main Screen
Review the hardware resources of the device.
Review the strength of the communication signal between the
device and the control panel.
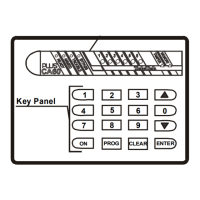
Set the arm type for every one of the areas (Modes A and B):
[d] - Disarm, press button “1”; [f] - Full Arm, press button “2”; [s] - Stay Arm, press
button “3”; [S] - Sleep Arm, press button “4”; [*] - No action, press button “0”.
Menu for wireless devices enrolment. DD - device number.
Menu for remote key fobs enrolment. RR - key fob number.
* The menu/address is available only for LED keyboards.
** The menus/addresses are available only for Proxy Readers.
*** The available menus/addresses for ZEXP, PEXP and WEXP expanders are 1, 2, 4 and 5. No options are available for settings.
**** The menus/addresses are available only for Wireless expander module – WEXP. The address 8XX6 is accessible only from the main screen of
the Engineering Programming Menus.