Tellur Dash Patrol DC1 & DC2 FullHD Dash Cam User Manual
This document provides a comprehensive overview of the Tellur Dash Patrol DC1 and DC2 FullHD Dash Cams, including their functions, technical specifications, usage features, and maintenance guidelines.
Function Description
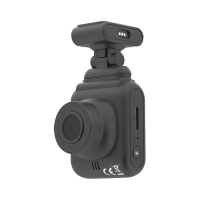
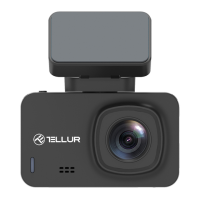
The Tellur Dash Patrol DC1 and DC2 are FullHD Dash Cams designed for automotive use, recording video in 1920x1080p or 1280x720p resolution. These devices automatically start recording when the car is turned on and stop when the engine is off. They feature a 1.5" color display and a 140° field of view.
Key functions include:
- Video Recording: Continuous loop recording in 1, 3, or 5-minute segments. Videos are saved to a microSD card (Class 10 or above, up to 32GB, not included).
- Photo Capture: The device can also function as a camera, taking still images.
- G-Sensor (Gravity Induction): Automatically locks and saves video files during a collision or significant external vibration, preventing them from being overwritten. The sensitivity of the G-sensor can be adjusted (OFF/HIGH/MEDIUM/LOW).
- Parking Monitoring: When activated and the vehicle is off, the dash cam will automatically start recording and lock for 15 seconds if it detects external vibration. It then shuts down after 20 seconds and reactivates upon subsequent vibrations. This feature requires the recorder to be connected to a power supply.
- Motion Detection: When enabled, the camera starts recording for 10 seconds if it detects movement in its field of view. Subsequent detections will trigger additional 10-second recordings.
- Audio Recording: Can be turned ON or OFF via the settings menu or quickly during recording.
- Date and Time Stamp: Videos can include a date and time stamp.
- License Plate Marking: Allows users to input their license plate number, which will be marked on the recorded video.
- USB Mode: When connected to a computer via USB, the device can function as a storage device to access video/photo files or as a PC Cam for real-time photos and videos.
- GPS Module (DC2 only): The DC2 model includes a GPS module that displays current speed and allows for playback with a dedicated GPS player.
- WiFi Connection (DC2 only): The DC2 model supports WiFi connectivity, allowing users to connect to the camera via the GoPlus Cam APP (available on Google Play and Apple Store) for remote control and file access.
Important Technical Specifications
- Usage: Automotive
- Video Resolution: 1920 x 1080p, 1280 x 720p
- Lens Type: 4 Glass 2.24
- Chipset & Sensor: GP5168 & F37
- Field of View: 140°
- Display: 1.5" Color
- Frame Rate: Max 30fps
- Sensor Resolution: 2 Mega Pixels
- Photo Resolution: 12 Mega Pixels
- Video Compression: H.264
- Video File Type: MOV
- Built-in WiFi: Yes (DC2 only)
- GPS Module: Included (DC2 only)
- Speed Display: Yes (DC2 only)
- Automatic Recording: Yes
- G-Sensor: Yes
- Motion Detection: Yes
- Parking Monitor: Yes
- Loop Recording: Yes, 1/3/5 minutes
- PC Camera Support: Yes (By miniUSB cable)
- Storage Support: Micro SD card, max 32GB, Class 10 (not included)
- Battery: 200 mAh
- Battery Autonomy: Up to 15 minutes
- Power Supply: Micro USB / Mini USB - 5V 2.1A
- Mounting: Magnetic bracket
- Bracket Mounting: 3M adhesive
- Working Conditions: -10° - 60° C
- Color: Black
- Product Dimensions: 43.6mm x 37.4mm x 55mm
- Product Weight: 79g
Usage Features
Before Use:
- Memory Card Insertion: Insert a high-speed microSD card (CLASS10 or above) into the designated slot until it clicks.
- Memory Card Removal: Press the memory card to eject it.
- Formatting microSD Card: For optimal performance, format the microSD card, especially before first use and regularly thereafter. This can be done through the camera's menu. Warning: Formatting erases all data. Ensure the camera is off when inserting or unplugging the memory card to prevent damage.
- Automatic Start-up: The camera automatically starts recording when connected to power. Press [OK] to stop recording before accessing the menu.
Camera Installation:
- Clean the front windshield.
- Tear off the 3M adhesive protective tape from the bracket.
- Connect the car charger to the cigarette lighting port.
- Stick the bracket onto the windshield.
- Remove protective film from the display screen and lens.
- Connect the recorder bracket to the host via magnet.
- Connect the USB terminal of the car charger to the recorder's USB terminal.
- Adjust the video angle (recommended: lower picture 1/3, sky 1/3).
Display Status and Information:
The display provides various icons and information:
- Loop Video Recording Time: Indicates the current cyclic recording duration (e.g., 1 minute).
- Video Time: Shows remaining video time on the memory card (white font) or current video duration (red font during recording).
- Video Lock Icon: Appears when a video is locked by the G-sensor or manually.
- Parking Guard Icon [P]: Displays when parking guard is active.
- Video Resolution [1080 FHD]: Shows the selected video resolution.
- Movement Detection Icon: Indicates motion detection is enabled.
- Exposure Compensation Icon [00]: Displays the adjusted exposure value.
- Audio Recording ON/OFF Icon: Shows current audio recording status.
- Gravity Induction Icon: Appears when gravity induction is active.
- Storage Card Status Icon: Indicates if a memory card is inserted or not.
- Battery Power and Status Icon: Shows current battery level and charging status.
- GPS Status Icon (DC2 only): Displays GPS signal status and current speed.
- Time and Date: Shows current standard time and date.
Setting Time and Date:
- Pause recording by pressing [OK].
- Access the menu by pressing the menu button twice.
- Select "Date/Time" using Up/Down keys and confirm with [OK].
- Adjust values using Up/Down keys and confirm with [OK].
- Exit with the menu button.
Taking a Photo:
- In standby mode, press [M] once to switch to camera mode.
- Press [OK] to take a picture. The screen will flash.
Video/Photo Playback:
- Stop recording by pressing [OK].
- Press [M] twice to enter playback mode.
- Navigate files using Up/Down keys.
- Press [OK] to play or view selected files. Press [OK] again to pause.
Settings Menu:
- Stop recording by pressing [OK].
- Press the menu button once to access settings.
- Navigate options using Up/Down keys.
- Select an option with [OK].
- Exit with the menu button.
USB Mode:
Connect the USB cable to a computer. Select "Storage" to access files or "PC Cam" to use the device as a webcam.
Maintenance Features
- Product Care: Avoid disassembling, opening, squeezing, bending, changing shape, piercing, cutting, or dropping the product.
- Power Supply Protection: Protect the power supply from being trampled or squeezed, especially the plug, socket, and external power cord.
- Professional Repair: All maintenance work should be performed by qualified personnel. If the product is damaged or not working properly, seek professional repair.
- Charging: Use the factory's standard charger. The red charging indicator lights up during charging (approx. 180 minutes) and turns off when fully charged. The built-in battery is primarily for saving files during parking and shutdown, not for extended operation.
- Reset: If the recorder is not working properly, press the RESET button to reset the system.
- Temperature Warning: The camera's working environment is -10°C to 60°C. Extreme temperatures can cause constant failure. Adjust car temperature before turning on the dash cam.
- Memory Card Formatting: Regularly format the microSD card for best performance.
- Disposal and Recycling: Dispose of the device and its battery at designated waste collection points for electrical and electronic equipment (WEEE) according to local laws. Do not dispose of with household garbage.