Do you have a question about the Tenergy ODEV Dynamo Lantern and is the answer not in the manual?
Guides users on building the dynamo lantern and exploring its play features like color-changing LEDs and water lanterns.
Crucial safety advice including choking hazards, avoiding direct LED light exposure, and keeping away from AC power.
A comprehensive list of all components included in the Dynamo Lantern kit, with quantities specified for each part.
Connect the LED light connector through the LED holder, ensuring correct mounting of the LED light.
Insert the LED connector into the lantern base, ensuring the LED light is correctly mounted on top.
Mount the assembled LED light component to the left panel and wind the wire as illustrated.
Attach the motor onto the left panel and wind its wire onto the panel as shown in the diagram.
Connect the joint lever to the panel, install double gears, and insert the gear shaft into the double gear.
Install the gear shaft to the left panel and the double gear to the shaft, ensuring correct alignment and grip.
Cover the assembly with the right panel, making sure all shafts and holes are properly aligned.
Install joint clips at the corners and place wires between clips and panel shafts for securement.
Connect the wires to their connectors. Parental guidance is advised for this step.
Attach the handle to the hand crank and insert the assembled component into the joint lever.
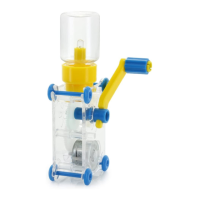
Position the plastic lantern cover on top of the LED light to complete the assembly.
Guidance on resolving problems like the crank not rotating the motor or the LED lantern not lighting up.
Instructions on operating the dynamo lantern, including changing LED colors and creating a water lantern effect.
Suggestions for enhancing the water lantern, such as adding confetti or glitter for visual effects.
Explains how the dynamo lantern generates electricity through electromagnetic induction using coils and magnets.
Details why the LED light produces different colors by explaining the use of two-color light-emitting diodes.
Explains how gears are used to increase the speed of the motor to achieve higher rotation for the LED light.
Information about Michael Faraday, his contributions to electromagnetism, and his discovery of electromagnetic induction.
Defines an LED (Light-Emitting Diode) and explains its unilateral conductivity and how it lights up.
The Tenergy ODEV Dynamo Lantern is an educational and recreational kit designed for children aged 8 and above to build and understand the principles of electricity and generators. It allows users to construct a hand-cranked lantern that generates its own power to light up LEDs.
The primary function of the Dynamo Lantern is to provide a hands-on learning experience about how a generator works and how electricity is produced. By assembling the various components, users build a functional dynamo lantern that can illuminate LEDs. The lantern features a hand crank that, when rotated, drives a motor to generate electricity, which then powers the LEDs. A unique feature is the ability to change the LED light color (blue or green) by rotating the hand crank in different directions (clockwise or counterclockwise). Additionally, the lantern can be used as a "water lantern" by filling its plastic cover with water, which then reflects the LED light for a different visual effect. The manual also includes "fun facts" and explanations of the underlying scientific principles, such as electromagnetic induction and the role of gears.
While specific numerical technical specifications like voltage or current output are not explicitly detailed in the manual, the core components and their functions imply certain characteristics:
The manual does not explicitly detail long-term maintenance procedures, but the nature of the device suggests minimal maintenance beyond proper handling and storage.
In summary, the Tenergy ODEV Dynamo Lantern is an engaging, educational toy that combines hands-on construction with interactive play, designed to teach fundamental principles of electricity and mechanics in a safe and accessible way for children.