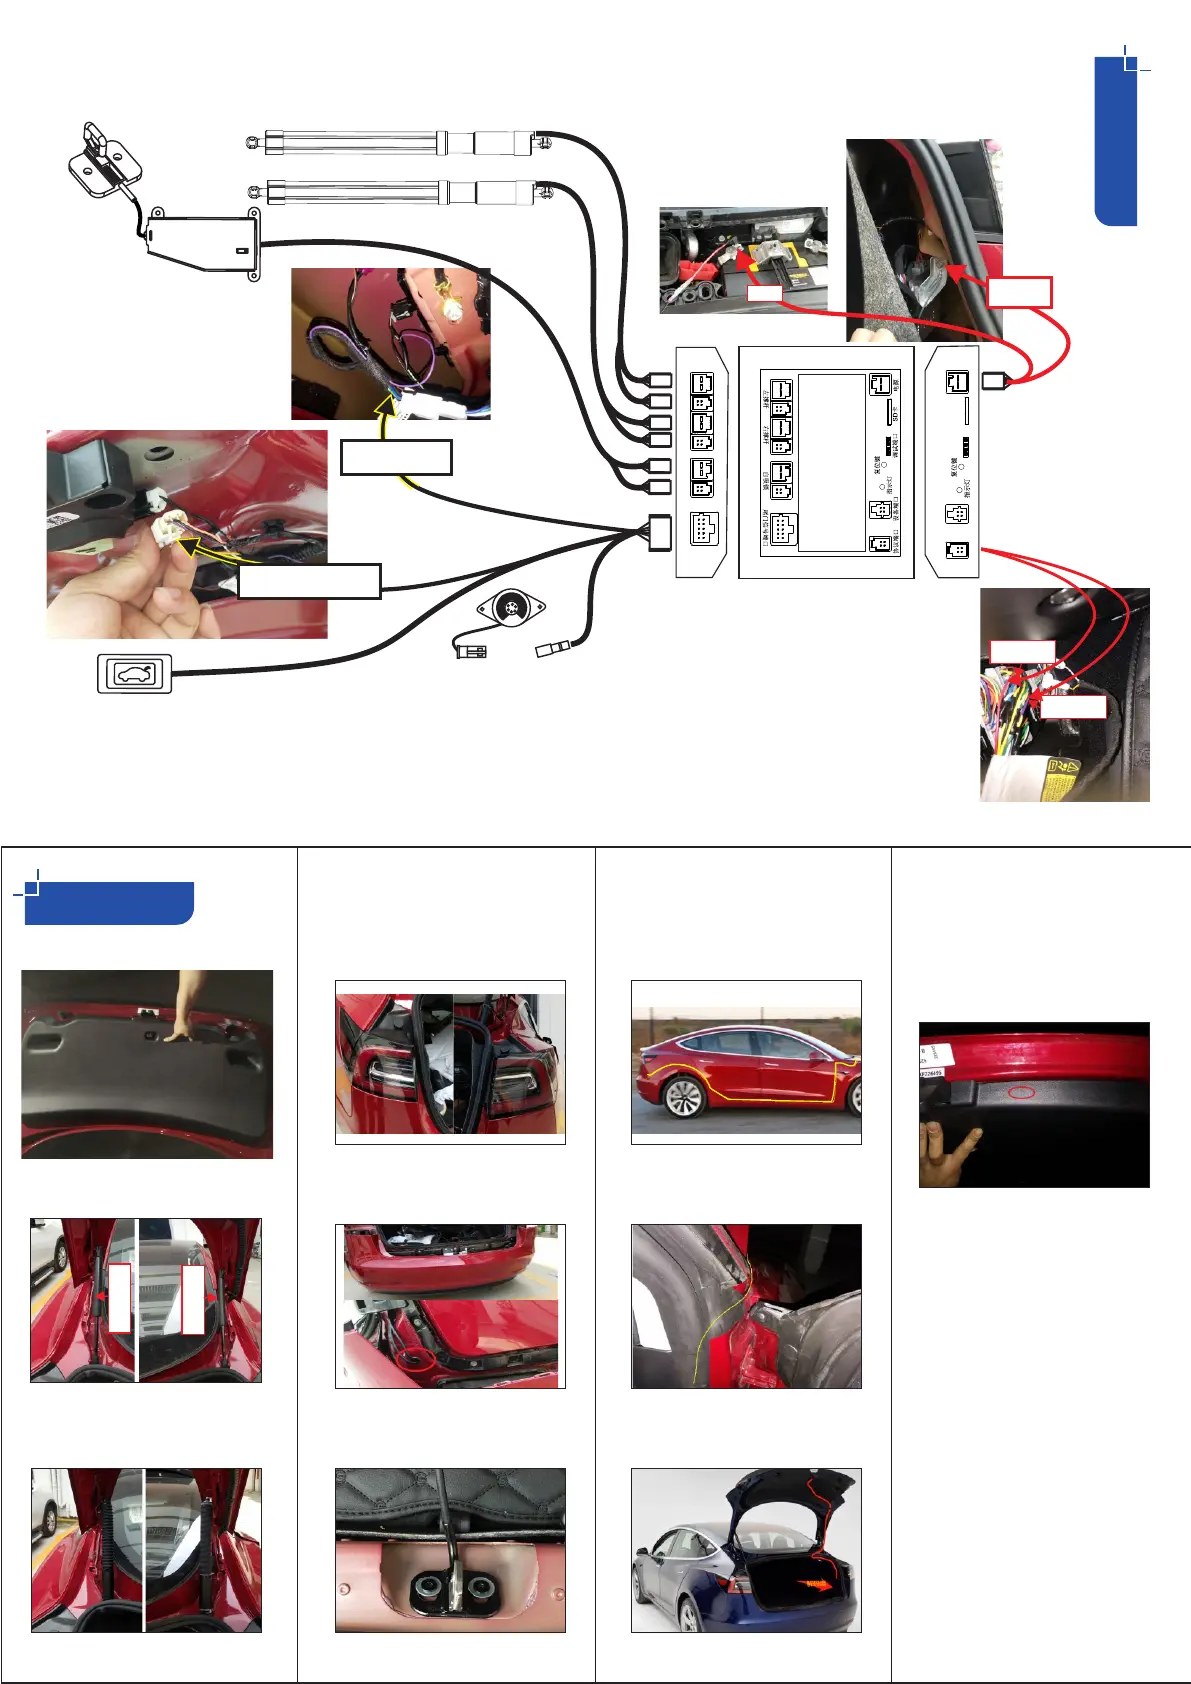
1.Remove original trunk panel
2.Remove original gas springs
with a screw driver
3 .Install our power actuators
4.Dismantle taillight for routing
cable
5.Dismantle the rear bumper,
routing actuator cable through
a hole in right side
6.Replace original latch buckle
to ours
7.Routing power cable per
picture
8.Routing power cable through
front side door to front trunk
9. Put control box in the right
side of trunk
INSTALLATION
BUZZER
Rear button
Remark: Front button is optional
There is a yellow wire please disregard it
SCHEMATIC
Power connect to BAT+
in the front trunk
GND ground to a screw in
the right side of trunk
+B
GND
LOCK SIGNAL
SWITCH SIGNAL
10.Drill a hole to install rear
button, positioning it to the
lower trim in case scratches
with bumper when closing
左撑杆
右撑杆
CANbus Signal:
Locate it inside
triangle panel under
driver's dashboard
CAN-H
LIGHT BLUE
CAN-L PURPLE
Actuators
Latch motor
**Initialize system after
installation: Manually lift the
door to a desired height, long
press our rear button for 5
seconds until you hear a beep.
The system now ready for use.
Support:
email: info@che1.com
tel.: 008618680368936
whatsapp 008618680368936