To attach a ball mount:
1.
Remove the dust cover from the hitch housing by
using a small object, such as a
flat screwdriver, to pry
between the dust cover and hitch housing. Store the
dust cover in a secure location.
2.
If necessary, remove the cotter pin from the locking
bolt and slide the locking bolt out of the hitch
assembly.
3. Slide the ball holder into the hitch assembly.
4.
Align the hole in the ball holder with the one in the
hitch assembly.
5. Slide the locking bolt through the hitch assembly/ball
holder.
6. Insert the cotter pin in the hole at the end of the
locking bolt.
To remove a ball mount:
1.
Remove the cotter pin from the locking bolt and slide
the locking bolt out of the ball holder/hitch assembly.
2. Pull the ball holder out of the hitch assembly.
3. Re-install the dust cover for the hitch housing and
store the ball mount in a secure location.
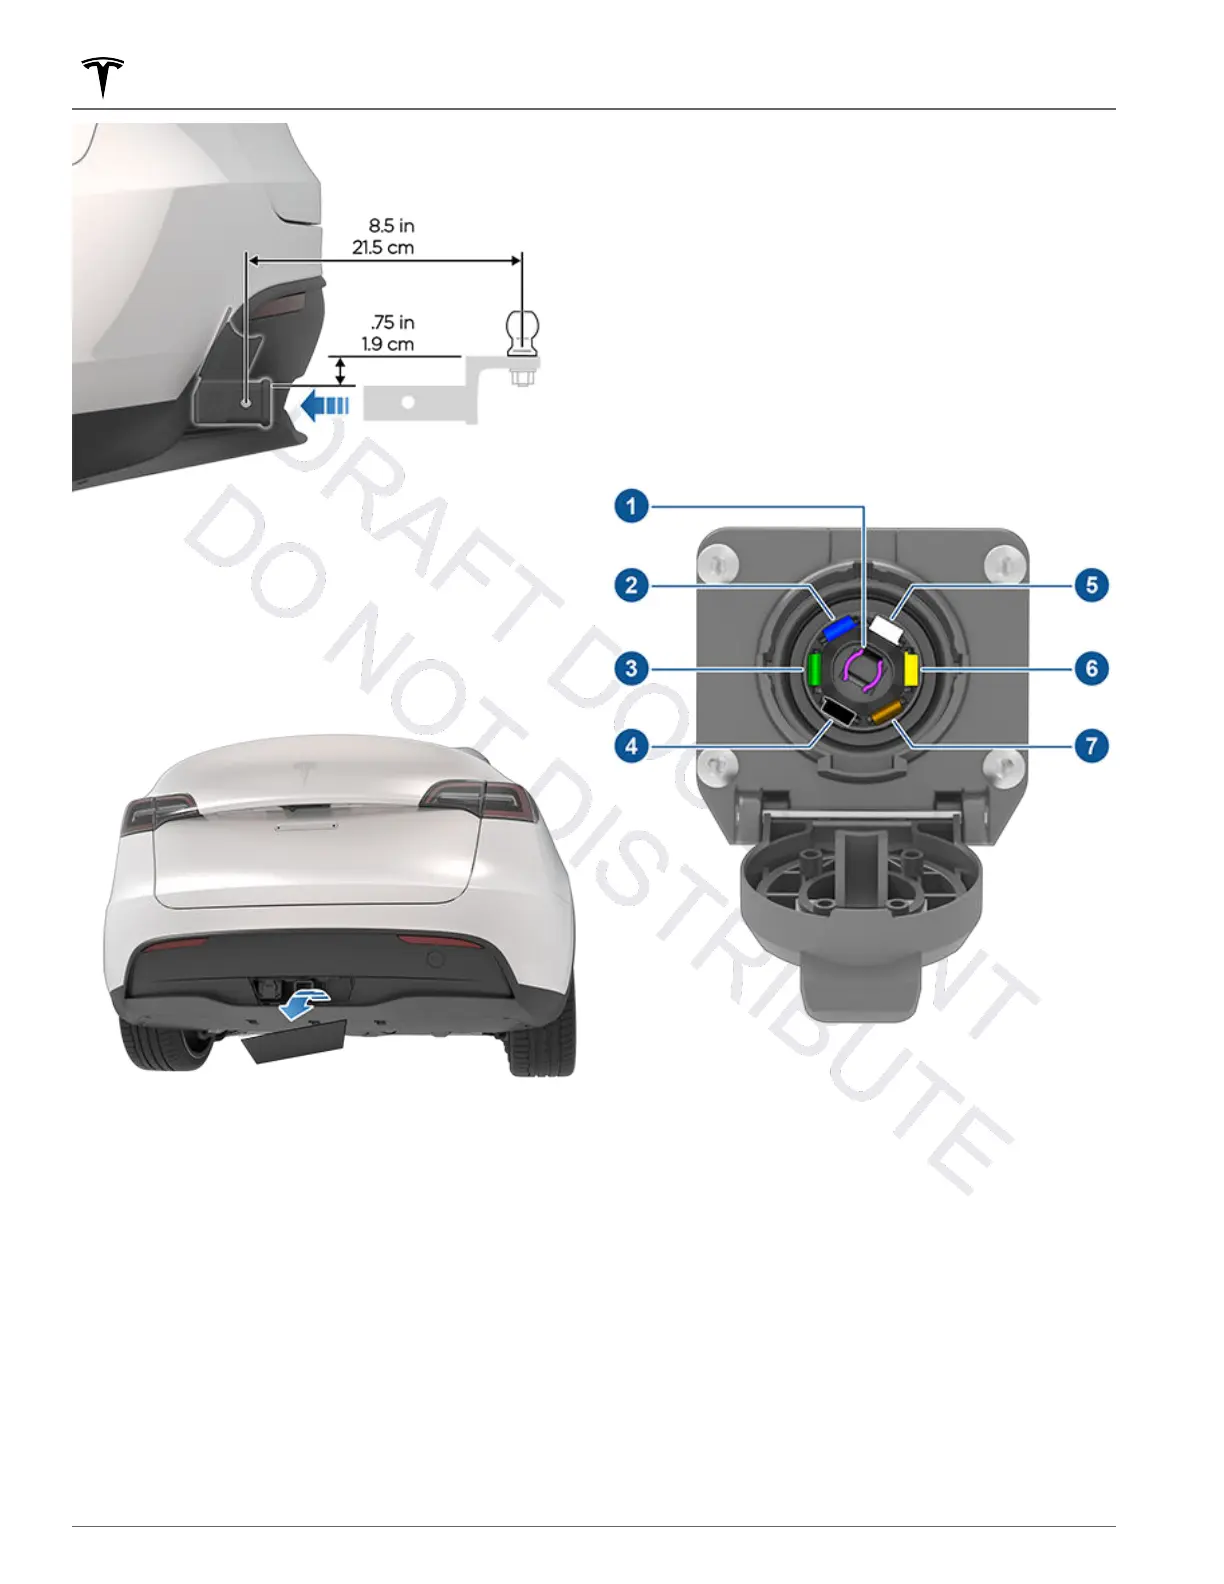
Electrical Connections
Regulations require all trailers to be equipped with tail
lights, brake lights, side marker lights, and turn signals.
To provide power for trailer lighting, a built-in 7-pin
wiring connector is provided near the hitch support's
wiring plugs for most types of trailers. Plugging in trailer
wiring into the
Model Y electrical connector
automatically engages Trailer Mode (see
Trailer Mode on
page 76).
1.
Reverse Lights
2.
Brake Controller Output
3.
Right Turn Signal and Brake Light
4.
Low Voltage Power (if equipped)
5. Ground
6. Left Turn Signal and Brake Light
7.
Tail Lamps
NOTE: It is the driver’s responsibility to ensure that all
electrical connections are working and all trailer lights
are operating before and during towing. You must
perform manual checks.
Towing and Accessories
78 MODEL Y Owner's Manual