14
OPERATION section 4.9
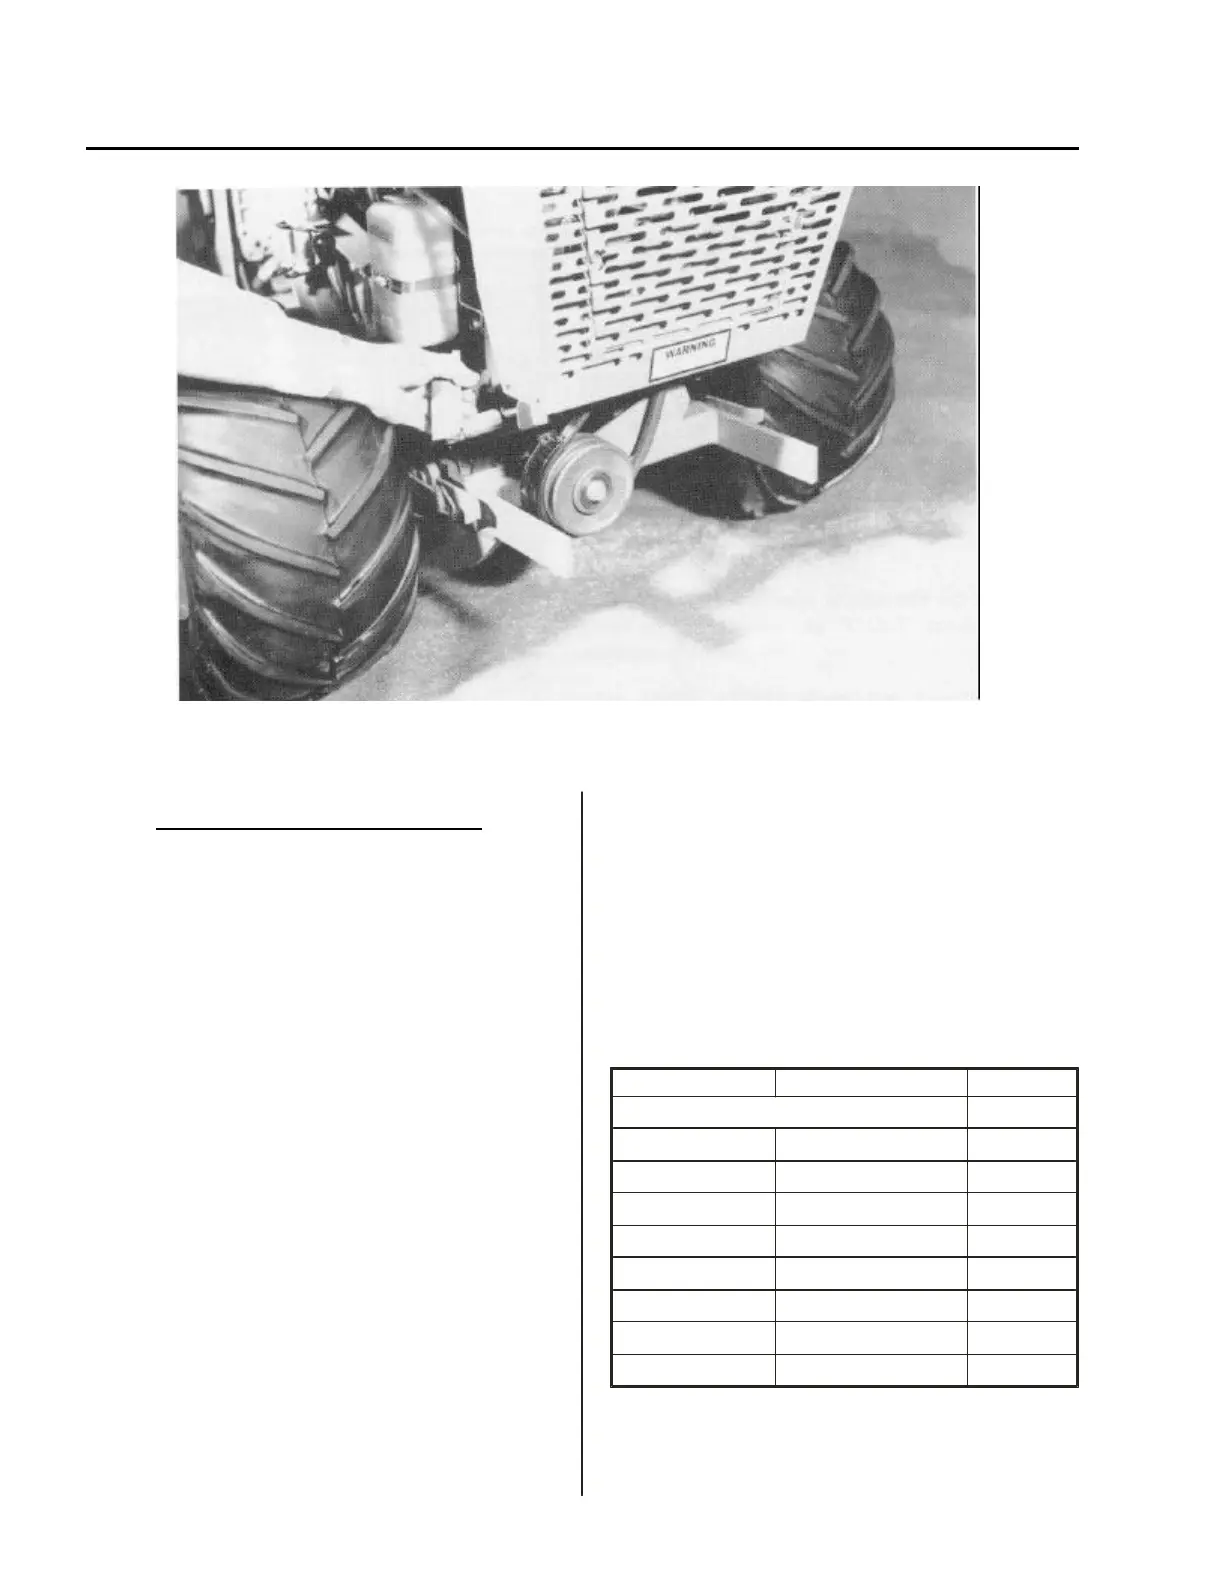
FRONT LIFT and PTO DRIVE
Follow these steps for installation of
front mounted attachments:
1. Place the correct size attachment drive belt around
the left hitch arm of the attachment before
mounting to the quick hitch front lift. See the belt
size chart for belt sizes.
2. Mount the attachment to the quick hitch front lift.
Push down on the front hitch release lever to open
latches. Pull up to lock latches. (See Photo 8)
3. On attachments with auxiliary hydraulics, connect
the hoses to the quick couplers.
4. For power driven attachments, follow additional
steps 5 through 8.
5. Stop engine, lift up on the belt release catch located
on the right front frame and push toward the center
of the tractor. (See Photo 8)
6. Install the attachment drive belt on the PTO drive
pulley of the tractor.
Photo 8 - PTO Drive and Front Lift (Serial No. 3000 - )
7. Each time a PTO belt driven attachment is installed,
it is necessary to check the drive belt tension. See
PTO BELT ADJUSTMENT on the next page
(Section 4.8) for adjustment instructions.
8. Operate mower and other similar front mounted
equipment with front lift lever in “FLOAT” position.
Belt Size Chart for Model 420
Model Description Part No.*
Engine Drive Pulley to Idler 81-B039
All Rotary Mowers 81-A040
CS312 Chipper Shredder 81-B041
LD300 Loader 81-A026
PB100 Power Blower 81-A040
RS350 Rotary Sweeper 81-A040
SB348 Snowblower 81-A053
SC101 Stump Cutter 81-A044
TL348 Tiller 81-A040
* See attachment parts manual for correct belt Part
Numbers. Use only Steiner approved belts.