2120
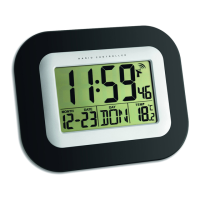
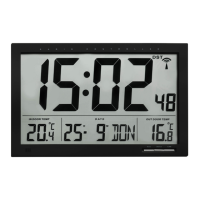
Radio controlled clock with outdoor temperature and indoor climate
D: Outdoor transmitter (Fig. 4):
D 1: Transmission indication LED D 2: Reception symbol
D 3: Indication of the outdoor temperature D 4: Channel number
D 5: Battery symbol for the transmitter D 6: Wall mounting hole
D 7: Channel switch 1,2,3 D 8: Battery compartment
5. Getting started
5.1 Insert the batteries
• Remove the protective film from the display.
• Open the battery compartment of the base station and insert four new AA 1.5V batteries, polarity as illustrated.
• The device will alert you with a beep and all LCD segments will be displayed for a short moment. Close the battery cover again.
• Open the battery compartment of the transmitter and insert two new AAA 1.5 V batteries, polarity as illustrated. The switch
is set to channel 1.
• The indicator light lights up briefly. The outdoor temperature is shown. Close the battery cover again.
5.2 Outdoor values reception
• The base station will scan the outdoor temperature and the reception symbol flashes
• If the reception of outdoor temperature fails, “- -.-” appears on the display. Check the batteries and try it again.
• You can also start the transmitter search manually later (e.g. if the transmitter signal is lost or if the batteries are changed).
Press and hold the CHANNEL button on the base station for three seconds. The last registered transmitter (channel) will be
cancelled and “- -.-” appears on the display.
5.3 Radio-controlled time reception
• The clock will now scan the DCF frequency signal and the DCF symbol flashes on the display. When the time code is suc-
cessfully received after some minutes, the radio-controlled time and the DCF symbol will be shown steadily on the display.
In Daylight Saving Time DST is shown on the display.
• If there is no reception, you can start the initialisation manually. Press and hold the ▼/RCC button for 3 seconds.
• The DCF symbol flashes.
• Interrupt the reception by pressing the ▼/RCC button again. The DCF reception symbol disappears.
• The DCF reception always takes place daily at 1:00, 2:00, 3:00, 4:00 and 5:00 o'clock in the morning.
• There are three different reception states:
flashing – Reception is active
remains – Reception is successful
disappears – No reception
• If the clock cannot detect the DCF-signal (e.g. due to interference, transmitting distance, etc.), the time can be set manually.
Radio controlled clock with outdoor temperature and indoor climate
5.4 Note on radio-controlled time
• The time is transmitted from an atomic clock near Frankfurt am Main by a DCF-77 (77.5 kHz) frequency signal with a range
of about 1,500 km. Your radio-controlled clock receives the signal, converts it and always shows the exact time. The
adjustment of Daylight Saving Time and Standard Time is also automatic.
• During night-time, the atmospheric interference is usually less severe. A single daily reception is adequate to keep the
accuracy deviation under 1 second. In extreme cases, please place the unit close to a window to improve reception.
6. Operation
6.1 Manual settings
• Press and hold the SET button for three seconds to enter the setting mode.
• The first adjustable value flashes on the display.
• Use the ▲/SHIFT or ▼/RCC button to make the desired setting.
• Confirm with the SET button and go to the next setting.
• The sequence is shown as follows:
– Time zone -12/+12 (default: 00)
– Day-of-week language: (default: GER)
– Year, month, day
– Hours, minutes
– DCF reception ON/OFF (default: ON)
• Press and hold the ▲/SHIFT or ▼/RCC button in the respective setting mode for quick setting. The device will automatical-
ly quit the setting mode if no button is pressed for 15 seconds.
6.1.1 Time zone setting
• In the setting mode you can make the time zone correction
• The time zone correction is needed for countries where the DCF signal can be received but the time zone is different from
the DCF time (e.g. +1=one hour plus).
6.1.2 Day-of-the week language
• In the setting mode you can choose between the day-of-the week language: German (GER), French (FRE), Spanish (SPA),
Italian (ITA), Danish (DAN), Dutch (DUT), Swedish (SWE), English (ENG).
6.1.3 DCF reception
• By default, the DCF reception is activated (ON) and after successful reception of the DCF signal no manual adjustment is
necessary.
TFA_No. 60.4523_Anleitung 23.02.2022 17:15 Uhr Seite 11
 Loading...