1716
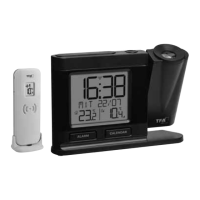
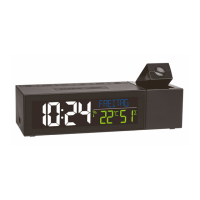
Radio-controlled projection alarm clock with thermometer
• Press and hold the ▲ button for 3 seconds in the time / temperature mode.
• F appears on the display.
• Press and hold the mode button for three seconds.
• The hour digit will be flashing. Press the ▲ or ▼ button to correct the hours
for the DCF time.
• Confirm with the mode button.
• Press and hold the ▲ button for three seconds to return to the time / tempe-
rature mode.
• F disappears on the display.
7.5 Setting of the alarm
• Select the alarm function you want with the mode button:
– Alarm 1
– Alarm 2
• Set the alarm time in the respective alarm mode.
• Press and hold the mode button and the hour indicator will be flashing.
• Press the ▲ or ▼ button to adjust hours. Press and hold the ▲ or ▼ button
in the setting mode for fast running.
• Confirm with the mode button. Set the minutes in the same way. Confirm with
the mode button and the alarm is activated.
• appears on the display.
• Set the second alarm time in the same way.
• To activate or deactivate the alarm function press the button. , , +
or no alarm symbol appears on the display.
• Once the alarm starts to ring, you can stop the alarm by pressing the but-
ton.
• You can activate the snooze function by pressing the snooze/light button.
• Zz will be flashing and the alarm will be interrupted for 4 minutes.
• If it is not stopped manually, the alarm will automatically turn off after certain
minutes and will be reactivated at the same time.
7.6 Setting of the dual time
• Press the mode button three times in the time / temperature mode.
• DT and 0:05 (default) appears on the display.
• Press and hold the mode button.
• The hour digit will be flashing. Press the ▲ or ▼ button to adjust hours.
Press and hold the ▲ or ▼ button in the setting mode for fast running.
• Press the mode button again and set minutes in the same way.
Radio-controlled projection alarm clock with thermometer
• Confirm the setting with the mode button.
• The dual time appears.
• Press the mode button again to return to the time / temperature mode.
7.7 Temperature display
• Press the °C/°F / wave button to select temperature display in °C (Celsius) or
°F (Fahrenheit) as the temperature unit.
7.8 Projection and light
A. Without permanent projection:
• Press the snooze/light button.
• The backlight and the projection will turn on for a few seconds.
B. For permanent projection:
• Plug in the adapter and turn on the continue projection switch in direction of
the arrow.
• Press the Flip button to turn the image by 180°.
• Hold the Flip button for three seconds and the projection toggles between
time and temperature every 5 seconds.
8. Care and maintenance
• Clean your instrument with a soft damp cloth. Do not use solvents or scou-
ring agents.
• Remove the batteries and pull out the plug of the socket, if you do not use the
product for a long period of time.
• Keep the instrument in a dry place.
8.1 Battery replacement
• Change the batteries when the functions of the instrument become weak.
• Open the battery compartment and insert two new batteries 1,5 V AAA. Ensu-
re that the battery polarities are correct.
• Close the battery compartment again.
9. Troubleshooting
Problems Solution
No indication ➜ Ensure that the battery polarity is correct
➜ Change the batteries
No projection ➜ Control the power adapter
➜ Slide the switch in the direction of the arrow
TFA_No. 60.5008_Anleitung_10_16 18.10.2016 09:11 Uhr Seite 9
 Loading...