– 30 – – 31 –
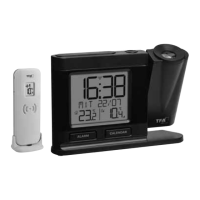
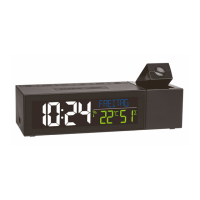
Radio-controlled projection alarm clock
6.3 Optional display
• With the CALENDAR button you can toggle the display in normal mode:
– Weekday written in full letters
– Weekday (3 digits) with date
– Alarm time
7. Alarm clock function
7.1 Alarm time setting
• Press and hold the ALARM button for three seconds to enter the setting mode. The
alarm symbol and ALARM appear on the display.
• The hour digits flash.
• Press the + or – button to set the desired time.
• Confirm the setting with the ALARM button.
• Set the minutes in the same way.
• Confirm the setting with the ALARM button.
• The current time and the alarm symbol appear on the display.
• The newly set alarm time appears in the optional display.
• The alarm is activated.
7.2 Activate and deactivate the alarm
• To deactivate and activate the alarm function, press the ALARM button in normal
mode.
• The last adjusted alarm time appears for 2 seconds on the display.
• The alarm symbol and ALARM ON appear on the display, if the alarm is activated.
• ALARM OFF appears on the display, if the alarm is deactivated.
• Wait some seconds until the display returns to normal mode to confirm the setting.
• When the alarm is activated, the alarm starts to ring when the set alarm time is
reached. The alarm symbol flashes.
• If the alarm is not stopped manually, the ascending alarm tone automatically turns
off after two minutes and it will be reactivated at the same set time on the following
day.
• When the alarm rings, press the SNOOZE/LIGHT button and the snooze function is
activated.
• The alarm will be interrupted for 10 minutes. The snooze symbol flashes on the
display.
• Press any button (except SNOOZE/LIGHT) and the alarm will stop. GOOD DAY
appears briefly on the display.
• The alarm symbol remains on the display.
Radio-controlled projection alarm clock
8. Projection and light
Note: Continuous illuminated backlight and projection only works when using
the power adapter.
8.1 Projection
• Press and hold the Projection HIGH/LOW/OFF button for three seconds to enter the
setting mode.
• The first option flashes on the display.
• Use the + or – button to make the desired setting, while the display is flashing.
• To confirm the setting, press the Projection HIGH/LOW/OFF button or wait some
seconds until the display returns to normal mode.
• The sequence is shown as follows:
– TIME
– IN TEMP indoor temperature
– OUT TEMP outdoor temperature
– TIME/TEMP time/indoor temperature/outdoor temperature alternating
• Press the Projection HIGH/LOW/OFF button to adjust the projection brightness in
2 levels or to switch it off.
• If the projection is switched on, the last selected display and the alarm symbol (if
the alarm is activated) appear on the wall or ceiling.
• Set the projection arm to the respective position.
• With the ROTATE dial you can rotate the image by 270°.
• Battery operation: To temporarily activate the projection, press the Projection
HIGH/LOW/OFF button.
8.2 Display backlight
• Press the SNOOZE/LIGHT button to adjust the brightness in 4 levels (BACKLIGHT 1-
4) or to switch it off (OFF).
• Wait some seconds until the display returns to normal mode to confirm the setting.
• Battery operation: To temporarily activate the backlight, press the SNOOZE/LIGHT
button.
8.2.1 Automatic dimming mode
• If the auto-dim mode is activated, the weak backlight (level 1) turns on automati-
cally for the set time. After that, the backlight goes to level 4.
• Press and hold the SNOOZE/LIGHT button for 2 seconds. AUTO DIM appears on the
display.
• By default, the automatic dimming function is disabled. OFF flashes on the display.
• To activate the function, press the + or – button (ON). The AUTO DIM symbol
appears on the display.
TFA_No. 60.5018_Anl_09_22 21.09.2022 11:01 Uhr Seite 16


 To Next Page
 Loading...