1716
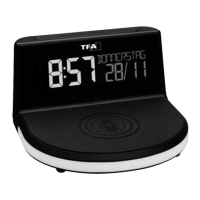
CHARGE-IT WIRELESS – Wireless charging alarm clock
5. Elements
A: Display (Fig. 1):
A 1: Time / wake up time A 2: Snooze symbol
A 3: Weekday / date A 4: Temperature / date
A 5: Alarm symbol A 6: Charging LED light
A 7: Symbol for auto-dim function
B: Housing (Fig. 2+3):
B 1: Charging pad B 2: Mood light
B 3: Micro USB port B 4: Power adaptor jack
B 5: Ventilation slots
C: Buttons (Fig. 3):
C 1: SNOOZE/LIGHT button C 2: GLOW button
C 3: – button C 4: SET button
C 5: + button C 6: ALARM button
C 7: RESET button
6. Getting started
• Remove the protective film from the display.
• Connect the attached power adapter to the alarm clock. Insert the power adapter pin into the
device jack and connect the plug to a wall socket. Important! Make sure that your household
voltage is no more than 240V! Otherwise your device may be damaged.
• The device will alert you with a beep and all segments will be displayed for a short moment.
• The device is ready for use. “HALLO” appears, then “ZEIT” and “EINGEBEN”.
7. Operation
• Press and hold the + or – button in setting mode for fast mode.
• Press the SNOOZE/LIGHT button in setting mode to return to normal mode.
• The device will automatically quit the setting mode if no button is pressed for 10 seconds.
CHARGE-IT WIRELESS – Wireless charging alarm clock
7.1 Settings
• After start-up or if you press and hold the SET button for three seconds in normal mode, you
will enter the setting mode.
• DEUTSCH (default) flashes on the display.
• Press the + or – button to set the day-of-the week language:
GERMAN – DEUTSCH, ENGLISH, SPANISH - ESPANOL and FRENCH – FRANCAIS.
• If you select English, the display will now appear in English.
• Press the SET button again to do the settings in the following sequence: the 12 - or 24 hour sys-
tem (FORMAT 24 Hr - default), the hours, the minutes, the year, the month and the date, the
month/day sequence DATE/MONTH or MONTH/DATE (DATE/MONTH - default) and the tempera-
ture unit °C or °F (TEMP °C - default). Press the + or – button to adjust it.
• Confirm the setting with the SET button.
7.1.1 24- or 12-hour system setting
• Press the + or – button in setting mode to choose the 12 HR or 24 HR system.
• In the 12-HR system AM (before noon) or PM (after noon) appears on the display.
7.2 Alarm function
• Press the
ALARM
button in normal mode.
• ALARM, 6:30 (default) or the last adjusted alarm time appear on the display.
• Press and hold the
ALARM
button for 3 seconds.
• The alarm symbol appears and the hour digit flashes.
• Press the
+ or –
button to adjust the hours.
• Press the
ALARM
button again and you can adjust the minutes with the
+ or –
button.
• Press the
ALARM
button again.
• SNOOZE, the snooze symbol and 10 min. (default) or the last adjusted snooze interval appear on
the display.
• Press the
+ or –
button to set the desired time duration – it adds 5 minutes at a time (5 to 120 min-
utes).
• Confirm the setting with the
ALARM
button and return to normal mode.
• The alarm symbol will appear on the display and the alarm is activated.
• When the adjusted alarm time is reached, the alarm rings.
TFA_No. 60.2028_Anleitung_06_20 05.06.2020 11:13 Uhr Seite 9
 Loading...