Please be aware of this fact and brace yourself accordingly. There are several reasons for this to be fitted. 1. to
top the throttle becoming pulled on accidentally causing a dangerous situation. 2. to stop intentional very rapid
l panic and pull the lever even harder. With this sensor fitted, in an emergency situation
een
tted with one of the following factory fitted options:-
of
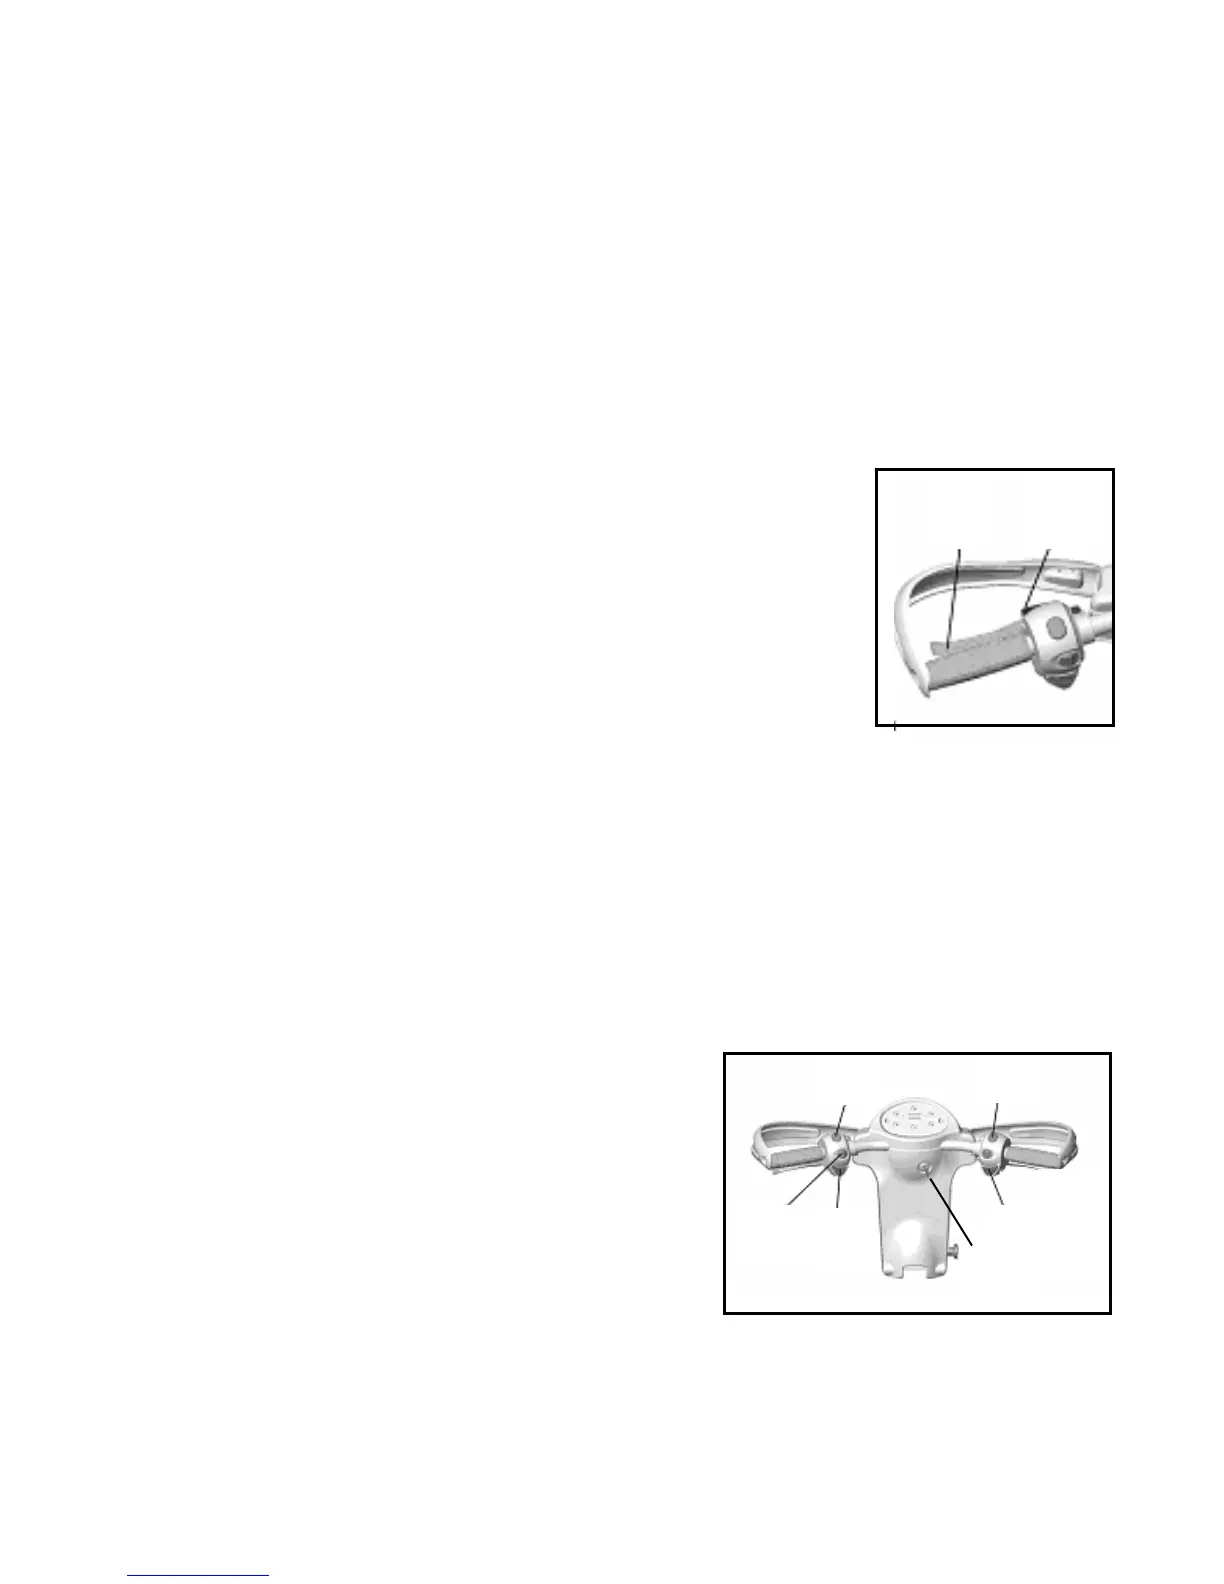
stop simply release or wind back the lever, fig 1.2
Foot Pedal Speed Control - Again much the same as above but used with the foot and not the hand. Simply
wist grip and foot throttle are not fitted with panic
nsors.
never need to be used. It is only for emergency use, in the very unlikely
vent that the automatic braking fails. If used this lever will cut off the power of the
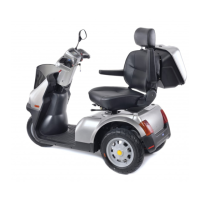
. Horn – Buttons located either side of handlebar (fig 3.1). The buzzer can be
) (fig 3.2).
. Indicator Warning Lights - Come on when using indicators (fig 4.1).
. Hazard Warning Lights - Operates all indicator lights together. For emergency use only and can be
. Head Light Switch - This switches on front and rear lights, and located at fig 3.3.
his has a removable key which
ould be taken out when machine not in use. When the key is
serted the switch has two positions, “off” where there will be no
engaged and
on” where the machine is ready for use (fig 3.4). If Breeze is
self down to conserve battery. To restart, turn the key to off, wait
.3)
sp a
WA ING Always come to a complete stop
s
acceleration. 3. for emergency use. 4. it is possible that when in an emergency situation, instead of releasing the
throttle some people wil
which ever direction the lever goes the machine will stop. In normal use take care not to pull the lever hard onto
the handlebar. It is best to familiarize yourself with this safety device. You may have a machine that has b
fi
a) L/H speed Control Lever - This is used exactly as described above and is fitted to the L/H handlebar instead
R/H
b) Twist Grip speed Control – Twist the throttle gently to engage power, the more you twist, the quicker you will
go. To
c)
release pedal to stop, located on the footplate RH side. NB T
se
2. Emergency Brake - All braking on the Breeze is automatic and the emergency
brake should
e
2.1
machine and bring you safely to a halt. Lever located on left handle bar (fig 2.1)
.
3
enabled to automatically sound when using reverse and the indicators (deactivated as
standard).
4. Indicators - Left and right hand located on the L/H handlebar. Push the switch in
the same direction as you need to turn. To stop the indicators, push the button
forward. The buzzer can be enabled to sound whilst indicators are in use (deactivated
as standard
2.2
Fig 2
5
6
accompanied by an audible warning (deactivated as standard) (fig 2.2).
7
8. Head Light Warning Light - Will come on when lights are in use. Lights will reduce range of scooter. Use
only when necessary (fig 4.2).
9. Power On/Off Switch - T
3.3
sh
in
power to the machine and the parking brake will be
“
inadvertently left switch on, after a certain period of time it will shut
it
a few seconds and turn on again.
10. On Light – Will come on when the key is turned to on and
Breeze ready for use (fig 4.3).
11. Forward/Reverse Switch – Located on the RH handlebar (fig 1
pressing either side of switch as marked. When using reverse the top
warning buzzer will sound (warning buzzer deactivated as standard).
before changing selector switch.
3.5
3.2
3.1
3.1
3.4
Fig 3
y . Select your desired direction b
eed is automatically reduced and
RN
4