25
6.4
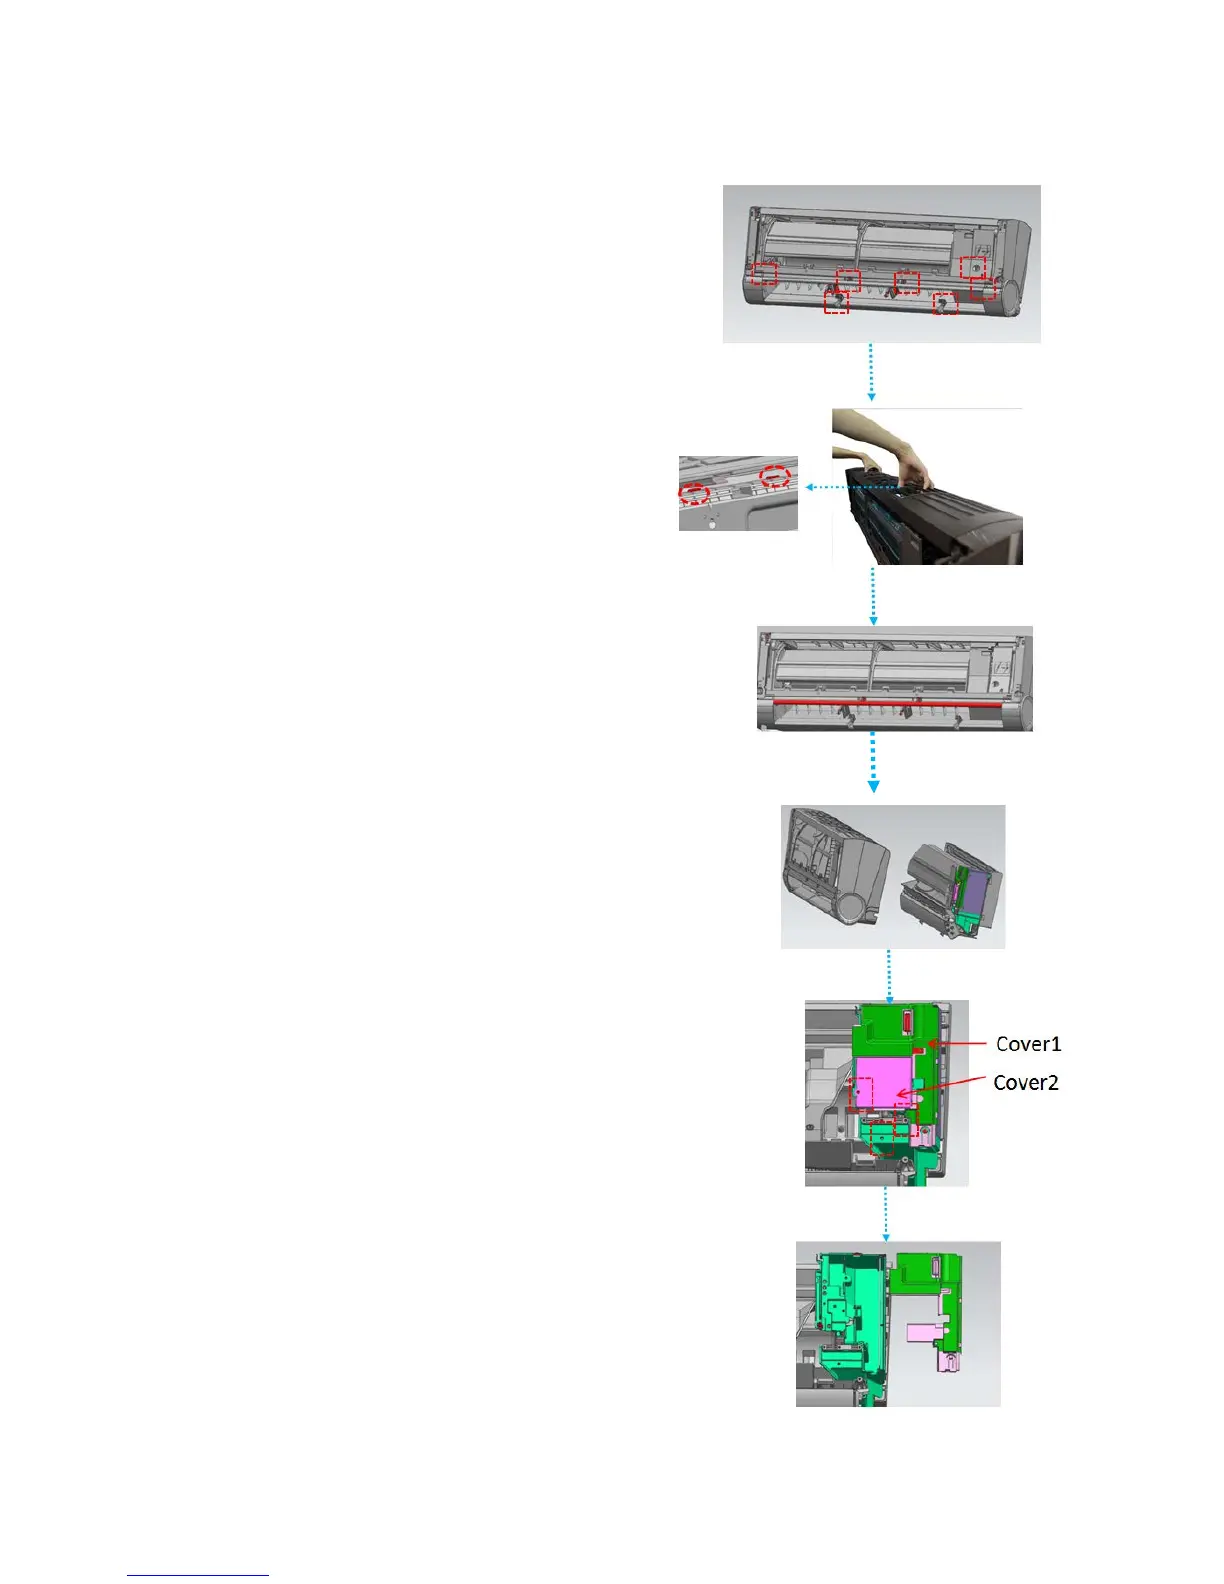
How to Remove the PCB
STEP1:
After disassembling the panel and the louver,
remove 7 screws (For 9 K and12K units, have 5
screws. For 18K units, have 4 screws) and
electrical cover;
STEP2:
Grab air grid with two hands and pull it upwards
along the direction indicated in right image
vigorously,so that the snap-fit inside can be
disassembled, this is the key step for removing
the frame;
STEP3:
Grab the frame (red side) and disassemble the
snap-fit inside;
STEP4:
Separate the frame part and the base plate
part ;
STEP5:
Remove the 3 Screws, and then remove the
cover1 and cover2
STEP6:
Open the cover and the PCB can be seen and
taken.