EasyManua.ls Logo

Thales payShield 10K PS10-F - User Manual

Thales payShield 10K PS10-F
2 pages
Print Icon
To Next Page IconTo Next Page
Loading...
Device Overview
12. Configure payShield Manager
Follow the instructions provided in the payShield Manager Quick start guide to complete the configuration of payShield Manager
13. Configuring the host ports
Depending upon the configuration connection required between the Host and the payShield 10K, you may require additional
information from your Network or Systems Support Group in order to complete this step.
Using either the console or payShield Manager, configure the Host ports to suit your system requirements. The parameters you
need to enter will vary, depending upon the type of communications to be used.
Test the connection:
The FICON board and transceivers can be tested using the FICNTEST console command. payShield Manager users can run this
from the payShield Manager virtual console. Note, that to run FICONTEST, you will need the loopback device provided with your
transceiver.
10. Connect using the console
The console terminal is pre-configured to communicate with the HSM via the USB-C to USB-A cable.
Use the supplied USB-C to USB-A cable to connect the USB-C port on the front of the payShield 10K to your laptop
NOTE: If your laptop has a USB-C port, instead of a USB-A port, you will need to order or provide a standard USB-C to
USB-C cable.
For Windows, ensure that all Windows updates have been applied and the laptop is connected to the internet before
connecting to the payShield. Upon connection, Windows will detect the new hardware and install the driver. The device
will appear as a new COM port.
If the laptop cannot be connected to the internet, the drivers are available for download and manual installation from
the Microsoft Update Catalog: www.catalog.update.microsoft.com/Search.aspx?q=PI%20USB%20to%20serial
Download the CAB file for the laptop operating system and extract the files into a folder
Expand the "Other devices" section of the Device Manager and look for "Gadget Serial v2.4". Right click on that and select
the option to install the driver. Choose the option to browse for the driver and select the folder from the previous step.
You may need to be signed in with an administrator account to install drivers
Using a standard terminal emulation program, select the set-up for serial terminal emulation and configure it as follows:
Baud Rate: 9600 bps
Word Length: 8 bits
Parity: None
Stop Bits: 1 bit
Test the connection:
Press the <Return> key on the console/laptop keyboard
The HSM should respond by displaying “Online>”, “Offline>”, or “Secure>” based on the position of the keys.
The appearance of this prompt indicates that the correct communications between the console and the HSM have been
established, but that no command has been entered.
Left key lock
Tamper light
Service light with serial number
Health LED
Smart card reader
Right key lock
USB-C
console port
Service light
on/off button
Ethernet
ports 1 & 2
Service LEDSerial number
2x Hot swappable fans
Erase Button
access
Printer ports
(Ethernet & USB-A)
Management
& Auxiliary
Erase
LED
Power
switch
2x Hot swappable power supplies
Power supply status LED
Fan status LED
© Thales Group - 2018-2021• 007-000856-001 Rev A
payShield 10K PS10-F
Installation Quick start guide
007-000856-001
> cpl.thalesgroup.com <
Contact us – For all ofce locations and contact information, please visit cpl.thalesgroup.com/contact-us
User Documentation
The payShield 10K user manuals are available for download from the Thales CPL support website: https://supportportal.thalesgroup.com/csm
NOTE: The HSM FICON interface supports speeds up to 32Gbp/s, with the option of 8Gbp/s or 16Gbp/s, if available. If using a
switched fabric, the connection switch must have the connecting port type set to fabric port.
11. Connect cables for payShield Manager
payShield Manager provides a secure GUI interface with an authenticated, encrypted connection allowing a full remote
or local management of the payShield 10K
Remote payShield Manager requires an Ethernet cable from the Management Port into your network
If you are not using DHCP, then you may need to use the console to set up the static IP address for payShield Manager.
(Refer to the payShield Manager Quick start guide. For the Console, refer to the payShield 10K Console Guide.)
Remove from packaging:
Remove the Accessories box
Remove the payShield 10K from the packaging, checking that the tamper evident bag containing the unit is not tampered
Check that the serial number on the tamper evident bag matches that supplied by email or shipment confirmation by Thales
Remove the accessories from the Accessories box.
Verify the shipment's contents:
payShield 10K PS10-F Host Security Module
HSM Rail Kit
2 AC power cables
4 Security keys in tamper evident bags (2 copies -- 4 total keys)
USB-C to USB-A cable (for console connectivity)
Carry out the following checks:
Check that the tamper evident bag containing the keys is not tampered and the serial number matches that supplied by email or
shipment confirmation by Thales
Locate the serial number on the key tag and verify that it matches the serial number on the unit
1. Assure Safety
Before installing, and using this product, please read the Warnings and Cautions in the following document: payShield 10K Regulatory User
Warnings & Cautions
Either a FICON Short Wave Small form-factor pluggable
transceiver (SFP) or FICON Long Wave SFP (ordered
separately)
Loopback device
payShield 10K Regulatory User Warnings & Cautions
document
payShield 10K PS 10-F Installation Quick start guide (this
document)
payShield Manager Quick start guide
2. Unpack
The way in which you do this will vary, depending upon your system configuration; for example: Ethernet environment – issue a
PING command (both from the payShield 10K to the Host, and from the Host to the payShield 10K)
Question and Answer IconNeed help?

Do you have a question about the Thales payShield 10K PS10-F and is the answer not in the manual?

Summary

Connect Using the Console

USB-C to USB-A Cable Connection

Connect the USB-C port on the payShield 10K to the laptop using the provided cable.

Windows Driver Installation Process

Ensure Windows updates are applied and connect to the internet for automatic driver installation.

Serial Terminal Emulation Configuration

Configure terminal emulation with specific settings like Baud Rate, Word Length, Parity, and Stop Bits.

Console Connection Test

Press the <Return> key to check for the "Online>", "Offline>", or "Secure>" prompt.

Connect Cables for payShield Manager

Remote Management Connection

Use an Ethernet cable to connect the Management Port to your network for remote management.

Configure payShield Manager

PayShield Manager Setup Guide

Follow the PayShield Manager Quick start guide for complete configuration.

Configure Host Ports

Host Port System Requirements

Configure host ports based on system requirements and connection types.

Host Connection Testing

Test connections using PING commands or the FICNTEST console command.

Assure Safety

Review Safety Warnings

Read the Regulatory User Warnings & Cautions document before installation and use.

Unpack the Device

Remove Packaging Contents

Remove the payShield 10K and accessories from packaging, checking tamper evident bags.

Verify Shipment Items

Verify all shipment contents, including HSM, rail kit, power cables, security keys, and cables.

Perform Security Checks

Check tamper evident bags for keys and verify serial numbers match shipment confirmation.

Insert the SFP Module

SFP Insertion Procedure

Remove dust cover from Port 1 and slide SFP into housing until the latch clicks.

SFP Handling Precautions

Handle SFPs with care, following Electrostatic Discharge (ESD) precautions to avoid damage.

Gather Additional Equipment

Printer Port Equipment

Printer communication requires a USB peripheral cable for payShield Manager.

payShield Manager Equipment

Requires a standard Ethernet cable and a PC/laptop with a web browser for management.

Console Terminal Equipment

Connect using a desktop PC or laptop with terminal emulation software.

FICON Port Equipment

Requires FICON interface cables and specific optics/cable types as defined in the tables.

Determine Installation Location

Environmental Installation Factors

Consider airflow, temperature, and humidity ranges for optimal HSM installation and operation.

Environmental Specifications

Specifies operating, storage, and transportation temperature/humidity ranges, and altitude limits.

Mount the Unit in the Rack

Rack Mount Kit Components

Use the Thales Universal Rack Mount Kit, including rails and M4 x 6 mm screws.

Attach Inner Rails to Chassis

Attach inner rails to the chassis using provided screws, ensuring safety catches are oriented correctly.

Lock the Unit into the Rack

Rack Locking Mechanism

Lock the unit into the rack using the two key locks located on the front panel.

Connect Cables and Power On

Fiber Optic Cable Connection

Connect the Fiber optic cable to the Port 1 LC connectors.

Unit Power On Procedure

Push the on/off power switch on the back; wait for the health LED to turn solid white or red.

Configure the payShield 10 K

Available Configuration Methods

Configure the payShield 10K using payShield Manager or the console terminal.

Required ONLINE State

Ensure the payShield is ONLINE with front panel keys locked for payShield Manager and Host operation.

Overview

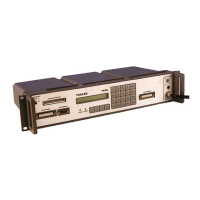
The Thales payShield 10K PS10-F is a Host Security Module (HSM) designed to provide robust security for various applications, particularly in financial services. It offers a secure environment for cryptographic operations, key management, and data protection.

Function Description:

The payShield 10K serves as a dedicated hardware security module that protects cryptographic keys and performs sensitive operations such as encryption, decryption, digital signing, and key generation. It is designed to meet stringent security requirements, including those for payment card industry (PCI) compliance. The device integrates into a rack-mount environment, offering both local and remote management capabilities.

Key functions include:

  • Cryptographic Processing: Executes a wide range of cryptographic algorithms to secure data and transactions.
  • Key Management: Securely generates, stores, and manages cryptographic keys throughout their lifecycle. This includes support for various key types and hierarchies.
  • Transaction Security: Provides real-time protection for financial transactions, ensuring data integrity and confidentiality.
  • Authentication: Supports secure authentication mechanisms for users and systems interacting with the HSM.
  • Tamper Detection and Response: Incorporates physical security features to detect and respond to tampering attempts, protecting sensitive data.
  • Remote and Local Management: Can be managed via a secure GUI (payShield Manager) over an Ethernet connection or through a local console terminal.

Important Technical Specifications:

  • Form Factor: 1U rack-mount unit, designed for standard 19-inch racks.
  • Dimensions: 1U rack 19" x 29" x 1.75" (482.6mm x 736.6 mm x 44.5mm).
  • Power Consumption: Maximum Operating Power Consumption of 80W.
  • Operating Temperature: 0°C to 40°C.
  • Storage Temperature: -5°C to 45°C.
  • Transportation Temperature: -25°C to 70°C.
  • Operating Humidity: 5-85% Relative non-condensing at 30°C.
  • Storage Humidity: 5-93% Relative non-condensing at 30°C.
  • Transportation Humidity: 5-93% Relative non-condensing at 40°C.
  • Altitude: -100m to 2000m AMSL (Above Mean Sea Level).
  • FICON Interface: Supports speeds up to 32Gbp/s, with options for 8Gbp/s or 16Gbp/s.
    • Short Wavelength Transceiver:
      • Data Rate: 8.5Gb/s (8GFC), 14.025Gb/s (16GFC), 28.05Gb/s (32GFC) (auto-detected).
      • Optics: Short wave (850 nm) laser.
      • Cable Types: Multimode (OM4 - 50/125 µm, OM3 - 50/125 µm, OM2 - 50/125 µm, OM1 - 62.5/125 µm).
      • Connector Type: LC.
      • Minimum Cable Length: 0.5 meters.
      • Max. Cable Length (dependent on fiber material): OM1 (25M), OM2 (50M for 8.5Gb/s, 35M for 14.025Gb/s, 20M for 28.05Gb/s), OM3 (150M for 8.5Gb/s, 100M for 14.025Gb/s, 70M for 28.05Gb/s), OM4 (190M for 8.5Gb/s, 125M for 14.025Gb/s, 100M for 28.05Gb/s).
    • Long Wavelength Transceiver:
      • Data Rate: 8.5Gb/s (8GFC), 14.025Gb/s (16GFC), 28.05Gb/s (32GFC) (auto-detected).
      • Optics: Long wave (1310 nm) laser.
      • Cable Types: Single Mode (OS2 - 9 µm, OS1 - 9 µm).
      • Connector Type: LC.
      • Minimum Cable Length: 0.5 meters.
      • Max. Cable Length: OS1 & OS2 (10 Km for 8.5Gb/s, 14.025Gb/s, 28.05Gb/s).
  • Connectivity:
    • FICON Ports: Two FICON ports (Port 1 shown with dust cover, Port 2 not used).
    • Ethernet Ports: Two Host Ethernet ports (1 & 2), Management & Auxiliary Ethernet ports.
    • USB Ports: USB-C console port, Printer ports (Ethernet & USB A).
    • Serial Port: For service and console access.
  • Security Features: Tamper light, Left and Right key locks, Health LED, Smart card reader, Erase button access, Security keys.
  • Power Supplies: Two hot-swappable power supplies for redundancy.
  • Cooling: Two hot-swappable fans.
  • LED Indicators: Tamper light, Service light, Health LED, Fan status LED, Power supply status LED, FICON yellow & green LEDs.

Usage Features:

  • Rack Mounting: The device is designed for easy installation into a standard 1U rack. It includes a universal rack mount kit that supports various rack depths and hole types (square hole and unthreaded round hole racks). The installation process involves attaching inner rails to the chassis, installing outer rails into the rack, and then sliding the unit into the rack until safety latches engage.
  • Physical Security: The unit is physically locked into the rack using two key locks on the front panel, with each lock having its own key typically held by a security officer. This ensures that the unit remains secured within the rack.
  • Initial Setup:
    • Unpacking: Requires checking for tamper-evident bags on the unit and keys, verifying serial numbers, and ensuring all components (HSM, rail kit, power cables, security keys, USB-C to USB-A cable, FICON transceivers, loopback device, documentation) are present.
    • SFP Installation: Short form-factor pluggable (SFP) transceivers are inserted into FICON Port 1. Care must be taken to avoid damaging the transceivers and to observe ESD precautions.
    • Cabling: Connecting Fiber optic cables to FICON Port 1, power cables to the power supplies, and Ethernet cables for management and host connectivity.
    • Console Connection: A USB-C to USB-A cable connects the HSM's USB-C port to a laptop for console access. Windows drivers may need to be installed for the USB-to-serial connection. A terminal emulation program is used with specific settings (Baud Rate: 9600 bps, Word Length: 8 bits, Parity: None, Stop Bits: 1 bit) to test the connection.
    • Power On: The unit is powered on using the switch at the back. A period of time is required for the unit to become operational, indicated by the Health LED turning solid white or red, and FICON interface Power On Self-test completion (indicated by yellow and green LEDs).
  • Management:
    • payShield Manager: A secure GUI interface for remote and local management, requiring an Ethernet connection from the Management Port. If DHCP is not used, the console may be needed to set up a static IP address for payShield Manager.
    • Console Terminal: Provides a command-line interface for configuration and troubleshooting.
    • Host Port Configuration: Host ports are configured via the console or payShield Manager to suit system requirements, with parameters varying based on the communication type (e.g., Ethernet, FICON).
  • Testing Connections:
    • Console: Pressing on the console/laptop keyboard should elicit a response like "Online>", "Offline>", or "Secure>".
    • Ethernet (Host): PING commands from both the payShield 10K to the Host and vice versa.
    • FICON: The FICNTEST console command can be used, requiring the loopback device provided with the transceiver.

Maintenance Features:

  • Hot-Swappable Components: Power supplies and fans are hot-swappable, allowing for replacement without powering down the unit, enhancing availability.
  • LED Indicators: Comprehensive LED indicators provide visual status updates for various components (tamper, service, health, fans, power supplies, FICON ports), aiding in quick diagnosis of issues.
  • Documentation: User manuals, including the payShield 10K Regulatory User Warnings & Cautions, Installation Quick Start Guide, and Console Guide, are available for download from the Thales CPL support website, providing detailed instructions for installation, configuration, and troubleshooting.
  • Security Key Management: The device uses security keys for locking and operational states, which are typically managed by security officers, ensuring controlled access.
  • Software Updates: Firmware updates and maintenance procedures are typically managed through the payShield Manager or console, as detailed in the user guides.
  • Environmental Monitoring: The device's specifications for operating, storage, and transportation temperatures and humidity, along with airflow considerations, guide proper installation to ensure optimal performance and longevity.

Thales payShield 10K PS10-F Specifications

General IconGeneral
BrandThales
ModelpayShield 10K PS10-F
CategoryNetwork Hardware
LanguageEnglish

Related product manuals