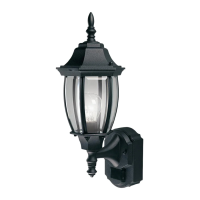
EasyManua.ls Logo

The Hampton Bay Motion Sensing Diecast Lantern HB-4190 Series User Manual

The Hampton Bay Motion Sensing Diecast Lantern HB-4190 Series
20 pages
To Next Page IconTo Next Page
Page #1 background imageLoading...
Page #1 background image
Motion Sensing
Diecast Lantern
HB-4190 Series
Features
Light comes on when motion is detected.
Automatically turns light off.
Dusk Accent lighting.
Photocell keeps the light off during daylight
hours.
Requirements
The light control requires 120 volts AC.
If you want to use Manual Mode, the control
must be wired through a switch.
Some codes require installation by a
qualified electrician.
© 2008 595-5770-05
OPERATION
* resets to Auto Mode at dawn.
Set the ON-TIME switch
on the bottom of the cover
plate to TEST.
TEST 1 5 10 MIN
Set ON-TIME switch to 1,
5 or 10 minutes.
1 Second
OFF then...
Manual mode only works at
night because daylight re-
turns the sensor to AUTO.
Flip the light switch off for
one second then back on to
toggle between AUTO and
MANUAL MODE.
Manual mode works only with
the ON-TIME switch in the 1,
5, or 10 position.
... back on.
Mode Switching Summary
D
ualBrite
®
Dimmer Control
Light comes on half bright for selected time
after dusk (3 hr., 6 hr., until dawn). If motion
is sensed, the light turns on full bright for the
ON-TIME (1, 5, or 10 minutes) then returns
to dim mode.
This package includes:
Lantern
Easy to use universal mounting bracket
(X-Bar)
Mounting hardware
Wire nuts
Light Bulb(s)
ON-TIME Switch at 1,
5, or 10 minutes
Flip light switch
off for one second
then back on*
* If you get confused while switching modes,
turn the power off for one minute, then back
on. After the calibration time the control will
be in the AUTO mode.
MANUAL MODE
AUTO
TEST
Note: When first turned on wait about 1
1
/
2
minutes for the circuitry to calibrate.
TEST
AUTO
MANUAL MODE
TEST 1 5 10 MIN
Mode: On-Time Works: Day Night
Test
5 Seconds x x
Auto
1, 5, or 10 Min x
Manual
To Dawn* x
Accent
3,6 Hr. to Dawn x

Questions and Answers:

The Hampton Bay Motion Sensing Diecast Lantern HB-4190 Series Specifications

General IconGeneral
BrandHampton Bay
ModelHB-4190 Series
TypeMotion Sensing Diecast Lantern
MaterialDiecast
Motion SensorYes
Power SourceHardwired
Light SourceIncandescent
Weather ResistanceWeather Resistant

Summary

Product Features

Installation Requirements

Mode Switching Summary

Operation Modes

Test Mode

Sets the ON-TIME switch to TEST for a 5-second duration to check functionality.

Auto Mode

Sets ON-TIME switch to 1, 5, or 10 minutes; sensor automatically returns to AUTO at dawn.

Manual Mode

Works only at night by toggling the switch off/on; uses the ON-TIME switch setting.

DualBrite® Dimmer Control

Installation

Fixture Mounting

Instructions for mounting the fixture at the recommended height of 1.8 meters above the ground.

X-Bar Installation

Steps for removing and attaching the universal mounting bracket (X-Bar) for fixture installation.

Sensitivity Adjustment

Setting the sensitivity on the fixture back to the mid-position for optimal detection.

Wiring

Single Fixture Wiring

Diagram and explanation for connecting a single motion light fixture.

Multiple Fixture Wiring

Diagram and explanation for connecting two motion light fixtures.

Wire Connections

Instructions for twisting and securing fixture wires with wire connectors for safe operation.

Grounding Procedure

Recommended grounding method using a green pigtail for electrical safety.

Optional Wiring Configurations

Standard Fixture Integration

Wiring the motion sensor's red wire to a standard light's black wire for combined control.

Master-Slave Setup

Wiring to control one motion sensing lantern (Slave) from another (Master) unit.

Load Capacity Guidelines

Calculating total fixture load and ensuring it does not exceed sensor capacity (360W).

Completing Installation

Wire Management

Stuffing wires into the junction box, ensuring none are pinched.

Bulb Installation

Installing the appropriate wattage light bulb (100W max or three 60W candelabra).

Glass Panel Installation (Model 4193)

Installing the six glass pieces by sliding them down onto corner guides and rubber bumpers.

Final Fixture Securing

Sliding the fixture onto mounting screws and tightening nuts.

Weather Sealing

Applying silicone weather sealant to the fixture mounting surface after testing.

Testing Procedures

Initial Power Up

Turning on the circuit breaker and light switch, noting the 1.5-minute warm-up period.

Test Mode Activation

Switching ON-TIME to TEST and DUALBRITE® to OFF for initial testing.

Coverage Area Testing

Walking through the coverage area to note where lights activate.

Sensitivity Adjustment

Temporarily removing the fixture to adjust sensitivity if false triggering occurs.

ON-TIME Setting

Setting the duration the light stays on after motion is detected (1, 5, or 10 minutes).

Accent Level Timing

Setting the time after dusk for accent lighting (3, 6 hrs, or until dawn).

Specifications

Detection Range & Angle

Specifies motion detection range up to 30 ft (9.1 m) and sensing angle up to 180°.

Electrical Load & Capacity

Details electrical load (100W max incandescent) and sensor capacity (360W).

Power & Operating Modes

Lists power requirements (120VAC, 60Hz) and available operating modes.

Timers & Settings

Details Time Delay (1, 5, 10 min) and DUALBRITE® timer settings (Off, 3, 6 hrs, to dawn).

Troubleshooting Guide

Light Will Not Come On

Addresses issues like switch status, bulb, fuse, daylight turn-off, and wiring errors.

Light Stays On Continuously

Covers sensor heat sources, Manual Mode, or DUALBRITE® mode as causes.

Light Comes On In Daylight

Troubleshoots issues related to installation location or Test mode activation.

Light Flashes On and Off

Addresses sensor issues in Test mode or heat reflection from other objects.

Light Comes On For No Apparent Reason

Investigates sensing small animals, traffic, or heat reflection causing false triggers.

Light Does Not Stay On In Manual Mode

Explains issues related to light-colored objects reflecting light or sensor aiming.