3
Achten Sie bei Montage- und Demontage des Uhrenthermostaten darauf, dass
die Anschlussleitung spannungsfreigeschalten ist.
Montage: Nur zur Montage auf nicht leitenden und ebenen Untergrund geeignet.
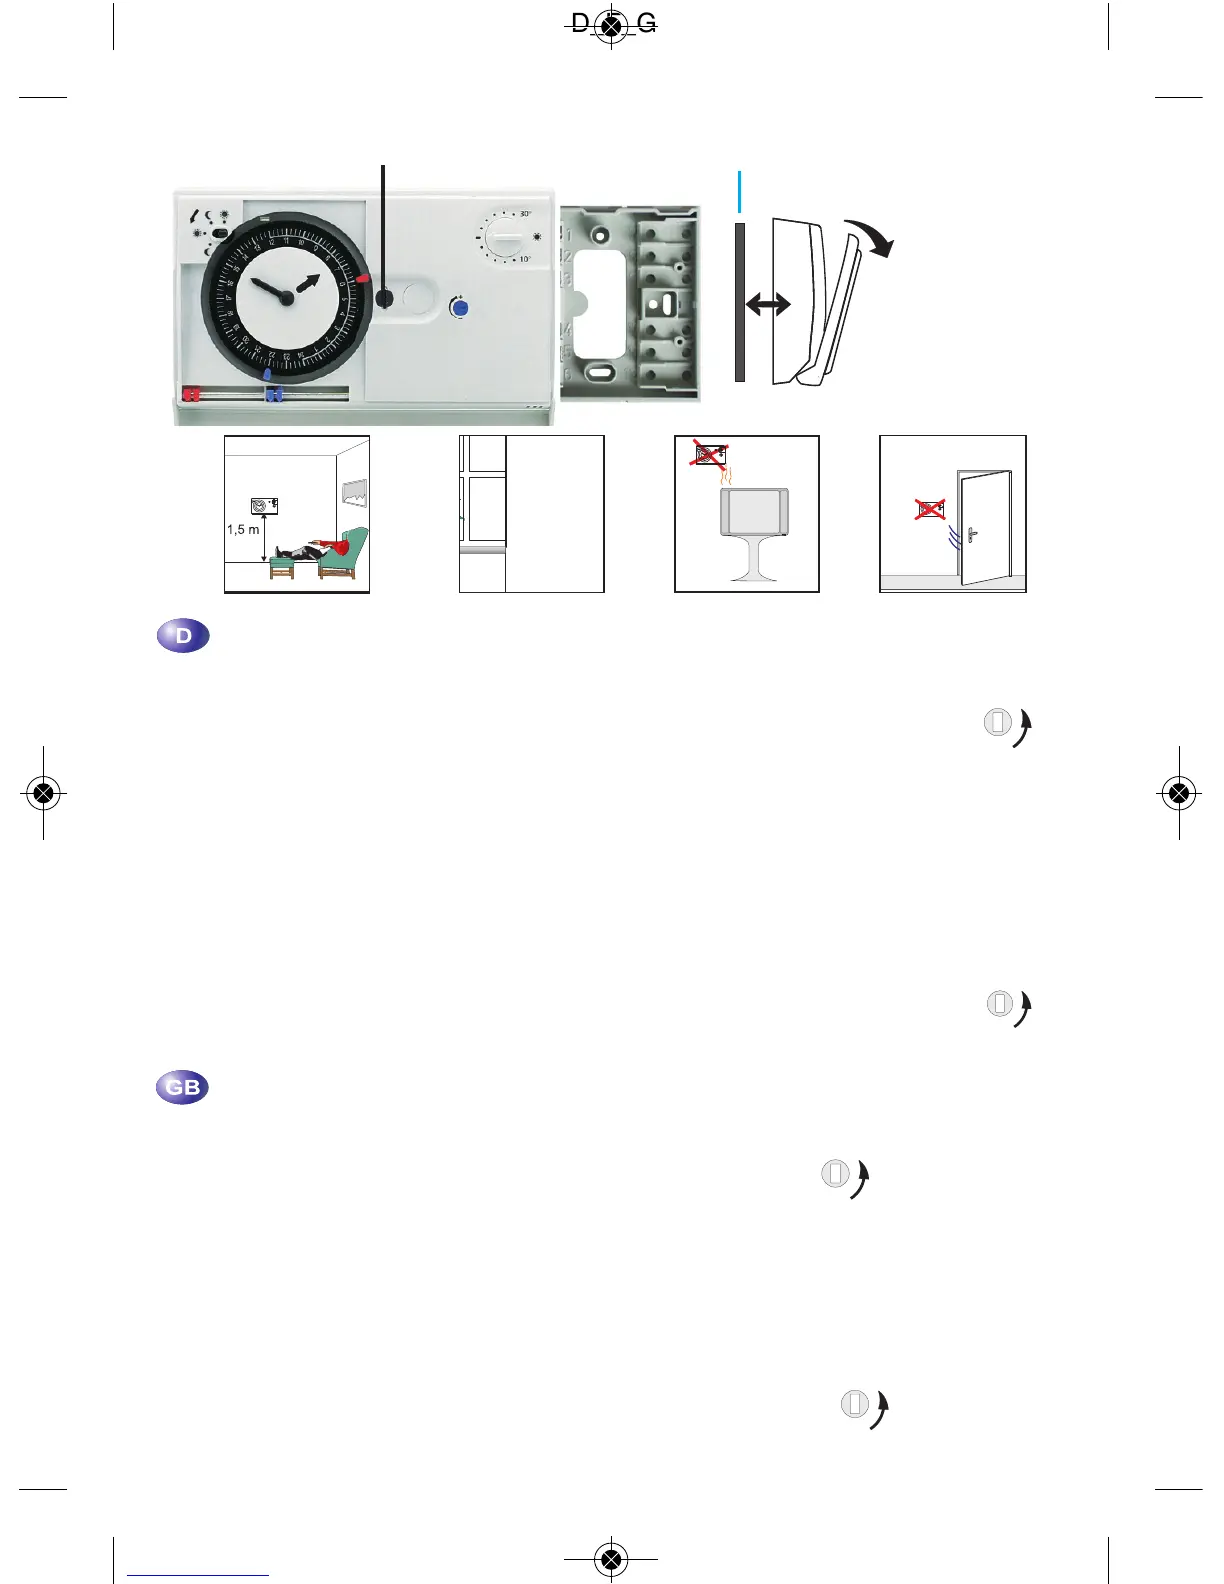
1. Klappen Sie den Frontdeckel nach unten.
2. Drehen Sie mit einem Schraubendreher den Verschluss 3 in Pos.
3. Heben Sie den grauen Sockel vom Reglerteil ab.
4. Ziehen Sie die Anschlussdrähte durch den Sockel
Der Raumtemperaturregler darf nicht auf einen leitenden Untergrund
montiert werden.
5. Befestigen Sie den Sockel an der Wand, ca. 1,5 m über dem
Fußboden, möglichst an einer Innenwand, an der die Luft
ungehindert zirkulieren kann
6. Schließen Sie den Sockel entsprechend dem zutreffenden
Anschlussbild an.
7. Drücken Sie die Anschlussleitungen flach in den Sockel.
8. Setzen Sie den Uhrenthermostaten auf den verdrahteten Sockel.
9. Drehen Sie mit einem Schraubendreher den Verschluss 3 in Pos.
Beachten: Halten Sie die Lüftungsschlitze 5 im Sockel frei; keine Farbe, Tapete o.ä.
5
9
Ensure that when installing and dismantling the clock thermostat that the vol-
tage in the connecting lead is switched off.
Mounting: Do not mount the device on an even conductive base.
1. Lower the front cover
2. With a screwdriver turn the seal 3 to position
3. Lift the grey plinth from the control section
4. Pull the connecting wires through the plinth
Controller of room temperature may not be mounted on conductive
ground.
5. Fix the plinth to the wall approx. 1.5M above the floor, if possible on an
internal wall, against which air can circulate without hindrance
6. Connect the plinth in accordance with the applicable circuit diagram
7. Press the connecting leads flat into the plinth
8. Fit the clock thermostat to the wired plinth
9. Turn the seal 3 into position with a screwdriver
Note: Keep the ventilation apertures 5 in the plinth free,
no paint, wallpaper or other such material.
OK