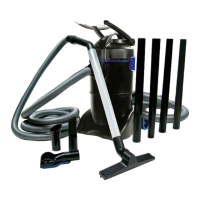
54
USAGE
NOTE: Always use the supplied Filter Foam (4) when collecting wet debris.
1) Plug the ClearVac™ into a GFCI and toggle the Switch to the ON position.
2) Submerge Suction Hose (6) with desired attachment and move in a slow, uniform
fashion to remove sludge. Using the vacuum level adjustment on the handle of the
Suction Hose (6), slowly increase the suction to lift unwanted debris.
3) When one reservoir in the Collection Chamber (1) becomes full, the ClearVac™
will automatically switch reservoirs and drain collected debris through the
Discharge Hose (7).
4) When nished, toggle the Switch to the OFF position and unplug the ClearVac™
from the GFCI.
MAINTENANCE
1) Make sure the ClearVac™ is switched to OFF and unplugged from any power sources.
2) Remove Suction (6) and Discharge (7) Hoses.
3) Unlock the Motor Housing Clamps (5) and remove the Motor Housing. (Figure 1)
4) Thoroughly rinse the Collection Chamber (1).
5) Remove and thoroughly rinse the Foam Filters (4). Inspect for signs of wear or damage
and replace as needed.
6) Make sure the ClearVac™ is empty and clean before storing. Store in a dry, temperature
controlled room.
WARRANTY
The Pond Guy® will repair or replace any ClearVac™ found to be defective within 3 years of
the original purchase date. Filter Foam is considered a wear part and is not covered under
warranty. This limited warranty is extended exclusively to the original purchaser beginning
from the date of original receipt. Abuse or misuse of this product voids all warranty. In case
of warranty claims, the product must be returned to place of purchase accompanied with
the original receipt. The ClearVac™ must be connected directly to a GFCI outlet. If using
an extension cord use only a 10 or 12 gauge outdoor rated extension cord no longer than
50’. The use of an improper extension cord will cause damage to the unit and will void
the warranty.
TROUBLESHOOTING
WarNING: FOR YOUR PROTECTION, ALWAYS UNPLUG THE CLEARVAC™
FROM YOUR POWER SOURCE BEFORE SERVICING. SHOULD THE UNIT
APPEAR TO BE NOT WORKING, DO NOT ATTEMPT TO REACH, REMOVE OR
DISASSEMBLE BEFORE DISCONNECTING IT FROM THE POWER SOURCE.
Problem PoSSIble SolUTIoNS
-Littleornosuctionisproduced
-MakesuretheClearVac™ispositionedatornearwaterlevel
-Remove&inspecttheIntakeDistributer(3),Suction(6)&Discharge
(7)Hosesforobstructions
-ReducenumberofSuctionExtension
T
ubes(11&12)used
-LaySuctionHose(6)asataspossible
-Unitdoesnotreachfullcapacity
-CollectionChamber(1)doesnot
drain
-CleanFoamFilters(4)
-Remove&inspecttheIntakeDistributer(3),Suction(6)&Discharge
(7)Hosesforobstructions
-
LayDischargeHose(7)atorataslightdeclinetoaidindraining
-CheckDrainOpeningforblockages(Figure3)
-Unitdevelopsnoiseorheavy
vibr
ation(Figure4)
-MakesureCollectionChamber(1)isnotfullandthatitisdraining
pr
operly
-CleanFoamFilters(4)
-Remove&inspecttheIntakeDistributer(3),Suction(6)&Discharge(7)
Hoses
forobstructions
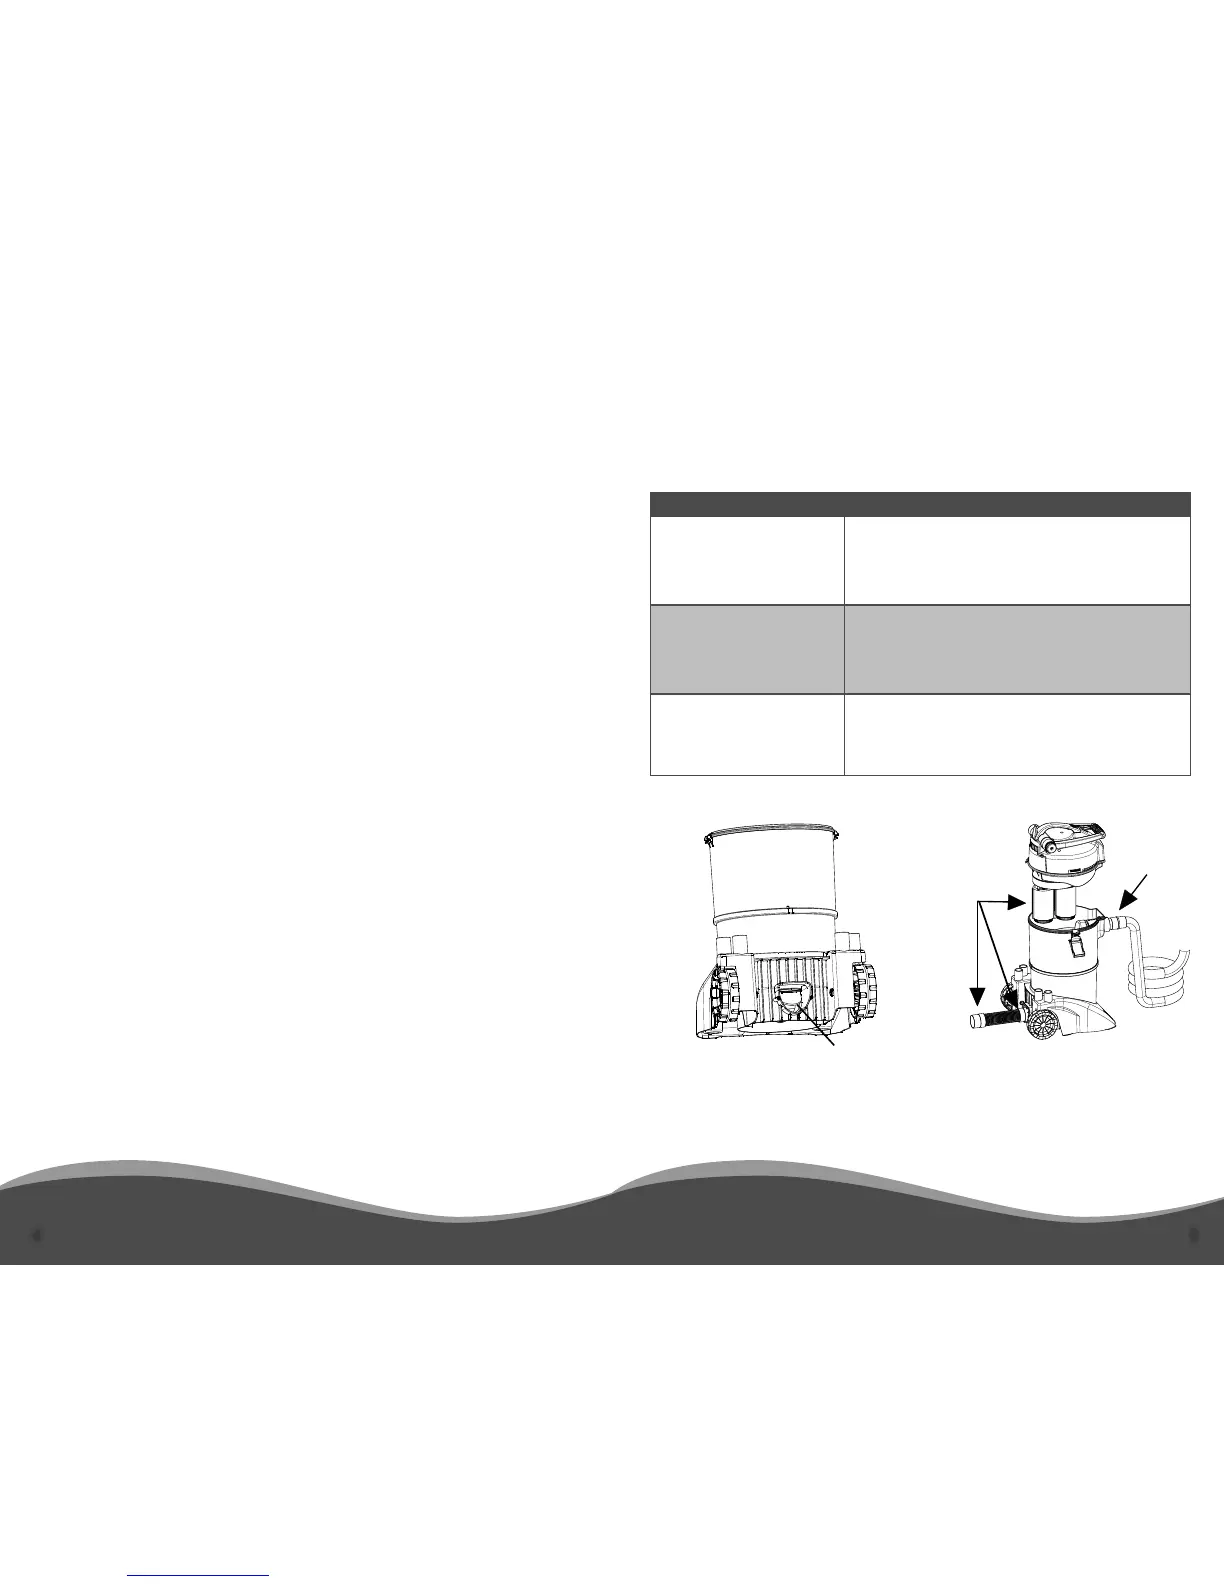
Figure 3
Figure 4
DrainOpening
Clean
Clean
 Loading...