Do you have a question about the ThermoTex Thermo-Ident 1 and is the answer not in the manual?
Overview of the marking machine's purpose and capabilities, including textile marking and label application.
Details the differences between the Thermo-Ident 1 (10mm tape) and Thermo-Ident 2 (15mm tape) models.
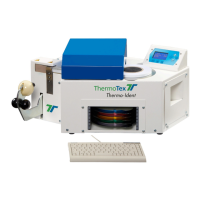
Visual identification of key components and parts of the Thermo-Ident marking machine.
Specifications of the Thermo-Ident marking machine, including electrical, dimensions, and weight.
Statement confirming compliance with relevant EC directives and applied standards.
Explanation of warning symbols used in the manual and on the machine for hazard identification.
Identification of hazardous areas on the machine, such as hot surfaces or crushing risks.
Details on built-in safety features like fuses and thermal protection.
Operator responsibilities for safe machine operation and maintenance.
Essential safety precautions to follow during normal machine use.
Safety guidelines to be followed before and during maintenance or repair activities.
Guidelines for safely moving the machine, including cooling down and cable removal.
Steps and checks for unpacking the machine and verifying all components are present and undamaged.
Recommendations for positioning and setting up the machine on a stable surface.
Procedures for connecting cables, inserting ink ribbon, and initial power-on.
Important information and precautions for handling the sensitive thermal print head.
Details on compatible marking tapes, ink ribbons, and recommended temperature/time settings.
Step-by-step guide for printing and applying labels to textiles using the machine.
Instructions for loading the ink ribbon roll correctly into the print unit.
Steps for installing the marking tape roll holder and feeding the tape.
How to switch between temporary and permanent label application modes.
Explanation of the information shown on the machine's control display, including temperature and time.
Overview of the machine's menu structure and navigation for settings.
Functions of the F1, F2, F3, PLUS, and RESET buttons for direct setting changes.
Description of the different machine operating modes: Keyboard, RS232, and Ethernet.
How to input text for printing using the keyboard or a connected PC.
How to save machine settings and current text data, both automatically and manually.
Configuration options for automatic label numbering (quantity or position).
Setting up continuous label printing, which continues until manually terminated.
Option to automatically clear entered text after each print process.
Instructions on how to print custom logos on labels.
Selecting between plain text, barcode, or combined barcode+text label formats.
Choosing the specific barcode symbology: 2/5 Interleaved or Data Matrix.
Setting text alignment (left, centered, right) on the printed label.
Defining label length as fixed or automatic based on the text content.
Setting the heat-seal temperature for temporary labels.
Setting the heat-seal temperature for permanent labels.
Switching between Keyboard, RS232, and Ethernet operating modes.
Setting the shorter heat-seal time for temporary marking on delicate fabrics.
Adjusting print density by controlling the heating energy output of the print head.
Procedure for transferring custom logos from a PC to the Thermo-Ident.
Procedure for properly applying the self-adhesive Teflon film to the heating element.
Function to remove permanent marking labels by softening the adhesive with heat.
Demonstrations of various label formats, including plain text and barcodes, for Thermo-Ident 1.
Demonstrations of various label formats, including plain text and barcodes, for Thermo-Ident 2.
Configuration settings for controlling the machine via a serial connection.
Configuration settings for controlling the machine via an Ethernet network connection.
Describes the sequence of status requests and responses between PC and Thermo-Ident.
Commands sent from a PC to control machine functions and initiate printing.
Acknowledgements and status codes sent from the Thermo-Ident back to the PC.
Essential safety rules to follow before and during maintenance activities.
Procedure for cleaning the sensitive thermal print head to maintain print quality.
Instructions for cleaning and replacing the Teflon film on the heating element.
Maintenance of the heat-seal rubber for optimal label pressing and longevity.
Information regarding the air filter and its automatic water separator function.
Explanation of the 'Perform maintenance!' message and required actions.