1
3
3
2
2
1
1
1 Aqua-Magic IV
2 Aqua-Magic Galaxy/Starlite
3 Sealand 510, 910, 2000
Front/Devant
Fig. 2
Bolt Pattern
Bravura
Fig. 3
Fig. 1
1: Bravura,
Aqua-Magic V,
Aqua-Magic
STYLE
1, 2, 3: Bravura
(if replacing
Starlite/Galaxy)
Front
Required Tools
• Adjustable wrench
• 1/2” ratchet or box wrench
If carpeted:
• Carpet cutting tool
• Marker or chalk
Plumbing required:
For adequate flush, a 3/8” I. D. water supply line
with good flow is required.
Procedure
1. Remove old toilet and closet flange seal.
2. Attach new closet flange seal to new toilet,
STYLE PLUS
Fig. 4
Permanent RV Toilet Owner’s Manual
Fresh Water Flush
Operation
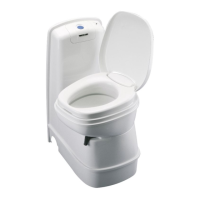
Aqua-Magic V
Hand or pedal flush
Hand operation
Aqua-Magic V
Pedal operation
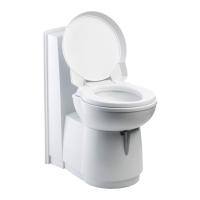
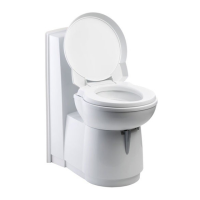
Aqua-Magic STYLE PLUS & STYLE II
China Bowl – Pedal Flush
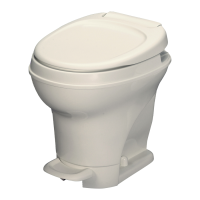
Bravura
Pedal flush
Aqua-Magic STYLE II
Aqua-Magic V,
Bravura, STYLE Plus
To add water,
press halfway
To flush, press
all the way
lip side down (Fig. 1).
3. STYLE Plus and Bravura only: Remove
shroud from base of unit (Figs. 3 & 4).
With mounting bolts in place, position toilet
over closet flange (Fig. 2). If not carpeted,
go to Step 5.
4. If carpeted, trace around toilet, remove
toilet and cut away carpet to expose floor.
Carpet beneath pedal may also need to be
removed.
5. Reset toilet. Using body weight, press toilet
to floor.
6. Tighten nuts until toilet is stable. Do not
overtighten.
7. Connect water line to water valve/elbow
using 1/2” NPT tube fittings.
8. Turn on water and flush. Check for leaks.
9. Bravura only: Install Shroud (Fig. 3). STYLE
PLUS only: Attach shroud to toilet by depress-
ing pedal and placing the pedal opening over
the pedal and pushing it firmly against the
base. Press the sides of the shroud to the toilet
and attach two O-rings on the hooks to secure
it. Make sure to engage dual lock under front
of shroud by tapping shroud above pedal
(Fig. 4).
Removal
Follow the installation directions in reverse
order.
Installation