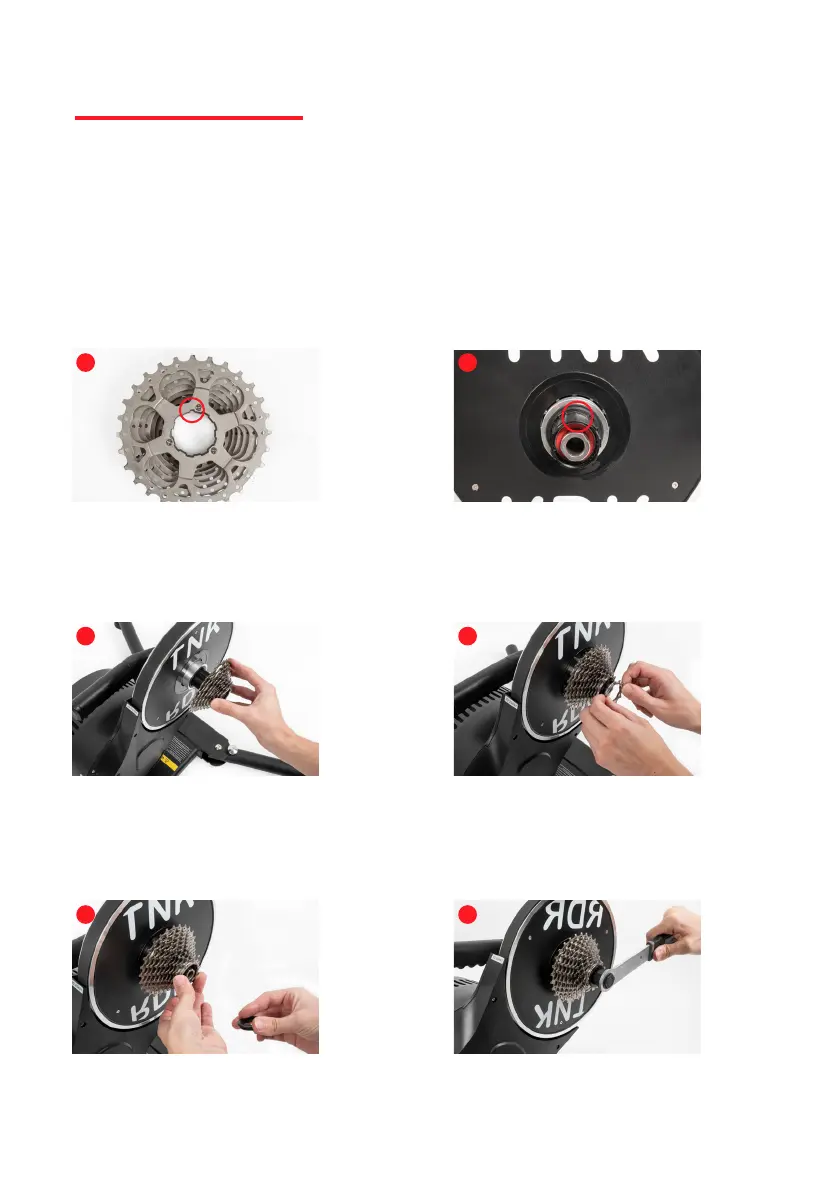
5. Installation
Cassette Installation
1 2
3 4
5 6
Note: The assembly is explained using an 11-speed cassette. In the case of a cassette
with fewer sprockets, the spacer ring supplied (scope of delivery, gure no. 5) must rst be
attached. Then follow these instructions.
The cassette only ts in one position on the
freewheel. Pay attention to the narrow notch.
There is also only a narrow elevation on the
freewheel.
Put the cassette on the freewheel.
Put on the locking ring and screw it hand-tight in
a clockwise direction.
A torque wrench (not included) should be used
for tightening; the cassette is tightened to 35-50
Nm.
Now the individual sprockets, starting with the
larger one, come onto the freewheel.