3/12
PLAYSTATION® 3
INSTALLATION ON PLAYSTATION® 3
1. Connect the USB connector (12) to a USB port on your console.
2. Turn on your console.
3. Switch your gamepad to “PS3” mode = the MODE button should be Off.
(to do so, if necessary, press the button until it switches off).
4. Launch the game.
You are now ready to play!
“PLAYSTATION® 3” MODE
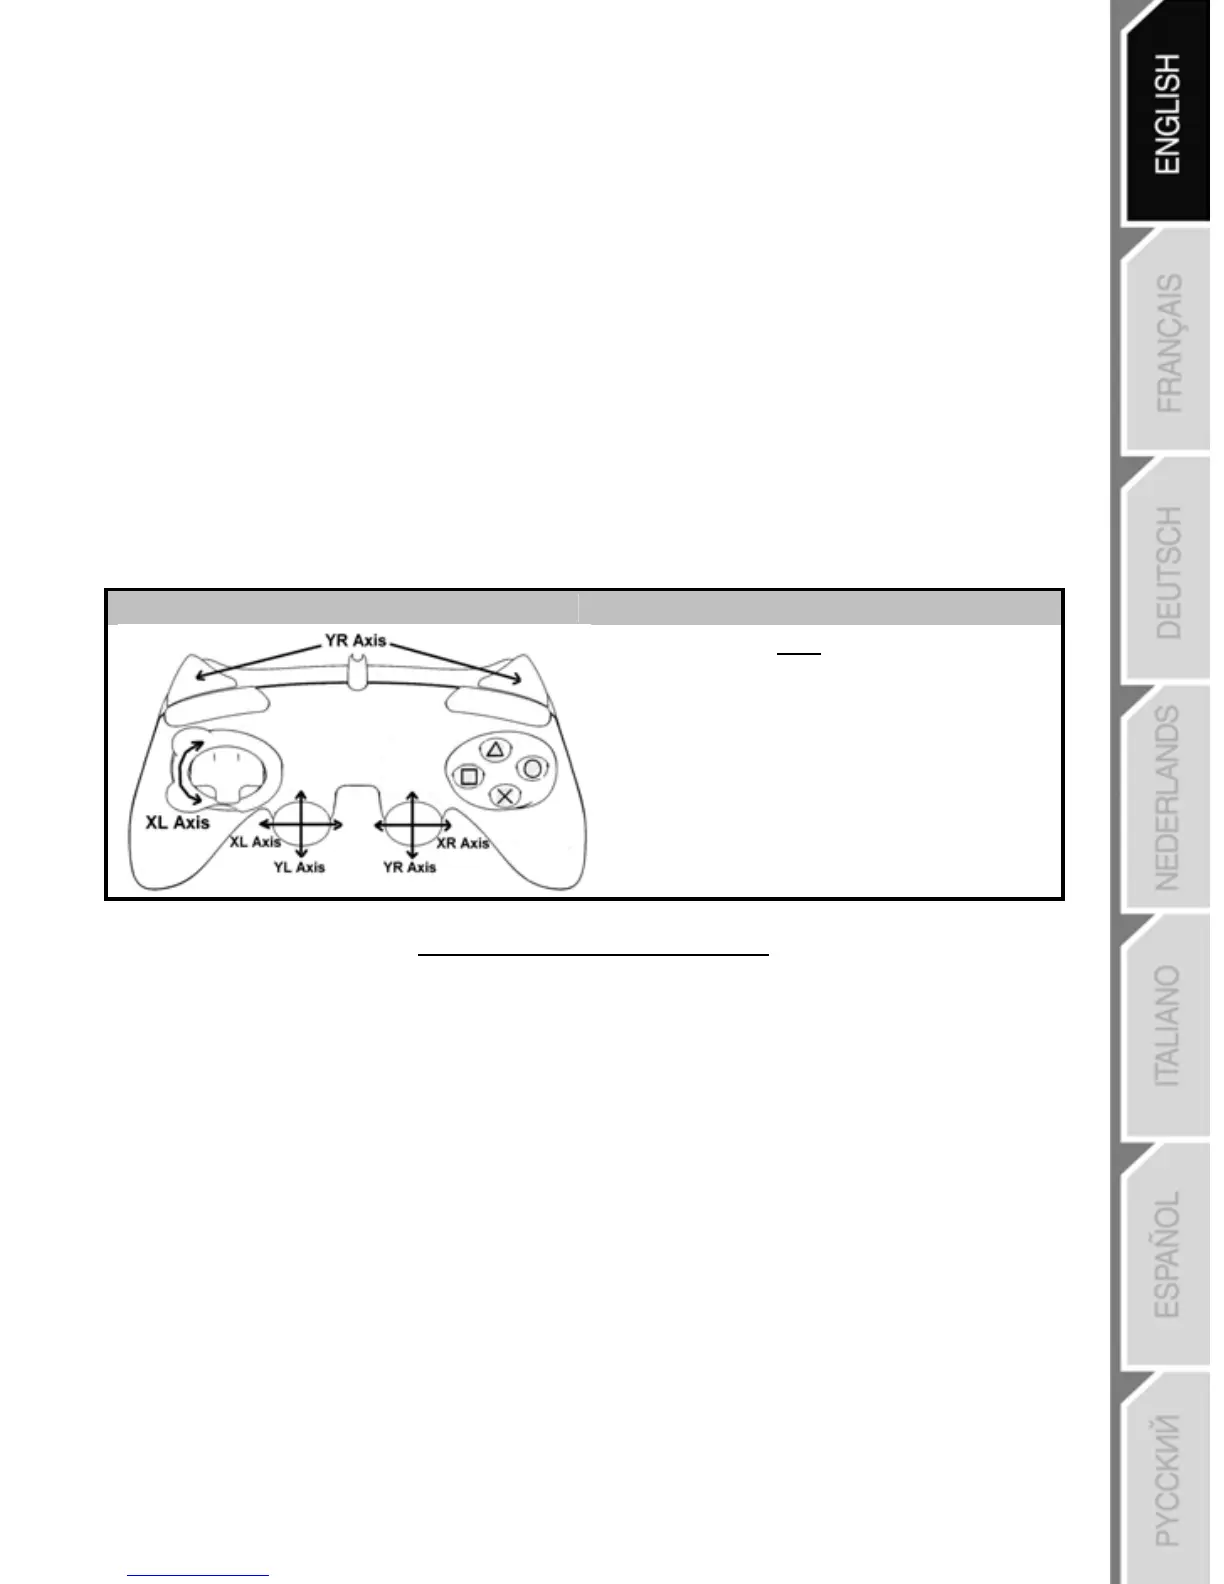
“AUTOMATIC PRESET” CONFIGURATION - PLAYSTATION® 3
“PS3” mode MODE button is OFF
Here:
• “Optical wheel” associated with
“Left/Right” direction on left mini-stick
• “Right” trigger associated with
“Up” direction on right mini-stick
• “Left” trigger associated with
“Down” direction on right mini-stick
Important notes for “PlayStation® 3”:
- On “PlayStation® 3”, the MODE button must absolutely be “OFF” (and not red or green).
To do so, press the button if necessary.
- The “Run’N’ Drive” gamepad does not feature a “motion sensor” or “PS” button,
as does the official gamepad included with your console.
- In “1 Player” mode: if your official gamepad is powered on, you must switch it to
“controller port 2” for your “Run’N’ Drive” gamepad to be functional.
- On “PlayStation® 3”, the “Run’N’ Drive” gamepad is only compatible with “PlayStation® 3” games
(and will not function with “PlayStation® 2” games).
- To exit your “PlayStation® 3” games, use the “PS” button on your official gamepad.







 To Next Page