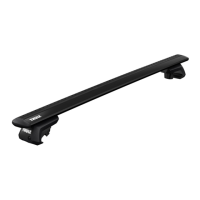
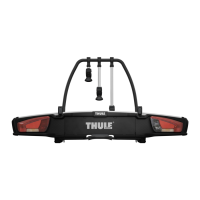
Thule System Kit 247
6,5 Kg
527•ODF2K
/
501-0247
MAX
50 K
g
LOAD
Front
Rear
995 mm / 39
1
/ 4 inch 990 mm / 39 inch
mm/inch
4
3
2
1
160 m
m
440 mm
5
7
B
MITSUBISHI Sigma‚ Diamant, 95–
C
2
1
258
270
270
258
6
Introduction
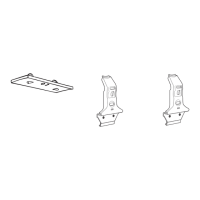
Before the load carrier can be fitted, brackets must first be
mounted. The brackets should always been left on the
vehicle (The load carrier should be removed when not in use).
Read through these instructions carefully before starting the
work of assembly. If you feel in any doubt about how to
proceed, ask your local Thule dealer for advice.
9
8
10
1
15 mm
11
6A
270
x4
258
03
x2 x2
x4
Removing the weatherstrips
1. Remove the weatherstrips as indicated in the
diagrams. Do not loosen the soft sealing strip more
than as indicated in fig. 1.
2. Remove the 6 plugs that fasten the door pillar
weatherstrip and put them to one side, and then
remove the weatherstrip.
3–4. Remove the 18 plugs that hold the two remaining
weatherstrips in position, put them to one side, and
then remove first the outer and then the inner
weatherstrip, taking care not to damage them. Plugs
should be put where they will not be lost.
Fitting the fastening brackets
5. Fit the fastening brackets 160 mm in front of and
440 mm to the rear of the centre line of the door
pillar respectively. There are two marks on the roof
of the vehicle that indicate each of these positions.
6. Clean the edges of the roof before fitting the
brackets. Press the brackets between the marks.
7. Tap them carefully with a rubber headed mallet.
Refitting the weatherstrips
8–10. Fit the three weatherstrips back in position in
reverse order, as shown.
Important ! Use a silicone-base filler or similar when
refitting the inner weatherstrip to make it watertight.
11. If clips (1) are fitted, unfasten the rear one and
move it 15 mm forward.
Finally, fit the soft weatherstrip back in position and
wind the windows up to check that the weatherstrips
are correctly in position.
Fitting the tensioning plates
A–B. The brackets prevent the fastening brackets,
and thus the load carrier, from sliding on the roof
of the vehicle.
Follow the basic instrucions for fitting the load
carrier.
C. First, however, position the tensioning plates on
the roof of the vehicle, and then bend them outwards
slightly while lowering the load carrier into position.