EasyManua.ls Logo

Thule 946(91946) User Manual

Thule 946(91946)
4 pages
To Next Page IconTo Next Page
Page #1 background imageLoading...
Page #1 background image
Upright Assembly/Assemblage vertical
Bike Arm Assembly/Support de vélos
M8 Washer/Rondelle
M8 Lock Nut/Écrou auto-freiné
M12x40 Receiver Bolt/
Écrou auto-freiné de 19 mm (3/4 po)
M8x70 Attachment Bolt/
Boulon de fixation M8 x 70
M12 Washer/
Rondelle de 19 mm (3/4 po)
M12 Lock Washer/
Rondelle de blocage de 19 mm (3/4 po)
Cradle/Étrier
Nut Cover/Couvre-écrou
A
B
C
D
E
F
G
H
I
J
1
1
4
4
1
4
1
1
4
4
part
pièce
753-2796
753-2744
951-0816-11
938-0800-11
908-1240-11
915-0870-13
951-1224-11
956-1221-11
753-2757
853-1010
description
description
part number
numéro de pièce
qty.
qté
946
(91946)
/947
(91947)
HITCHING (TWO BIKE)
PARTS INCLUDED
PIÈCES COMPRISES
A
B
C
E
F
G
H
®
1
Socket wrench with 13 mm (
1
/
2
”) and 19mm (
3
/
4
”) sockets or
13 mm (
1
/
2
”) and 19mm (
3
/
4
”) wrench
Clé à douilles de 13 mm (
1
/
2
po) et de 19 mm (
3
/
4
po) ou
Clé 13 mm (
1
/
2
po) et de 19 mm (
3
/
4
po)
No more than two bicycles should be carried on the Hitching Post.
Check tightness of all bolts and knobs periodically.
Not intended for off-road use.
Check straps for wear and replace if worn.
Not intended for tandems & recumbents.
Your vehicle must be equipped with a 2
or 1
1
/
4
receiver hitch.
Do not install on a trailer or other towed vehicle.
Ne transportez pas plus de deux bicyclettes à la fois au moyen du
poteau d’attache.
Vérifiez régulièrement le serrage de tous les boulons et écrous.
Le poteau d’attache n’est pas fait pour une utilisation tout-terrain.
Vérifiez si les sangles portent des marques d’usure et remplacez-les au
besoin.
Le poteau d’attache n’est pas destiné au transport de tandems ni de
vélos à position allongée.
Votre véhicule doit être muni d’un attelage de remorque à logement de
5cm (2 po) ou de 3,2 cm (1
1
/
4
po).
N'installez pas ce dispositif sur une caravane ou tout autre véhicule tracté.
TOOLS REQUIRED
Outils Requis
WARNINGS / LIMITATIONS
Avertissements / Restrictions
I
J
D
Question and Answer IconNeed help?

Do you have a question about the Thule 946(91946) and is the answer not in the manual?

Thule 946(91946) Specifications

General IconGeneral
BrandThule
Model946(91946)
CategoryAutomobile Accessories
LanguageEnglish

Summary

Parts Included

Upright Assembly

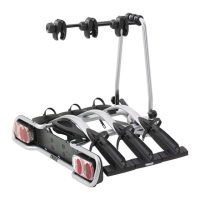
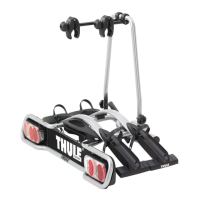
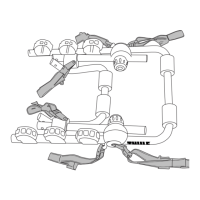
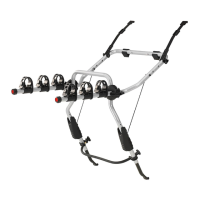
Vertical assembly for the bike rack.

Bike Arm Assembly

Bike support arm for the rack.

M8 Washer

Washer for M8 bolts.

M8 Lock Nut

Self-locking nut for M8 bolts.

M12x40 Receiver Bolt

Bolt for securing the rack to the receiver hitch.

M8x70 Attachment Bolt

Bolt for attaching components.

M12 Washer

Washer for M12 bolts.

M12 Lock Washer

Lock washer for M12 bolts.

Cradle

Component to hold the bicycle frame.

Nut Cover

Cover for nuts.

Tools Required

Socket Wrench

Socket wrench with 13 mm and 19mm sockets or wrenches.

Warnings and Limitations

Bicycle Capacity

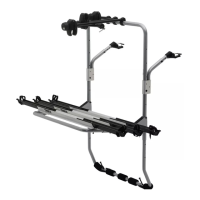
Maximum of two bicycles allowed on the rack.

Maintenance Checks

Periodically check bolt and knob tightness.

Usage Restrictions

Not for off-road use or tandem/recumbent bikes.

Vehicle Compatibility

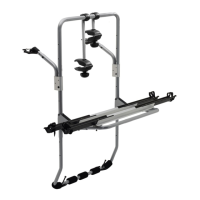
Requires a 2" or 1 1/4" receiver hitch.

Installation Location

Do not install on trailers or other towed vehicles.

Installation Instructions

Step 1: Mount Hitching Post

Slide post into receiver, align holes, secure with M12 bolt, washers.

Step 2: Attach Bike Arm Assembly

Lower arm assembly, attach bolts, washers, nuts, and caps.

Step 3: Load Heaviest Bike

Load the heaviest bike first onto the innermost cradles.

Step 4: Adjust Cradles

Rotate or shift cradles for different bike geometries.

Step 5: Secure Straps

Ensure straps are tightened securely around the bike.

Step 6: Lower Carrier

Remove bikes, hold assembly, release safety hook, slide pin out.

Step 7: Built-in Stop Position

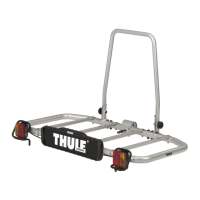
Gently lower carrier to the built-in stop position.

Step 8: Hitch Lock

Use Snug Tite lock (sold separately) to lock carrier to hitch.

Step 9: Bike Lock

Lock bikes to carrier using built-in locking eye with cable lock.

Thule Rack Guidelines

General Precautions

User must understand precautions for safe rack system use.

Warranty Information

Thule limits warranty to repair/replacement of defective products.

Pre-Trip Checks

Ensure all parts are attached, tightened, and locked before each trip.

Usage and Maintenance

Remove rack when not in use, obey speed limits, adapt speed to conditions.

Product Limitations

Do not use for unintended purposes or exceed carrying capacity.

Related product manuals