QUICK START GUIDE for:
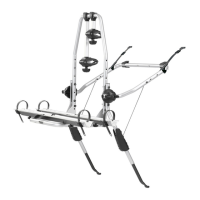
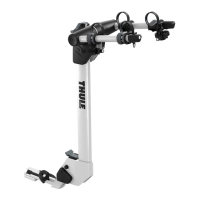
HELIUM AERO™ (2 BIKE CARRIER) 9042, (3 BIKE CARRIER) 9043
GUIDE DE DÉMARRAGE RAPIDE POUR :
HELIUM AEROMC (PORTE-VÉLOS POUR 2 VÉLOS) 9042,
(PORTE-VÉLOS POUR 3 VÉLOS) 9043
GUÍA RÁPIDA DE INICIO para: HELIUM AERO™
(SOPORTE PARA 2 BICICLETAS) 9042,
(SOPORTE PARA 3 BICICLETAS) 9043
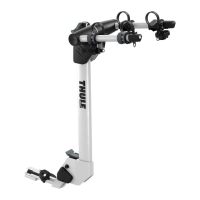
DO
À FAIRE
HAGA LO
SIGUIENTE
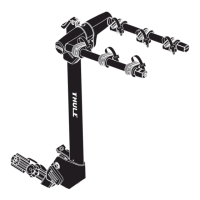
DO NOT
À NE PAS
FAIRE
NO
HAGA LO
SIGUIENTE
• Loosen locking knob
completely before inserting
stinger into hitch receiver.
• Make sure Auto Pin engages
into receiver hole (STEP 3).
Use knob to tighten. Lock.
• Load heaviest bike first–front
to the right (STEP 8).
• Alternate bike direction.
• Secure bicycle to rack with
rubber straps and safety
strap through the frames and
around the mast of the rack
(STEPS 8-12).
• Check tightness of all bolts
and knobs periodically (every
6 months).
• Check rubber straps for wear
and replace if worn.
• Déserrez complètement
le bouton de verrouillage
avant d’insérer le guide dans
l’attelage.
• Assurez-vous que la goupille
Auto s’engage dans le trou de
l’attelage (ÉTAPE 3). Utilisez le
bouton pour serrer. Verrouillez.
• Chargez le vélo le plus lourd en
premie—avant du vélo vers la
droite (ÉTAPE 8).
• Alternez la direction des vélos.
• Fixez les vélos sur le porte-
vélos avec les sangles en
caoutchouc et la sangle de
sécurité en les faisant passer
dans les cadres et en les
enroulant autour du mât du
porte-vélos (ÉTAPES 8 à 12).
• Vérifiez périodiquement (tous
les 6 mois) si les boulons et les
boutons sont bien serrés.
• Assurez-vous que les sangles
en caoutchouc ne sont pas
usées et remplacez-les au
besoin.
• Afloje la perilla de cierre por
completo antes de insertar
la espiga en el enganche
hembra de remolque.
• Asegúrese de que el Pasador
automático se enganche en el
orificio de alojamiento (PASO
3). Utilice la perilla para
ajustar. Trabe.
• Cargue la bicicleta más
pesada primero—a la derecha
y al frente. (PASO 8).
• Alterne el sentido de las
bicicletas.
• Fije las bicicletas al
portabicicletas con las correas
de goma y con la correa de
seguridad pasándolas a través
de los cuadros y alrededor
del mástil del portabicicletas
(PASOS 8 A 12).
• Controle periódicamente el
ajuste de todos los pernos y
perillas (cada 6 meses).
• Controle el buen estado de
las correas y reemplácelas si
están gastadas.
• Install on a trailer or other
towed vehicle.
• Put more than 2 bikes on a
class 1 hitch.
• Do not “overstretch” the
straps.
• Use the rack while traveling
on dirt roads.
• Use the rack to carry tandems
or recumbents.
• Put more than the intended
number of bikes on the rack.
• Installer le porte-vélos sur une
remorque ou sur un véhicule
remorqué.
• Transporter plus de 2 vélos
sur une attache-remorque de
classe 1.
• Ne pas « surtendre » les
sangles.
• Utiliser le porte-vélos lors de
déplacement sur des routes
poussiéreuses.
• Utilisez le porte-vélos pour
transporter des vélos tandems
ou à position allongée.
• Transporter plus de vélos que
le nombre prévu à cet eet sur
le porte-vélos.
• Instalar en trailers o en otros
vehículos remolcados.
• Colocar más de 2 bicicletas en
un enganche clase 1.
• No estirar excesivamente las
correas.
• Utilizar el portaequipajes
mientras se viaja por caminos
de tierra.
• Utilice el portaequipajes para
transportar bicicletas en
tándem o reclinadas.
• Colocar más bicicletas que
la cantidad indicada para el
portaequipajes.
5015950_01