@lP,"..-
BALANGE
31. Position the canopy in
place.
You may
use tape
the canopy in
place.
Or
you
may drill three 1/16"
(
holes then secure the canopy with furnished
wooo screws.
IMPORTANT-Do not fly
your
model
before completing
this
very important
section. A model that is not
properly
balanced will
be
unstable could cause
serious damage and/or injury.
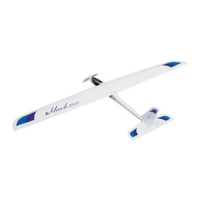
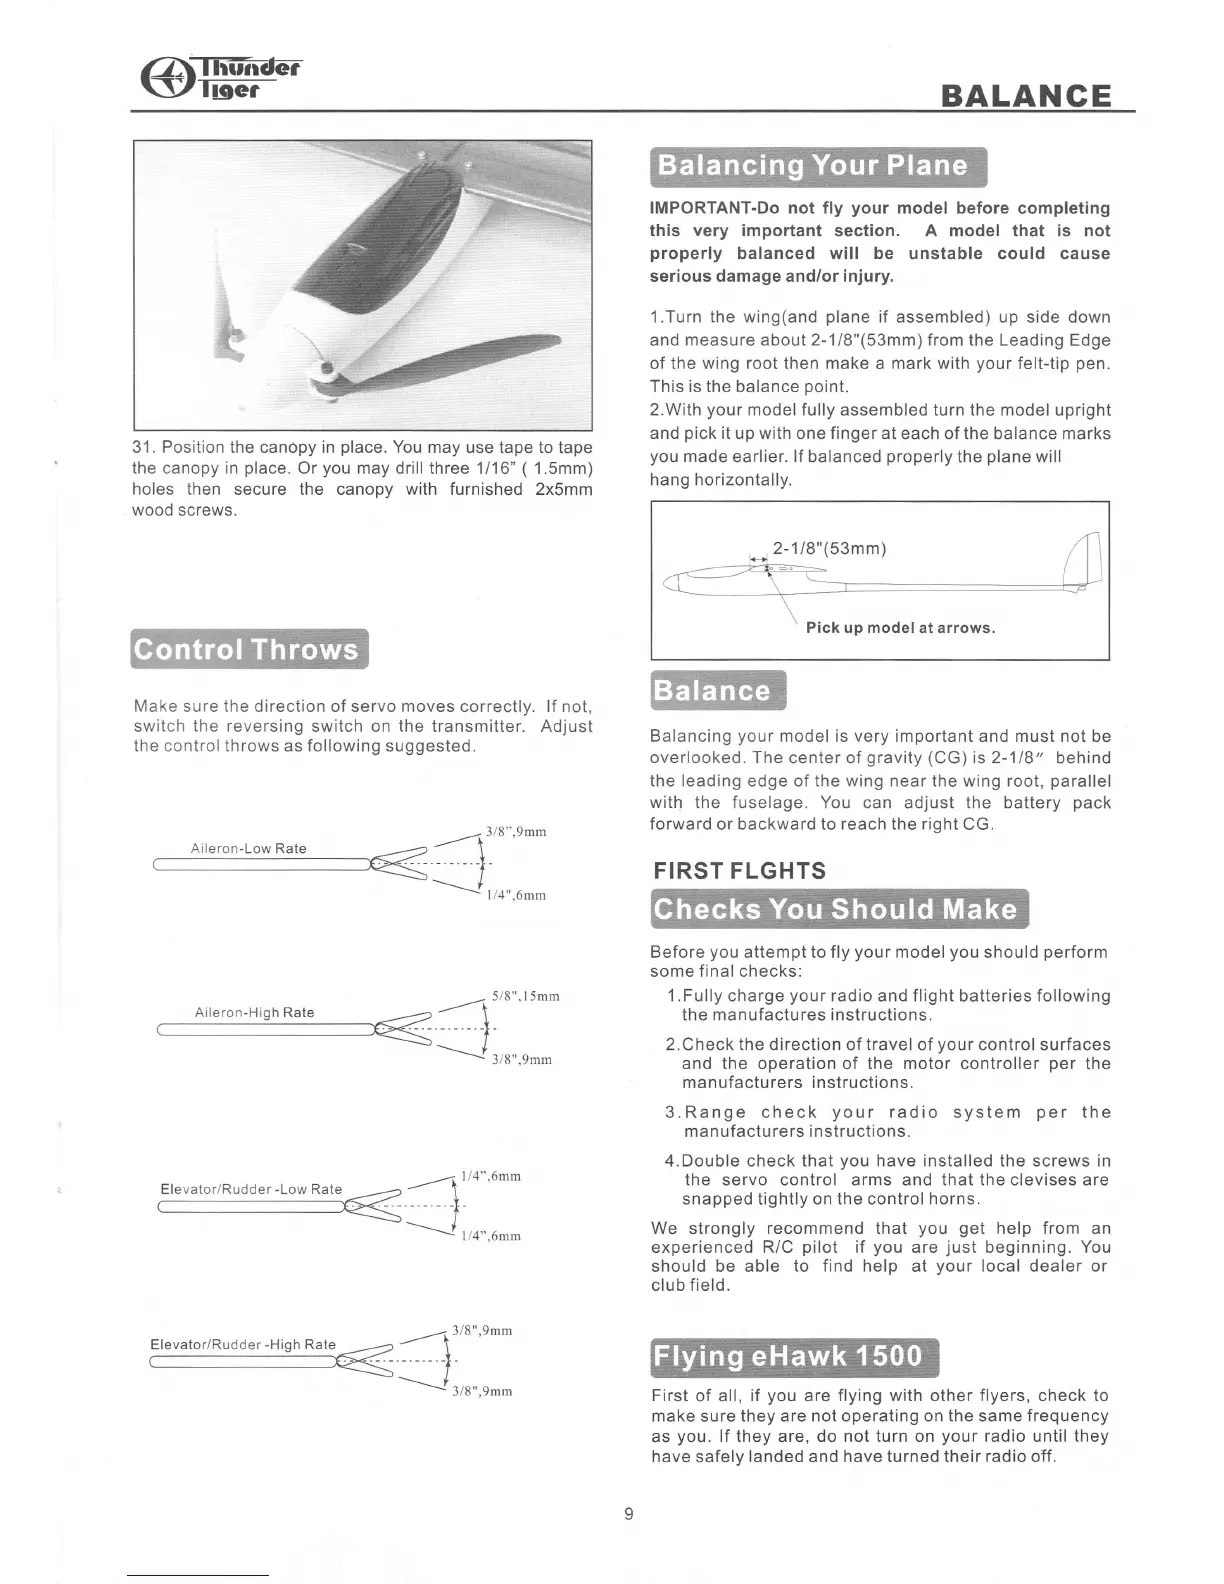
1.Turn the wing(and
plane
if assembled) up
side down
and measure about 2-1l8"(53mm)from
the
Leading
Edge
of the wing root then make a mark with
your
felt-tip
pen.
This is the
balance
point.
2.With
your
model
fully assembled turn the model upright
and
pick
it
up
with
one
finger
at each of the balance marks
you
made
earlier. lf balanced
properly
the
plane
will
hang horizontally.
2-118"(53mm)
Pick
up
model
at arrows.
Balancing
your
model is very important and must not
be
overlooked. The
center of
gravity
(CG)
is
2-118"
behind
the leading edge of the wing near
the wing
root,
parallel
with
the fuselage. You can adjust the battery
pack
forward
or backward to
reach the riqht
CG.
FIRST FLGHTS
to tape
1.5mm)
2x5mm
Make sure the direction of servo moves
correctly.
lf
not,
switch
the
reversing switch on the transmitter. Adjust
the
control
throws as
following
suggested.
__---r3t8"'vnn
{,^".u,n-
5/8".l5mm
Before
you
attempt to
some final checks:
1 . Fully charge
your
the manufactures
fly
your
model
you
should
perform
radio and flight
batteries
following
instructions.
114",6nm
l/4",6mm
2.Check the direction of travel of
your
control surfaces
and the ooeration
of
the motor
controller oer the
manufacturers instructions.
3.Range check
your
radio
system
per
the
manufactu rers i nstructions.
4.Double
check
that
you
have installed the screws in
the servo control arms and that the clevises are
snapped tightly on the control horns.
We
strongly
recommend that
you get
help from an
experienced R/C
pilot
if
you
are
just
beginning. You
should be able to
find
help at
your
local
dealer or
club field.
First
of all,
if
you
are flying with other flyers, check to
make
sure
they are not operating on the same frequency
as
you.
lf they
are,
do
not turn on
your
radio until they
have
safely
landed and have turned their radio off.
3/8",9mm
3/8",9mm
Aileron-Low
Rate
Aileron-High Rate
Elevator/Rudder
-Low
Elevator/Rudder
-High
Rate