3
TX, 100, 200 SERIES INSTALLATION
CANOPY ASSEMBLY
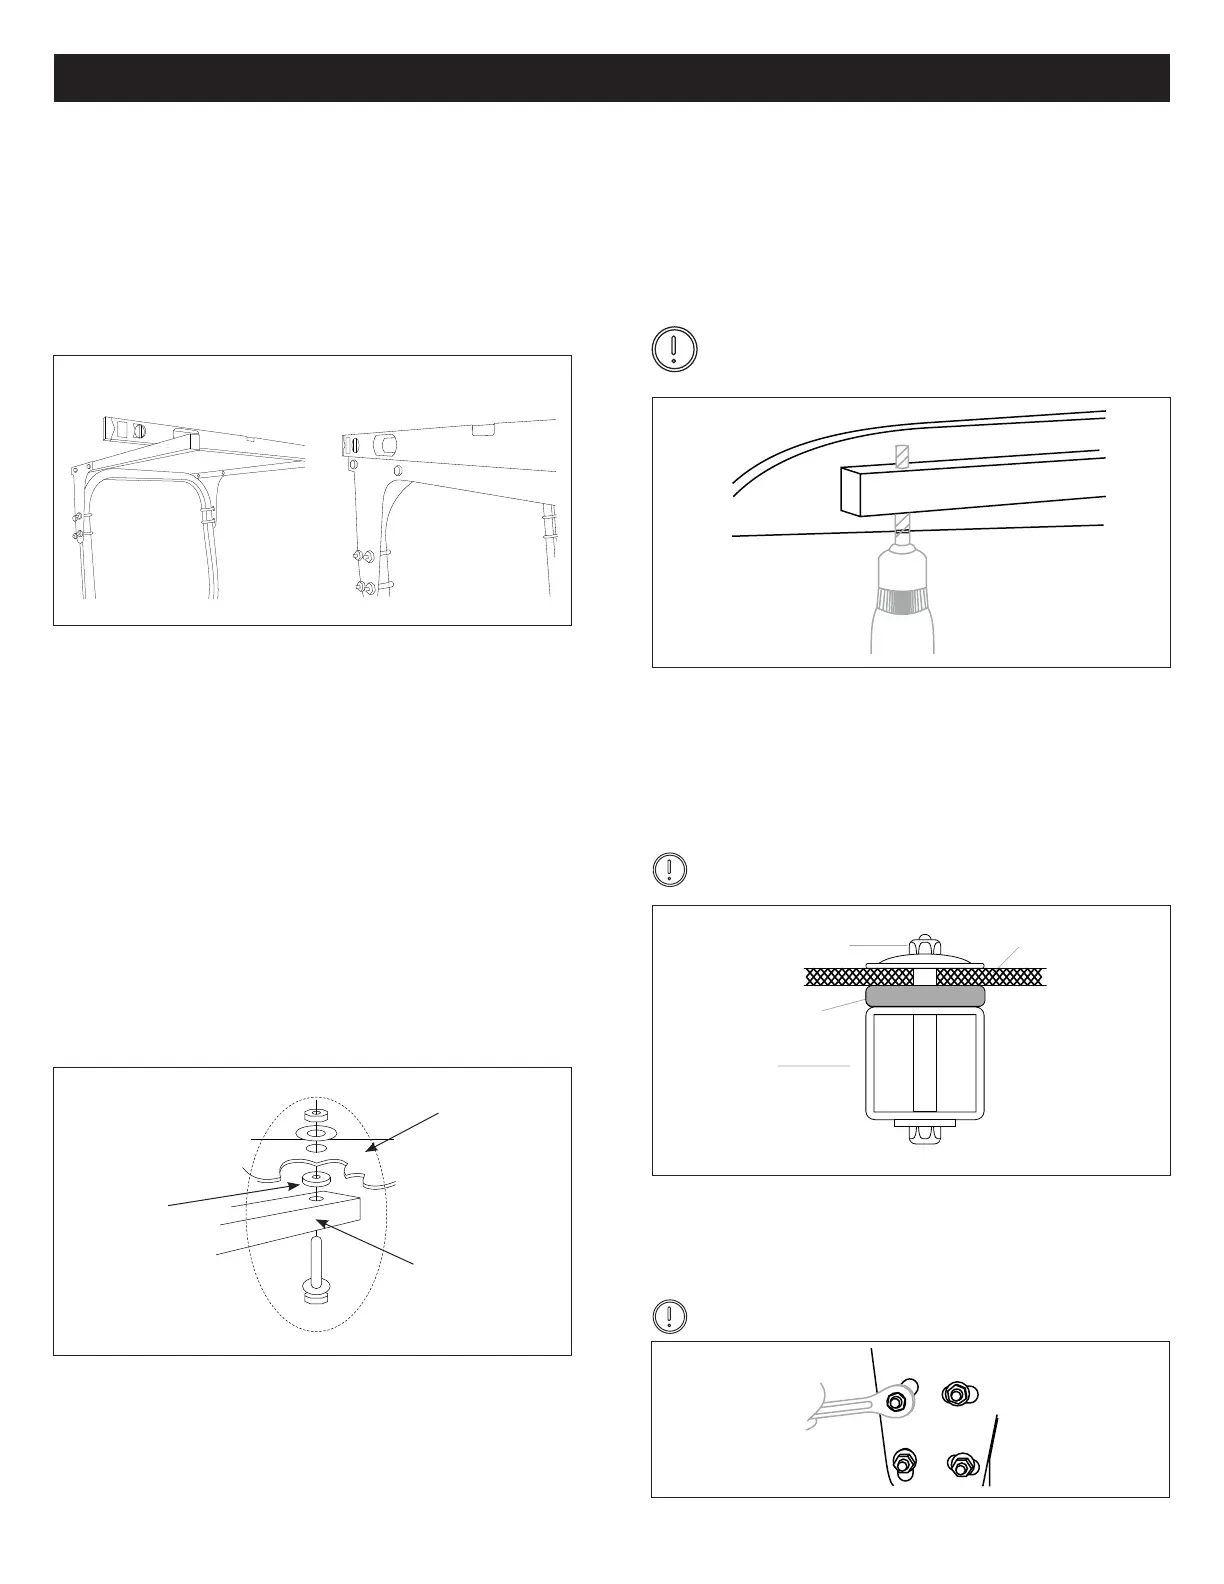
Level the Brackets1.
The bracket assembly should be mounted level.
(See Figure 1)
Figure 1
Once level - Securely tighten the (8) eight ½” ange nut (B).
• Even with the top of the roll bar
• Side to side in front and rear
• Parallel to tractor frame
Figure 3
Place sunshade onto mounting brackets. Proper
placement should be:
• Fore-Aft positioning: The inside rear of the canopy
should sit within 2-3” of the end of the mounting
tubes.
• Left-Right: The canopy rest on the at mounting
pads integrated into the canopy design, and be equal
distance from the mounting tube.
Center the Canopy2.
Place rubber isolation pads on top of canopy support
tube, in alignment with mounting holes in tubes. (See
Figure 2)
Figure 2
Figure 5
Fiberglass
Canopy
Rubber
Isolation Pad
Steel Tube
Add Isolation Pads
Drill and Mount
3.
4.
Tighten Brackets6.
• Starting in either rear corner using the 3/8” hole in the
mounting bracket as a guide, drill from the bottom of
the canopy upward.
• Insert and assembly canopy mounting hardware
• Repeat for remaining three corners.
Before drilling and carefully centering canopy,
visually inspect all four mounting points to assure
proper location on mounting pads. (See Figure 3)
Figure 4
Tighten Mounting Hardware5.
NYLOCK NUT
RUBBER
ISOLATOR
PAD
SIDE RAIL
CANOPY
Tighten the canopy mounting hardware
DO NOT OVER-TIGHTEN!
The mounts are designed to allow the canopy to “oat” in
rubber. Tighten to a slight “bulge” in the 1/2” rubber isola-
tor pad (G). (See Figure 4)
Tighten the mounting bracket assembly and you’re done!
(See Figure 5)
DO NOT OVER-TIGHTEN!
 Loading...