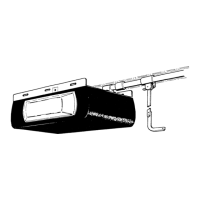
Do you have a question about the Tilt-A-Matic TRV-300 and is the answer not in the manual?
| Type | Residential Garage Door Opener |
|---|---|
| Horsepower | 1/2 HP |
| Battery Backup | No |
| Drive Type | Chain Drive |
| Voltage | 120V |
| Remote Controls | 2 |
| Security | Rolling Code |
| Warranty | 1 Year |
Do not attempt to install or service the opener with the power connected.
Do not put hands or tools inside the power head with the power on. All adjustment and installation connections are made externally.
Stay clear of the opener when it is in motion. Never operate the opener from a step ladder.
An automatic garage door opener cannot move a garage door that is in poor working condition. The door must operate freely with no binding or obstructions, and must be well balanced.
Check the spring balance of the door by bringing the door to the half open position and leaving it there.
Where possible, it is recommended that the door springs be adjusted, and the opener be installed by a qualified B & D dealer.
The opener is 240 volt and must be installed in accordance with AS-3000 Standard Electrical Code.
During installation the opener must be properly grounded with the power turned off.
Use screwdrivers ONLY, to adjust limit switches. DO NOT USE a spanner or pliers.
Power should be 'OFF' while main cover is removed or replaced.
The push button switch as supplied is for internal use only. If situated outside or near the door opening, this switch should be replaced by a weather resistant type...
The door should be properly installed and adjusted, well maintained and free of all obstructions.
Install push button in a convenient position, but at least one metre from any door fittings, and out of the reach of children.
Operate only when the door is fully visible. Do not allow children to play with the door controls.
Remove the sprocket cover (Fig.1) and position the trolley on the drive tube as illustrated (Fig.2).
Roll out the chain assembly carefully to prevent tangling. Connect the trolley release rod to the connecting link through the drive trolley...
Tension the chain by turning the adjusting nut. Hold the trolley release rod and the connecting link to prevent from turning. (Fig.4)
Most of the force applied by the opener while lifting and lowering the door is concentrated at the header bracket. It must be fixed to a beam or rigid support member.
Lift the door and find the highest point of travel of the top of the door. Using a level, transfer this height to the head above the door.
Place the bottom of the wall bracket at the height indicated in Step 5, and drill two 6mm pilot holes for the coach screws. (Fig.6)
Raise the powerhead and support on a step ladder. Raise the door to the open position. Line the drive tube with the point market at the top of the door.
Before starting, determine which type of garage door you have. Each of the diagrams describe an ideal situation, and are drawn to scale.
SPECIAL NOTE: Installation to Jamb-Type fittings: Use straight connector arm. Do not use curved door arm. (Also applicable for installation to track-type fittings.)
IMPORTANT (iv) Locate the push button at least ONE METRE from the door fittings.
NOTE: Tilt-A-Dor and Panelift doors over 2200mm in height will require an extension kit and a longer tube.
To adjust the door travel limits raise the door manually until the trolley passes over the trolley release rod and engages.
The limit adjustments on the chassis screws adjust where the door stops after traveling eithen up or down.
Should the door contact an obstruction on the UPWARD travel, it will stop, and within 30 seconds, the safety reverse system will stop the motor.
As an additional safety precaution, a FAILSAFE CIRCUIT has been incorporated into the main circuit. If for any reason the reverse system fails...
Check for defective capacitor or manual door operation issues.
Motor may have overheated; wait for thermal protector to reset.
Check line voltage, defective board, open circuit, or defective capacitor.
Check for burnt-out bulb or defective printed circuit board.
Check safety setting, door spring adjustment, or obstructions.
Check door spring adjustment or binding in track.
Troubleshoot defective transmitter battery, antenna, or signal range.
Automatic door reversal via FAILSAFE CIRCUIT if safety reverse system fails.
Courtesy lights activate during operation and remain lit for approximately 4½ minutes.
Includes Domino lock, Key switch, Two position hand transmitter, Emergency key release.
Kit includes tube, chain, and master link for lifting doors up to 2500mm in height.