• Rugged, blue baked enamel finish in a durable die-cast aluminum enclosure finished with
attractive silk-screened art and complete labeling.
• 9v battery operation or optional DC adapter; Unit will also function with most onboard pedalboard
power supplies that use a positive sleeve (9-9.6 v 200mA) connection.
• Limited Lifetime warranty (see Warranty section below for complete details)
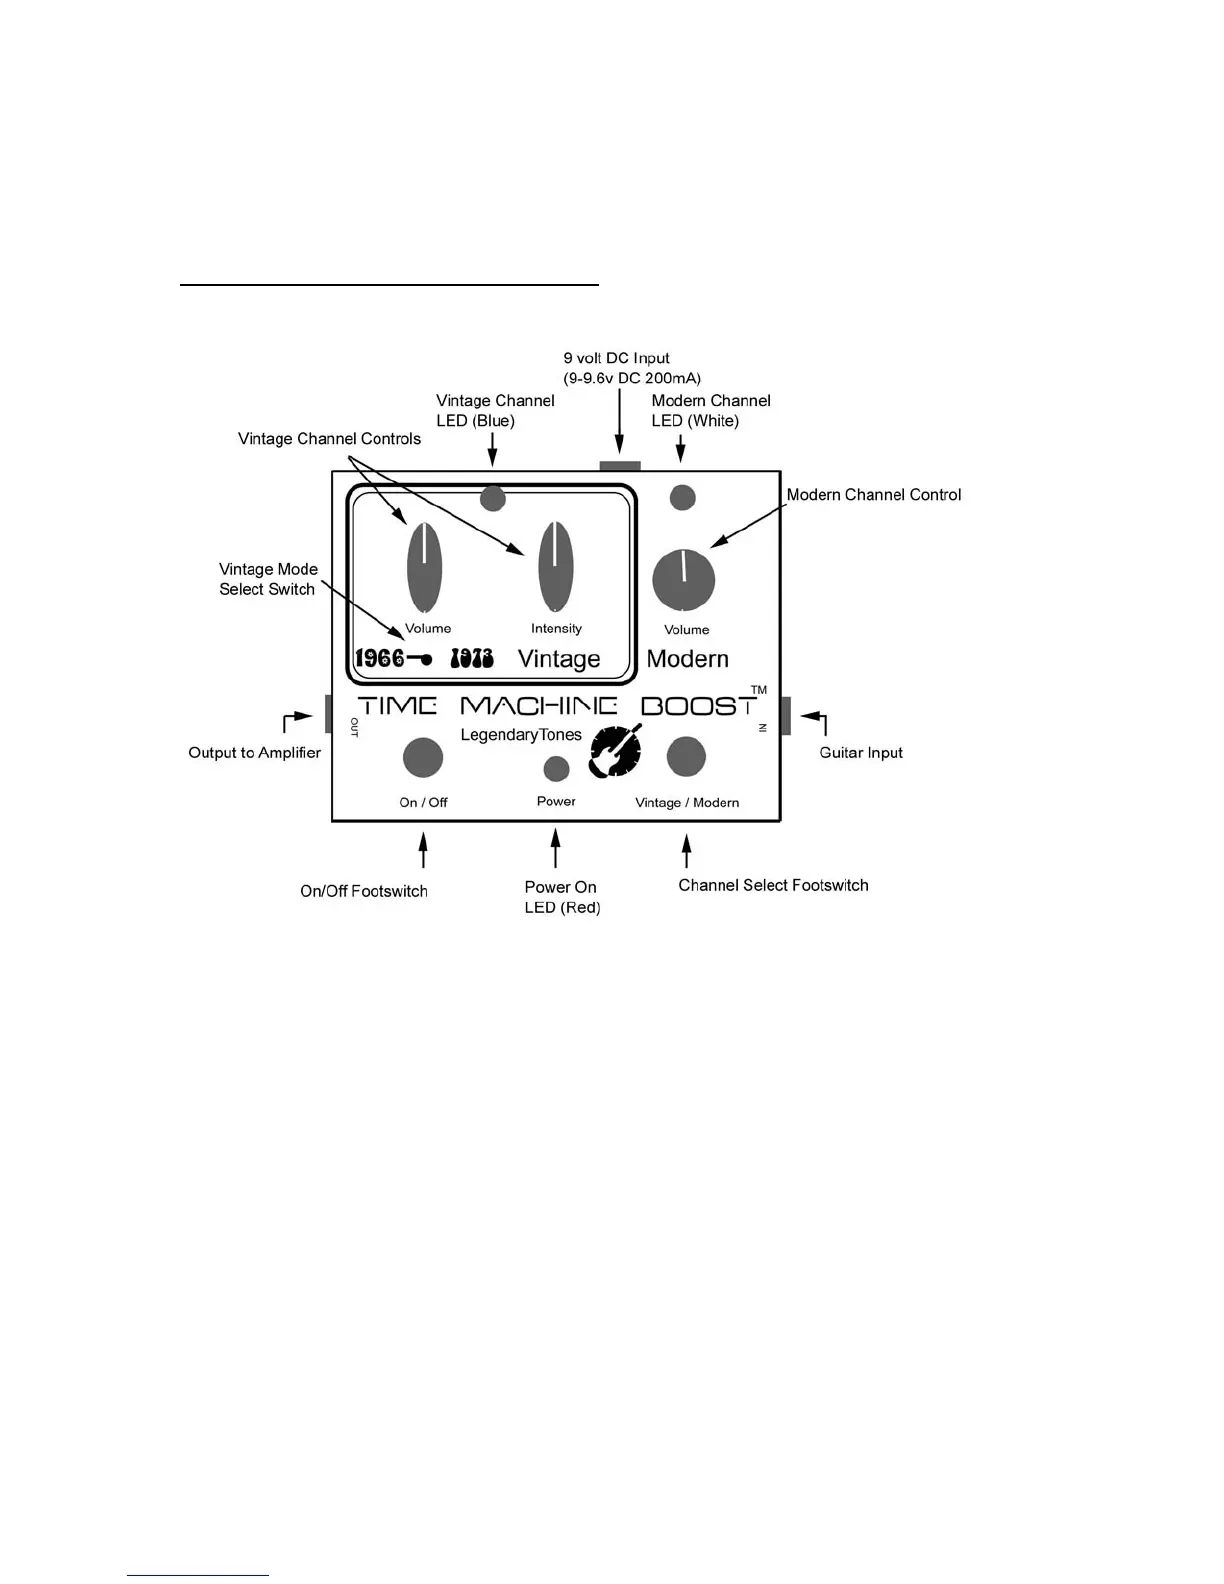
Getting Started Using Your Time Machine Boost
Vintage Channel Controls
• Volume – increases vintage channel volume
• Intensity – increases or decreases high frequencies and harmonic content. Note on Intensity
control: Leaving the Intensity control at the full-clockwise position can be considered a “stock”
normal starting point for obtaining vintage-types of tones. This control can be adjusted lower if the
overtones don’t complement your particular equipment at the “stock” full-up setting.
Modern Channel Control
• Volume – increases modern channel volume
Vintage Mode Select Switch (only functions while unit is in Vintage channel)
• 1966 – Classic treble boost effect that increases harmonics and gain in select upper mid and high
frequencies
• 1973 – Custom modified treble boost effect with more enhanced mids as well as fuller bottom end
9v DC input –The 2004 model Time Machine Boost operates from a standard 9v battery or 9-9.6v DC and
may be used with standard power supplies and with multi-effect systems that utilize a positive sleeve
connection.
Channel Select Footswitch – Toggles between Vintage and Modern Channels. Channels can be pre-set with
unit power OFF.
On/Off Footswitch – Turns unit on or off. Has true bypass so if unit is damaged or otherwise non-
functioning, true bypass will allow signal to continue to flow through the circuit so guitar’s signal will not
be cut out. Note on True-Bypass switching: This circuit employs true-bypass switches to physically
 Loading...