8 | Apprentice Plus User Guide Apprentice Plus User Guide | 9
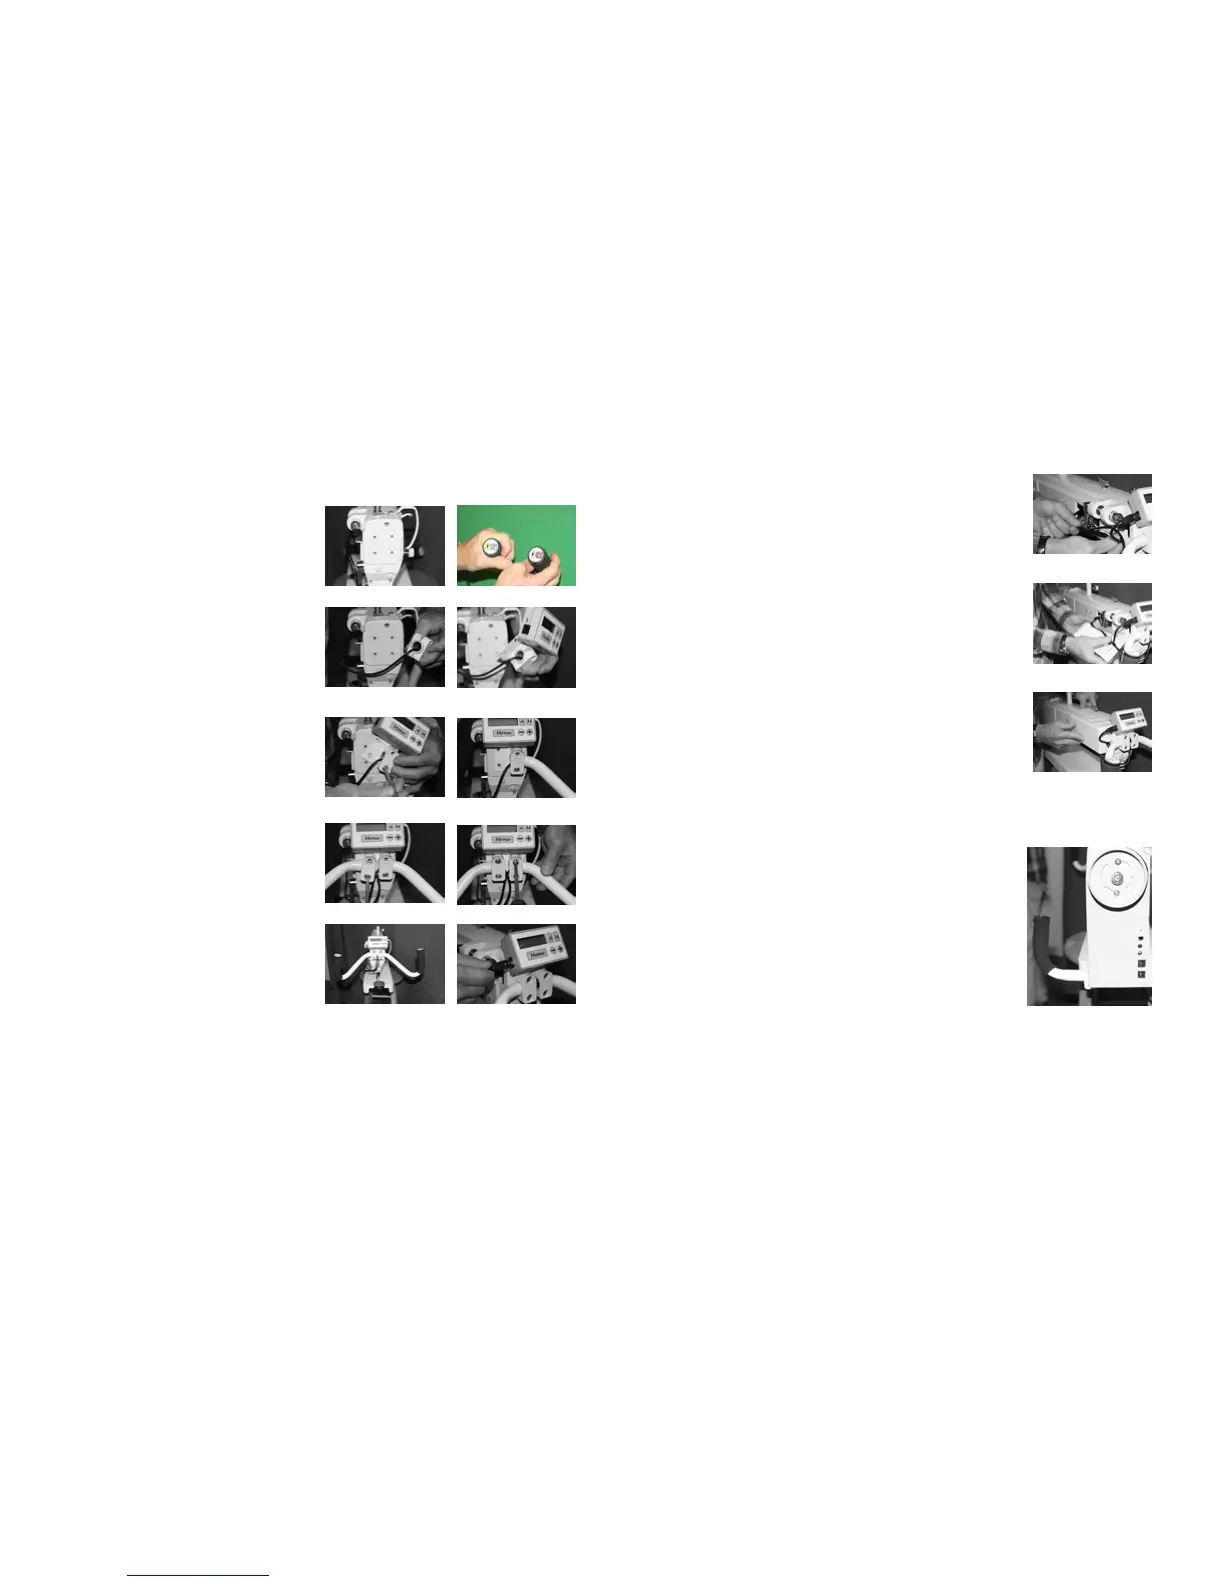
Attaching the Handlebar and Control Box to the Front
Your Apprentice Plus comes with two handlebars (a right and left) along with the main control box which
attach to the front of the Apprentice Plus. There are four screws and four clamps to hold these in place.
Step 1: Locate your set of handlebars and the
control box.
Step 2: Remove the four screws and clamps located
on the front of the machine above the needle. Figure
1 shows the front of the machine without the screws
and clamps.
Note: The front and rear handlebars are set up for left
and right. The right handlebar has red and white buttons
while the left handlebar has blue and yellow buttons.
See gure 2
Step 3: Place two clamps around the right handlebar
as seen in gure 3
Step 4: Place the main control box with bracket
behind the handlebar. See gure 4
Step 5: Using one of the four screws, attach the
bottom screw in the right handlebar and secure to
machine front nger tight, making sure that the main
control box bracket is lined up with the four screw
holes. See gures 5 and 6
Step 6: Place the brackets around the left handlebar
and attach the lower screw to the main control box
bracket to the machine. Finger tight for now. See
gure 7
Step 7: Attach remaining two screws to secure
the handlebars and main control box to the font of
the machine. See gure 8. Figure 9 shows the
handlebars and main control box in place.
Step: 8 Check that all your screws holding the
handlebars and main control box in place are tight.
Step 9: Use the remaining unconnected cable
coming from the side of the machine to connect the
main control box to the machine electronics. See
gure 10
Figure 1
Figure 2
Figure 3
Your Rocker Arm Cover
The Apprentice Plus machine ships without the
rocker arm cover attached to the machine.
Step 1: Remove the four screws from the casting
so that you can install the rocker arm cover.
Step 2: Dress the cords so that they are in a group
ready to be placed in the rocker arm cover. See
gure 11
Step 3: Line up the cords in the base of the rocker
arm cover thru the provided opening in the front of
the cover. See gure 12
Step 4: Secure the rocker arm cover to the
machine using the four screws you removed from
the machine. See gure 13
Figure 11
Figure 12
Figure 13
Figure 4
Figure 5
Figure 6
Figure 7
Figure 8
Figure 9
Figure 10
Your Rear Handlebars
Step 1: Using the same style clamps but from
the back of your machine you will attach your rear
handlebars.
Step 2: Take the left handlebar (blue and yellow
buttons) and attach to the left side of the machine
when standing in the back.
Step 3: Take the right handlebar (red and white
buttons) and attach to the right side of the machine
when standing in the back.
Step 4: Set handles for your comfort and tighten in
place.