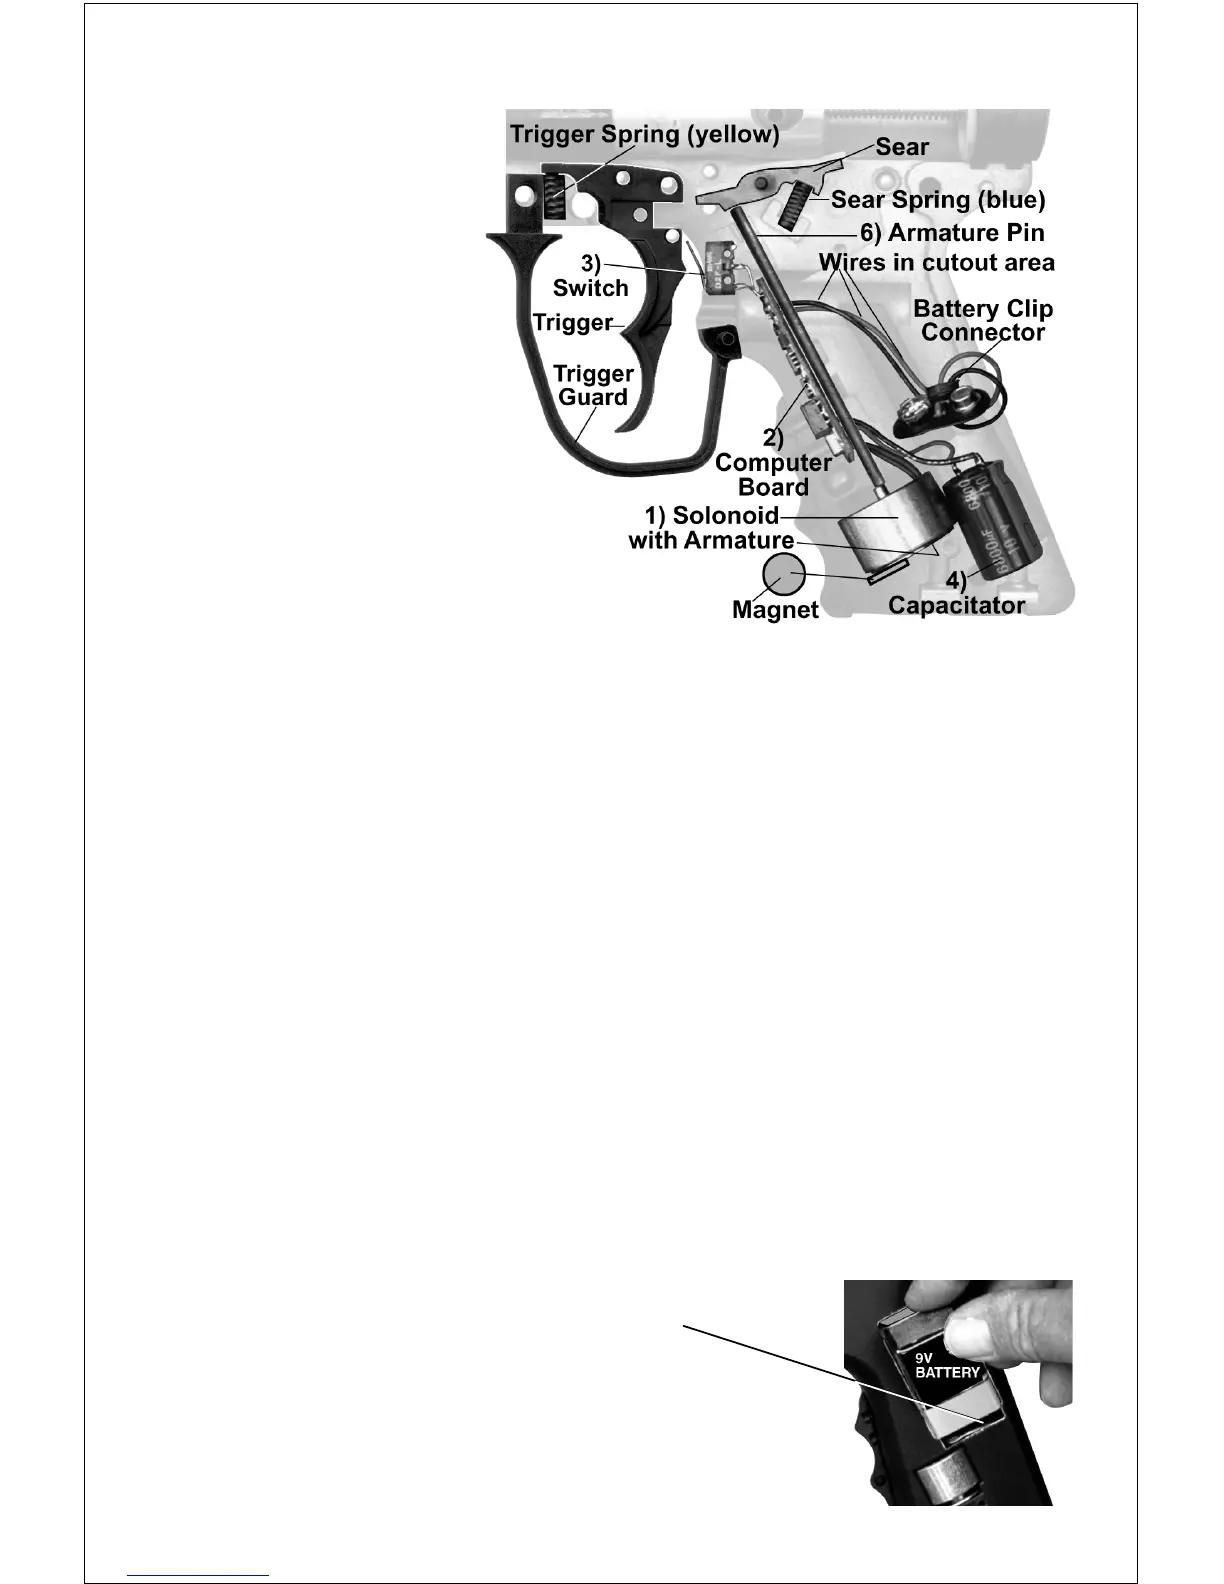
1) Place solenoid /
armature into position
in right receiver.
Insert Magnet in slot
below armature as shown.
2) Carefully align and insert
computer board into slot.
3) Place trigger switch on two
pins of right receiver half.
4) Insert capacitor in slot.
5) Route wires in cutout areas to
lay flat under armature pin and battery and not be pinched
when receiver halves are reassembled.
6) Insert armature pin into 2 slots so it moves freely.
7) Double check that all parts are in place as shown.
E-TRIGGER
TM
Internal Parts Positioned for Reassembly
Do not operate sear
tripper assembly
uninstalled as
solenoid/armature
may pinch you.
E-TRIGGER
TM
Reassembling Receiver Halves
1) Double check that all other parts: Front Sight, Front Site Pin,
Front Sight Spring, Ball Latch, Front Bolt, Linkage Arm, Rear
Bolt, Drive Spring & Guide Pin, Buffer O-ring, End Cap, Rear
Sight and Tank Adapter Nuts are place.
2) Place battery connector through left receiver half as you
replace left half on right half, don't pinch wires.
3) Make sure halves fit flush and magnet fits into left receiver
half slot so it does not break. For ease of installation tighten the
bolt over the trigger first. Next reinsert front grip, it gets longest
bolt, and tighten 5 remaining bolts.
4) Reinstall tank adapter and reinstall barrel.
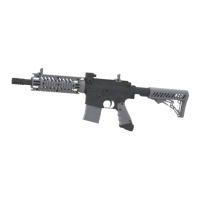
5) Attach 9v battery to battery connector and be sure wires lay
flat inside the cutout area of receiver, as shown above.
6) Carefully tilt and insert battery,
wire attached end first, into receiver.
7) Reinstall left receiver grip with 2 bolts.
Reassembly is complete.
You are now ready to tune the E-Trigger
TM
rate of fire and set the mode of fire as
outlined in tuning instructions on page 9.
E-TRIGGER
TM
Troubleshooting (continued from page 10)
11