6
COMPONENT CHECKLIST
Prior to start up use the following list to double check the conveyor components.
MOTOR Have a qualied electrician ensure the motor is wired correctly for your power source.
Check that motor is securely fastened to the reducer or motorbase.
REDUCER Check that the proper amount of oil is in the reducer.* Make sure a vent plug is installed
on the reducer.* (A solid plug is usually installed for shipping.)See FIGURE 10.
BEARINGS Double check that bearings are fastened securely. Be sure that locking collars are
tightened and set screws are secured rmly to the shaft.
GENERAL Check that sprockets with chain and/or sheaves with V-belt are aligned and properly tensioned.*
*Additional information available in section III Maintenance.
BELT INSTALLATION
1. Locate all take-up pulleys to their minimum take-up positions to allow for easy belt installation.
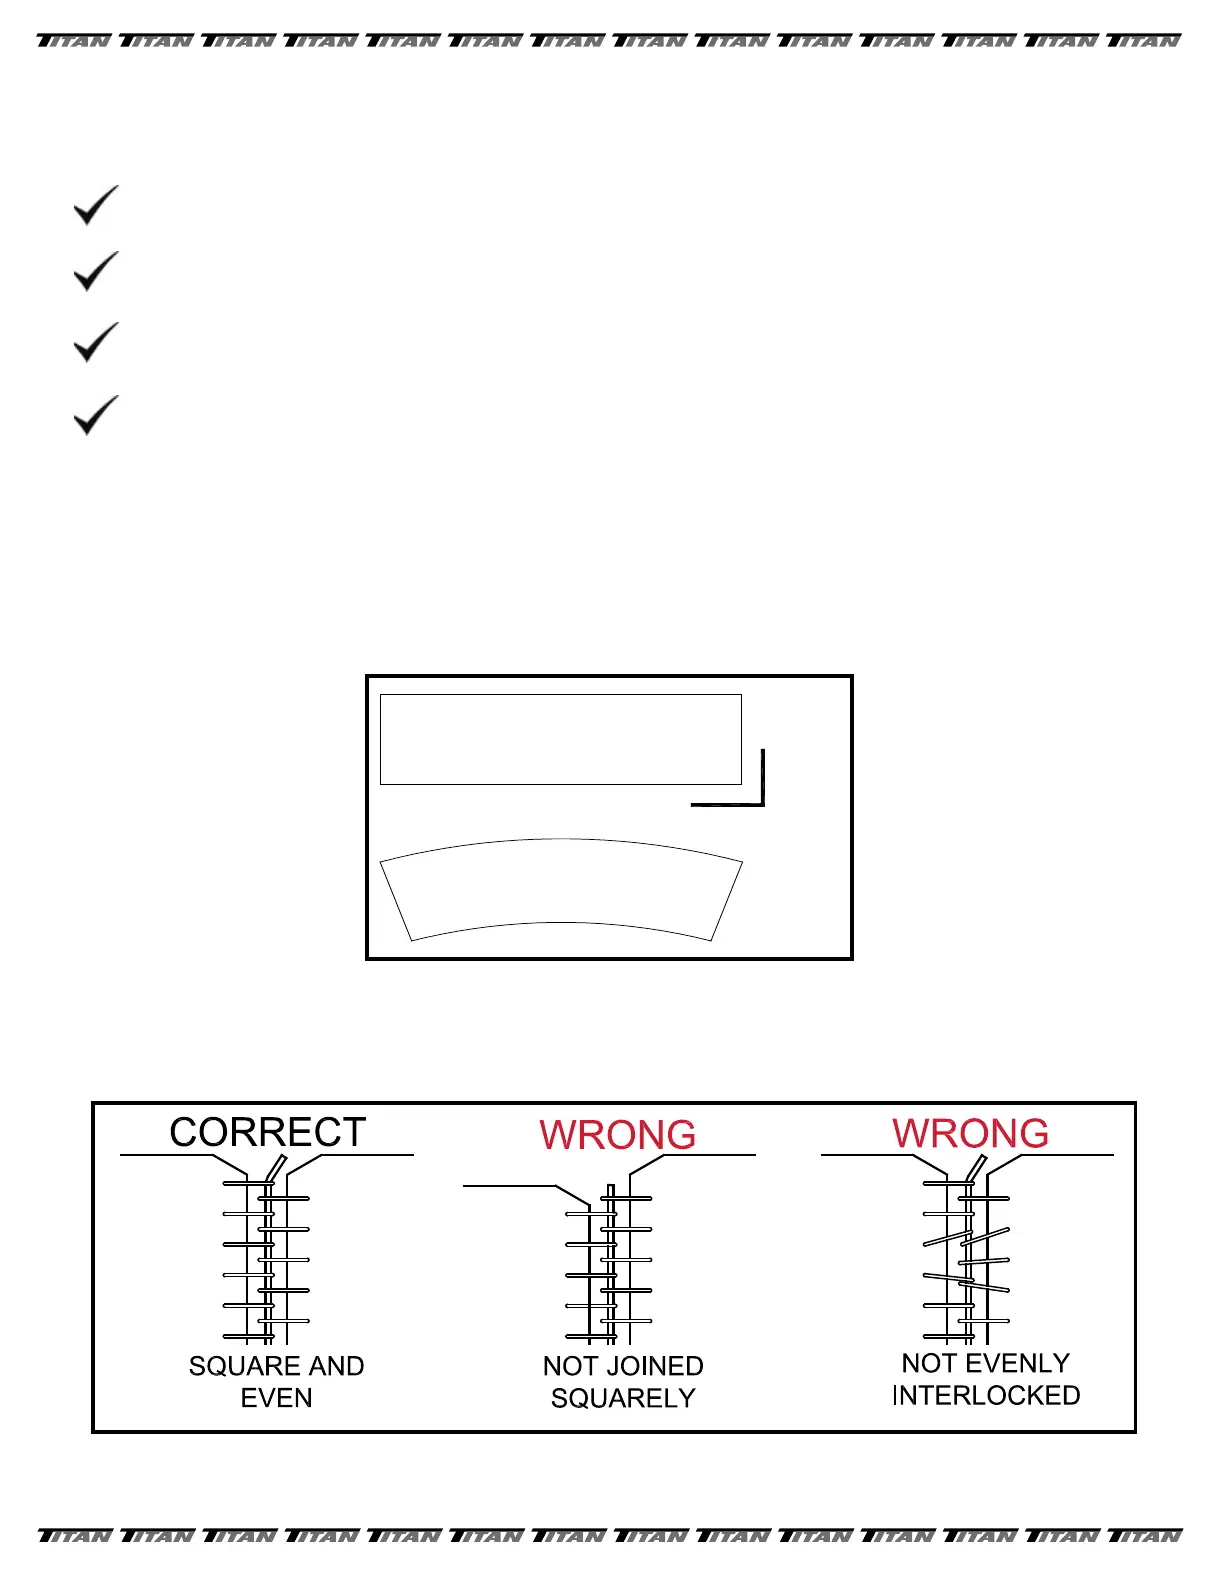
2. As a double check, lay out belt on a level surface and pull tight. The belt should lay at and be in a straight line.
See FIGURE 4. At this time recheck belt ends to ensure that they were cut squarely and that the lacing was
installed properly.
3. With typical belt threading arrangement shown on page 7 FIGURE 6 of this manual, install the belt on the
conveyor. Interlock the laced ends squarely, and push the connector pin thru the lacing. If a metal connector
pin is used, center the pin and bend the ends over slightly to keep the pin from working out. See FIGURE 5
FIGURE 4
FIGURE 5
Return to Table of Contents
 Loading...