Do you have a question about the TIVA SNBHTR and is the answer not in the manual?
Ensure support tabs holding the heating element are removed before use to prevent damage.
Fire risk if covered/near combustibles, burn hazards from hot parts, and overheating prevention.
Guidelines for safe use and supervision by children and vulnerable individuals.
Lack of temp control, small room usage, and damaged cord replacement advice.
Correct installation height, power, earthing, plug handling, and disconnection.
Placement rules for sockets, combustibles, flammable areas, water proximity.
Warnings for unattended use, sleeping, touching, cord inspection, extension leads, multi-boards.
Use weatherproof outlets and RCD for outdoor operation.
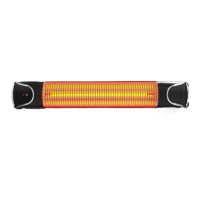
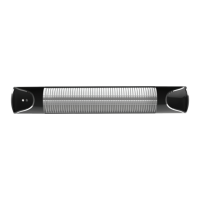
Introduction to the TIVA Heater Indoor/Outdoor, its features and benefits.
How the heater warms objects and people indoors by radiant heat.
Benefits of targeted radiant heating in outdoor environments.
Instructions for horizontally mounting the heater on a wall.
Minimum height of 1.8m and orientation requirements for mounting.
Minimum clearance from ceiling/walls and securing brackets.
Steps for fastening brackets, securing the heater, and adjusting its angle.
Identification of all parts included for assembly.
Step-by-step guide for mounting brackets and securing the heater.
How to turn the heater on/off and use basic controls.
Using the remote for power, level adjustment, and timer settings.
Activating and understanding the motion sensor mode's behaviour.
Steps for replacing the battery in the remote control.
How to clean the heater's external surfaces using a damp cloth.
Warnings against touching the heating element, attempting repairs, and handling damaged cords.
Guidelines for responsible disposal and recycling of the product.
Identification of stand parts and important safety advisories for use.
Crucial placement guidelines regarding distance from walls for stability.
Steps for assembling the base, poles and connecting the bracket head.
Steps for attaching brackets and securing the heater onto the stand.
Steps for assembling the base, poles and connecting the bracket head.
Steps for attaching brackets and securing the heater onto the stand.
Step for inserting and securing the top pole with the heater attached.
Technical details including voltage, power, dimensions, and ingress protection.
Explanation of error codes (23, E1, E2, E3) and their solutions.
Details of the one-year limited replacement warranty statement.
Conditions, exclusions, and what the warranty does not cover.
Contact details for Australia and New Zealand for warranty claims.