9
English
8. MIX IN: Connect the audio output of another device, such as a computer, to this input to hear
the audio mixed in with the tuner. With the Model 10+ in Auxiliary mode, this input acts as a
second Auxiliary input. This stereo input accepts a 3.5mm stereo male mini connector. The vol-
ume level is controlled by the source device.
9. AUX IN: To hear audio from another device, such as Tivoli Audio’s Model CD, a MP3 player, or
TV, connect said device’s audio output to this stereo input and change the source to Auxiliary.
This stereo input accepts a 3.5mm stereo male mini connector. Note you may need to adjust
the volume level differently for an auxiliary device than the level used for radio listening.
10. SERVICE: The port underneath this label is for use during service only. Do not remove the
“Service” label. Do not connect anything to this port or you could damage the Model 10+ and
void your warranty.
11. POWER CORD INPUT: Firmly insert the included power cord. When unplugging the power
cord from the wall outlet, always grasp it by the plug and not the cord. We recommend the
use of a power strip with surge protection. Be sure your region’s voltage is consistant with the
voltage indicated on the rear panel under the power cord input. Tivoli Audio is not responsible
for damages caused by incorrect voltage.
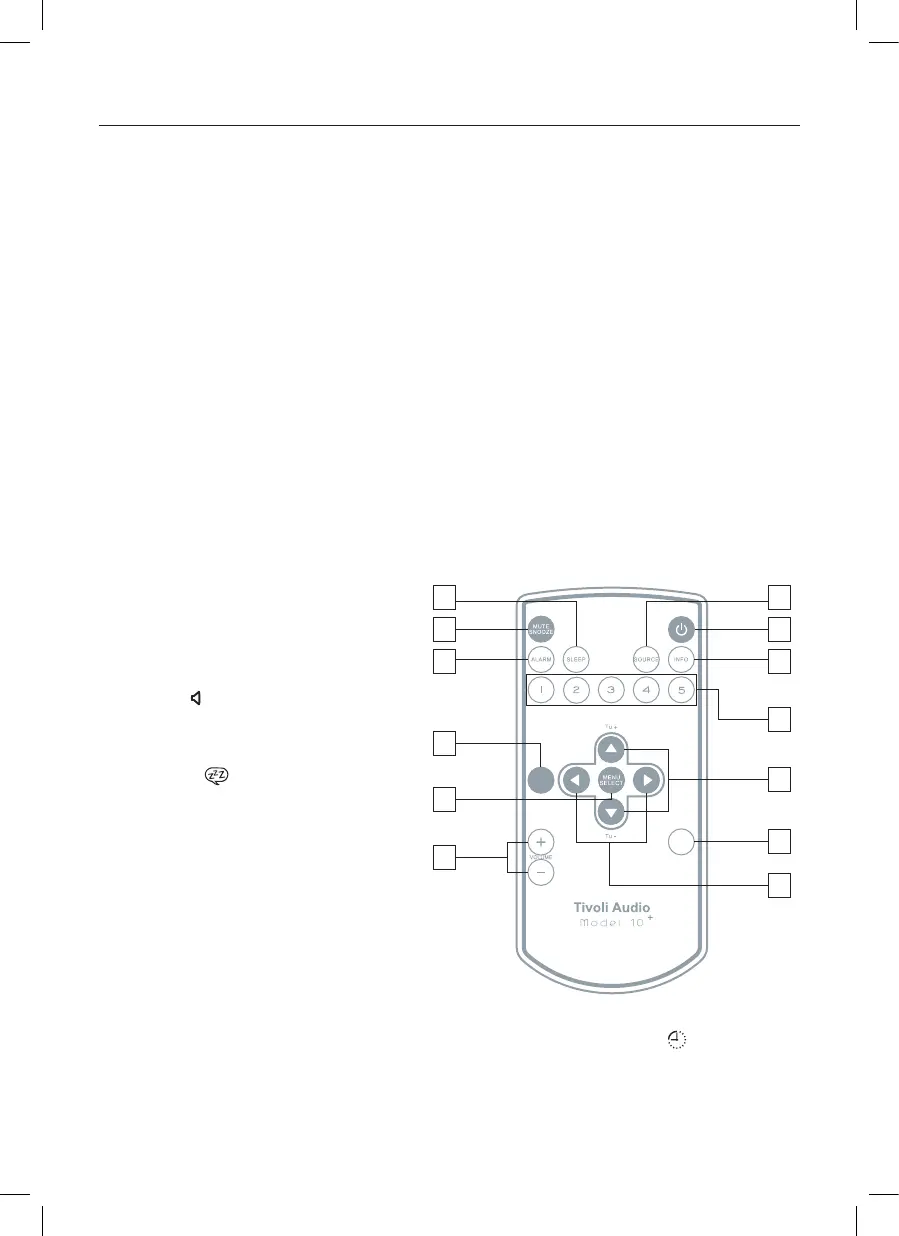
Guide to Features (Remote Control):
1. POWER: Press briefly to power the
Model 10+ off or on. The radio will
power on to the last source used.
2. MUTE/SNOOZE: Press to mute the
audio (the volume bars will disappear
from the icon) while the unit is play-
ing; press again or adjust the volume
to restore sound. Press to mute the
alarm for 7 minutes after the alarm
sounds. A icon will show on the
display when Snooze is active. The
Snooze time is not adjustable.
3. ALARM: With the Model 10+ powered
on, use the pq and Select buttons to
adjust and set the alarms. For a com-
plete step-by-step guide, refer to the
section titled “How to set the Alarm.”
4. SLEEP: Press repeatedly to view the
amount of time the radio will play be-
fore it turns off automatically, and
press the Select button to select that time. When the sleep timer is active you can check the
remaining time by means of pressing Sleep on remote. A small clock face [ ] will show on
the display when the Sleep timer is active. To cancel Sleep, press the Sleep button until the
display shows “Off”.
5. SOURCE: Press repeatedly to change sources.
4
2
3
11
8
10
13
9
7
6
1
5
12
MONO
BAC K

 Loading...