Injection Molding Machine Chapter 4
V3.0
4-39
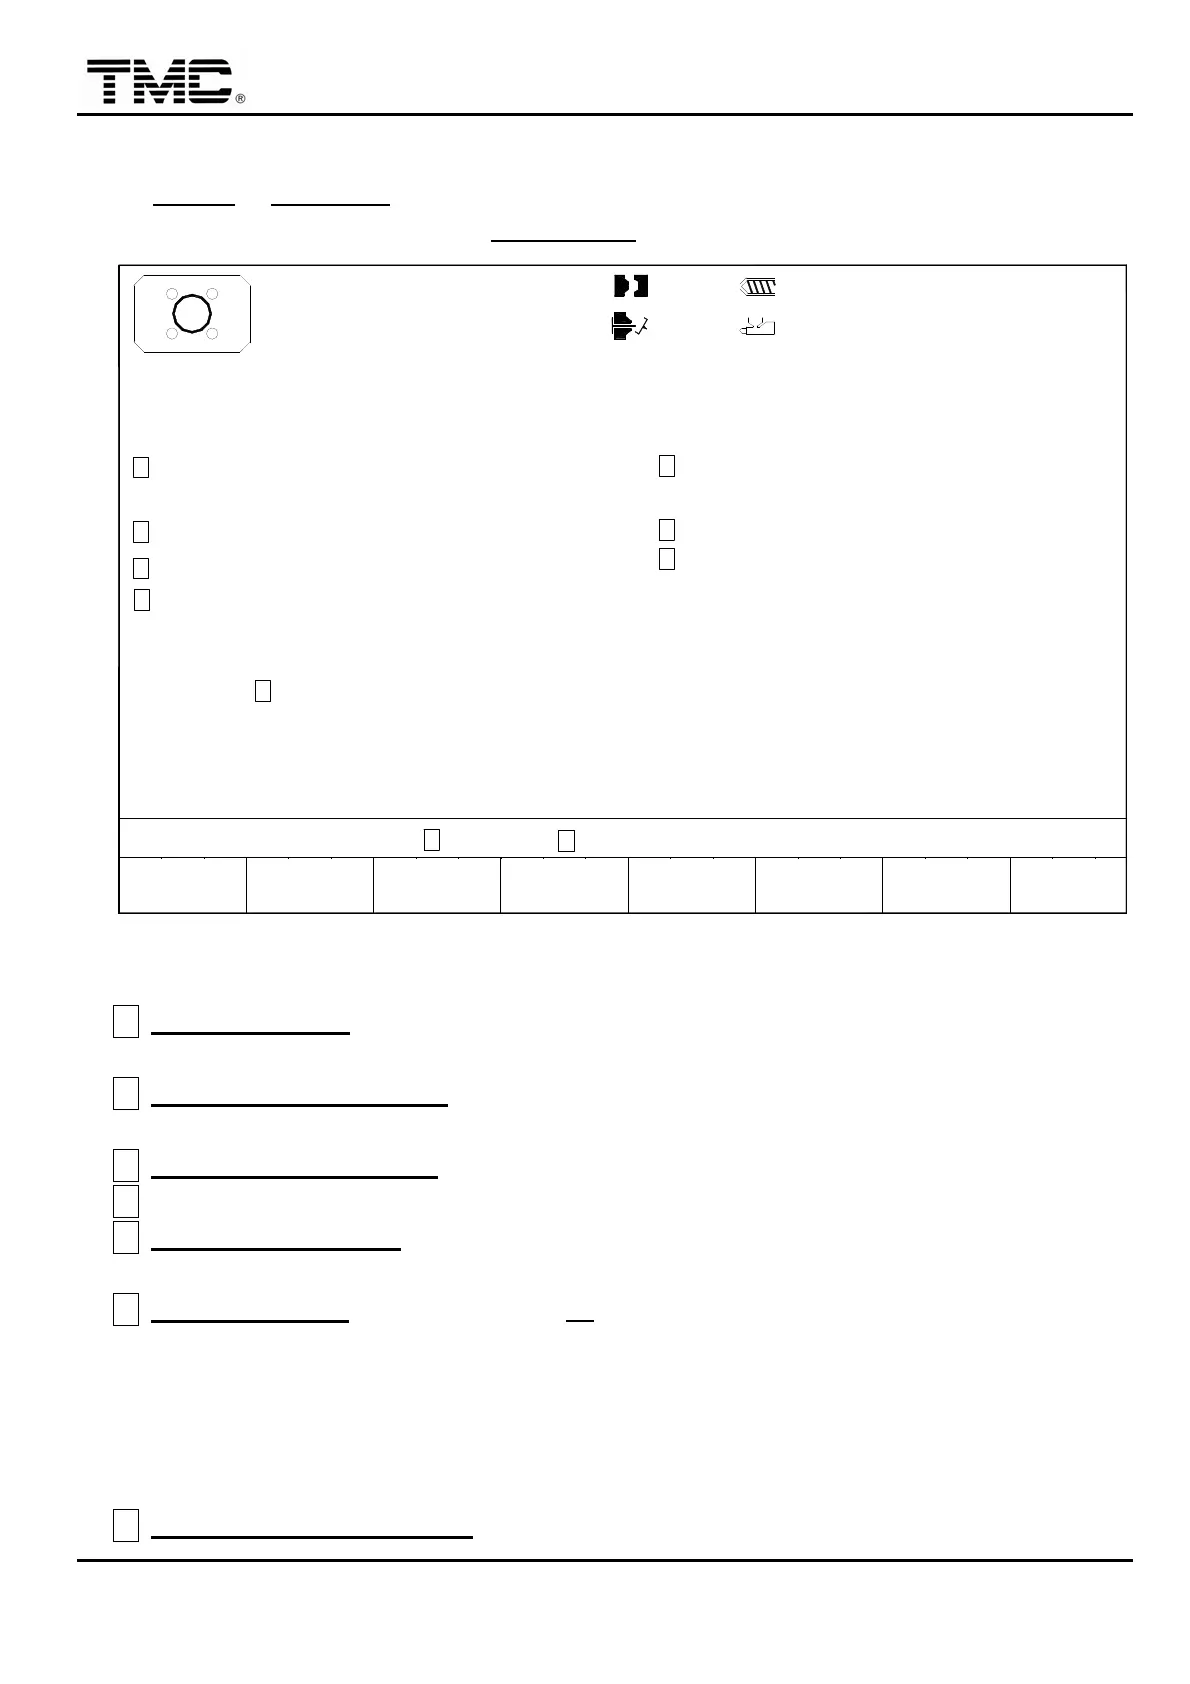
2.20 Automatic mold adjustment
On CLAMP or EJECTION screen press F3 MOLD ADJ.
,
or use the direction key in the main
menu screen to move the cursor to MOULD ADJ. To display this screen.
V1: 0/ 0 0/ 0V2:
0/ 0P1: 0/ 0 P2:100.0mm
50.0mm110.0mm
1.0mm
ACTION STATUS
M:
03D05M07Y
10h25m10s
20°C3W
F2F1 F3 F4 F5 F6 F7 F8
TONNAGEMENU
01
100.0 mm
100.0 mm
ORIGINAL DIE HEIGHT
DIE HEIGHT JOG
DIE HEIGHT ADJ.
DIE HEIGHT ADJ. PRESS
PRESET DIE HEIGHT
120 TON
CLAMPING FORCE
ORIGINAL CLAMPING FORCE
DIE HEIGHT ADJ. SPEED
PRESET CLAMPING FORCE
120 TON
120 TON
50 bar
OFF
OFF
:
:
:
:
:
:
:
:
:
AUTO AUTO
NOTE CHECK LUB. CONDITION IS WELL AT DIE HEIGHT MECHANISM.
DO AUTO DIE HEIGHT WITHOUT MOLD FIT ON.
1.
2.
CHANGE
LOG
ALARM
LOG
I
A
B
E
C
G
D
F
H
J
OFF
MOLD SETUP MODE
:
DO AUTO TONNAGE AFTER AUTO DIE HEIGHT AND MOLD FIT ON.
3.
MOLD
SUPPORT
DIE HEIGH
8%
Screen 4-24
A
DIE HEIGHT ADJ.
:
Before adjust die height
,
die height adjustment function has to be turn
ON.
B
DIE HEIGHT ADJ. PRESS:
Die height adjusting pressure shall not be set higher than
50bar.
C
DIE HEIGHT ADJ. SPEED:
Die height adjusting speed shall not be set higher than10%.
D
Make sure that there is no mold on the machine.
E
PRESET DIE HEIGHT
:
Measure mold thickness with ruler and key in to preset mold
thickness
,
close safety door.
F
AUTO DIE HEIGH:
Press function key F3
,
automatic die height adjustment process start
,
at this time
,
original die height value will change as gear rotating until it is equal that
preset die height setting
,
then machine will give an alarm signaling completion of die
height adjustment.
Upon completion of the above operation
,
open the safety gate and load the mould in and
secure it.
G
PRESET CLAMPING FORCE
:
After fitted mold
,
key in the present clamping force
,
close
 Loading...