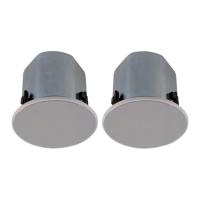
HY-TB1 (optional)
Ceiling panelCeiling reinforcement ring (accessory)
Ceiling frame
Mounting hole
Ceiling reinforcement ring
(accessory)
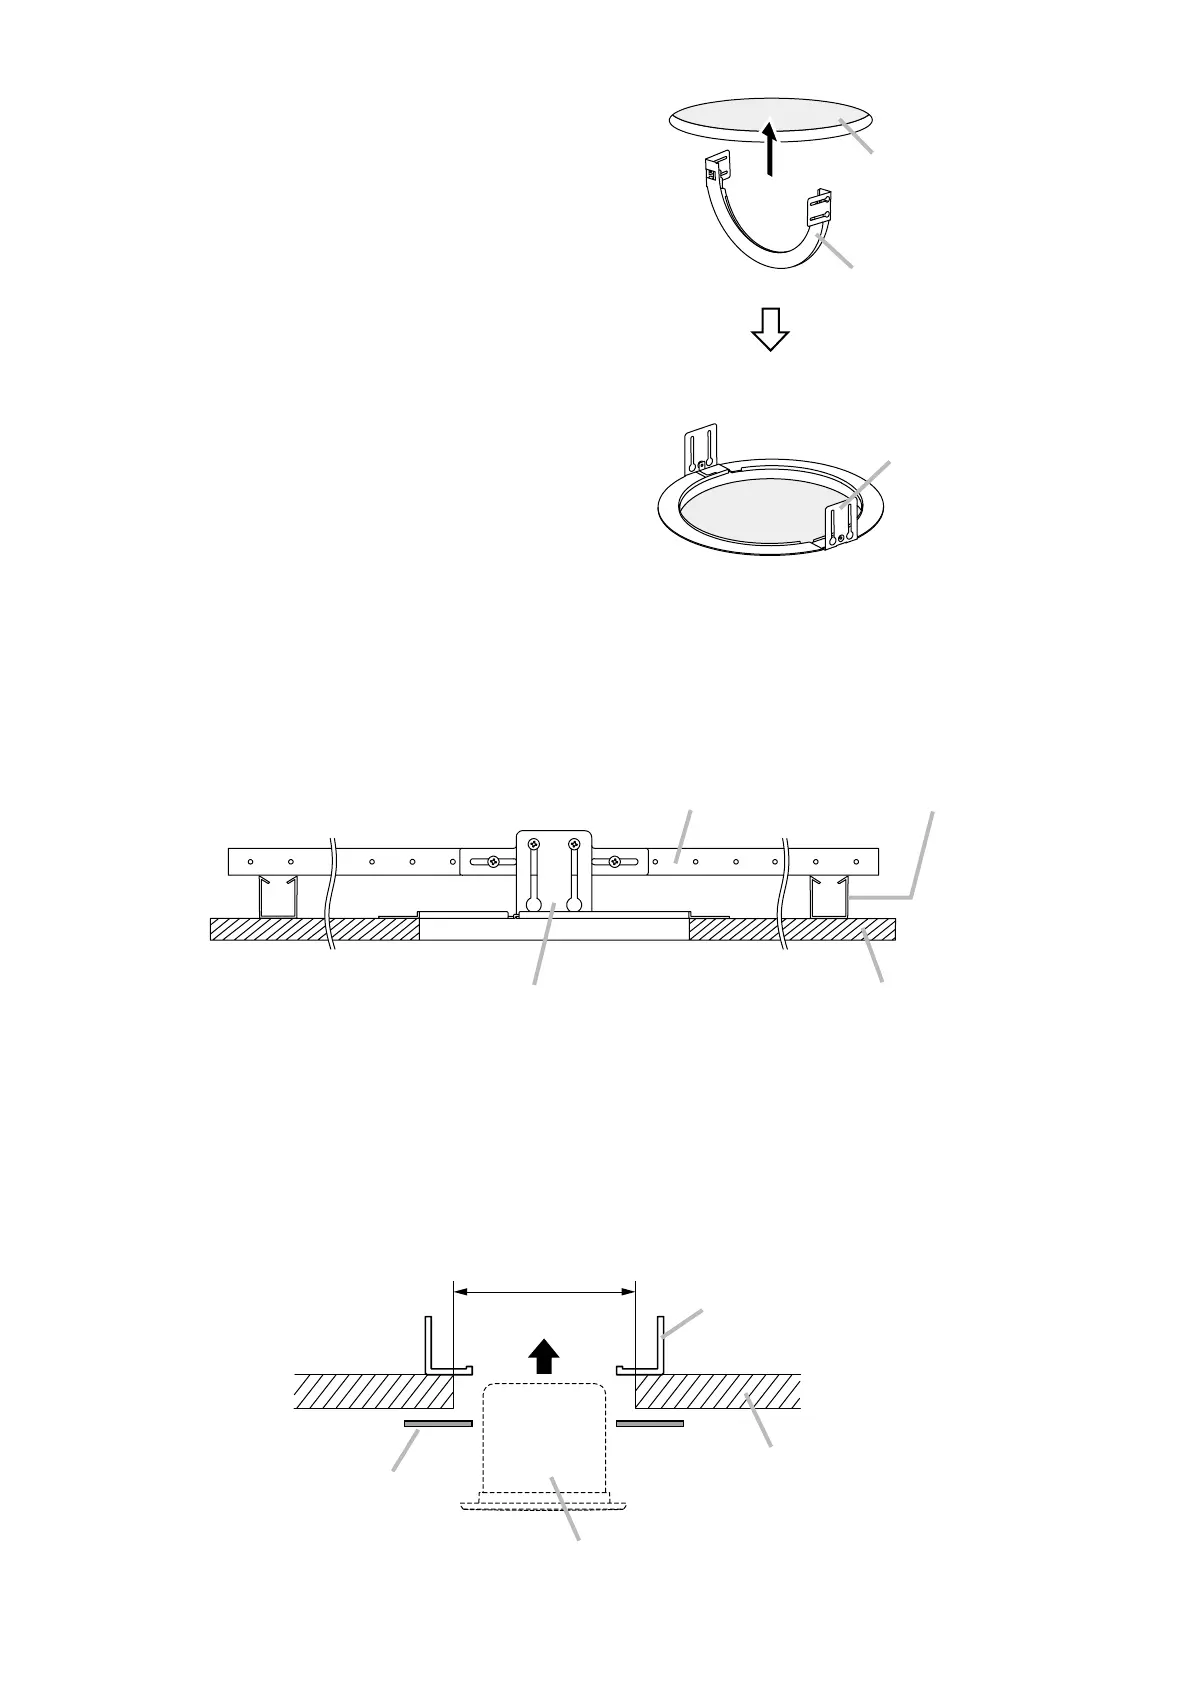
Reinforcement ring placed on ceiling panel
These tabs must
face upward,
away from the hole.
Step 3. Mount fittings to a ceiling or hanging pipe.
3-1. Direct mounting to a ceiling panel
Fold the supplied ceiling reinforcement ring in half*
and insert it through the mounting hole in the
ceiling panel, then open it with its tabs facing up.
Place the ring on the ceiling panel aligning it with
the mounting hole.
* The reinforcement ring is too large to be inserted
into the mounting hole unless folded.
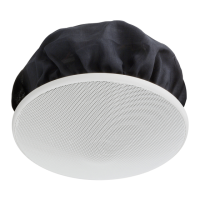
HY-TR1
(optional)
ø200 – ø300 mm
(7
7
/8" – 11
13
/16")
Ceiling panel
Ceiling reinforcement ring (accessory)
Speaker unit
3-2. Mounting to a ceiling frame
Use the supplied ceiling reinforcement ring in conjunction with the optional HY-TB1 Tile Bar Bridge.
Note
Refer to the instruction manual included with the HY-TB1 for the correct ceiling mounting procedure.
[Installed HY-TB1]
3-3. Ceiling mounting in a larger than specified hole
Use the supplied ceiling reinforcement ring in conjunction with the optional HY-TR1 Trim Ring.
Note
Refer to the instruction manual included with the HY-TR1 for the correct ceiling mounting procedure.
[Installed HY-TR1]