SAVE THESE INSTRUCTIONS
FEATURES
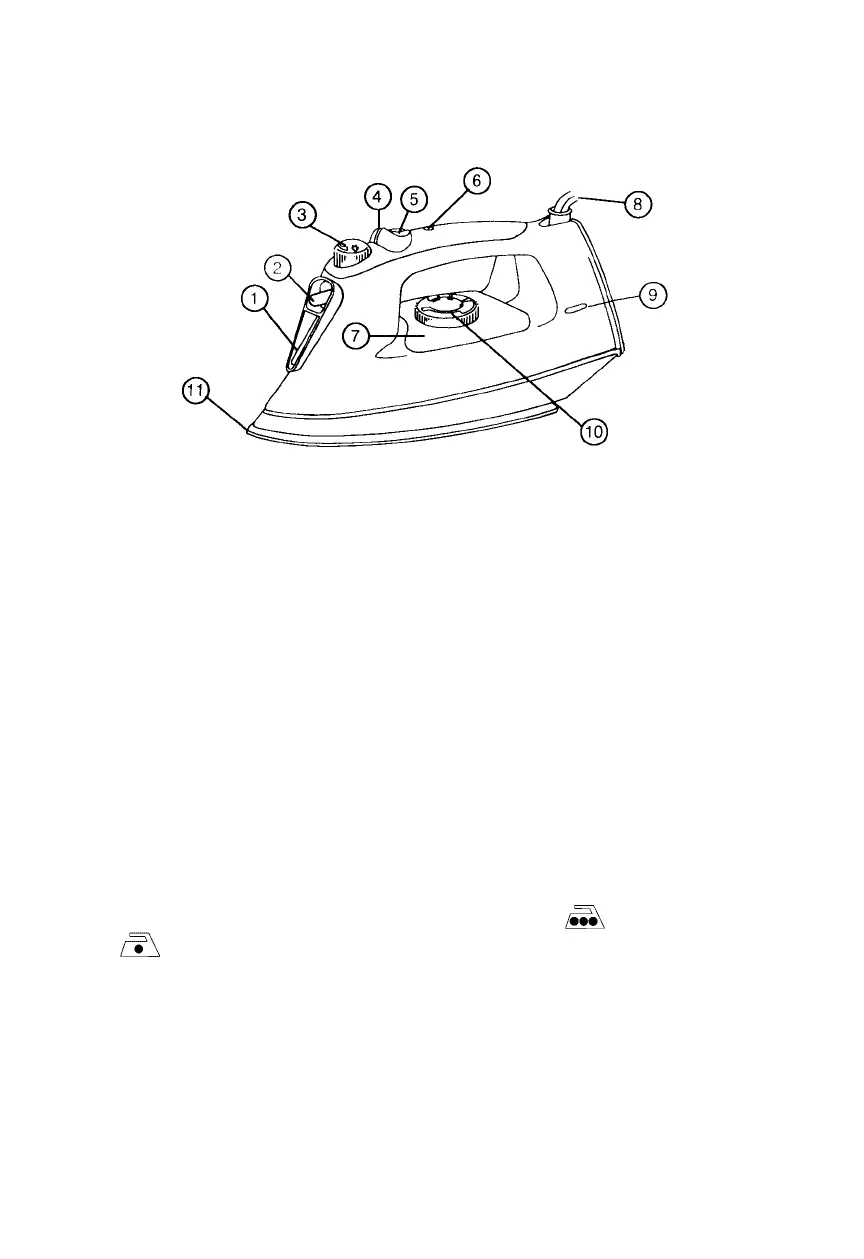
DIAGRAM 1
1. Water fill hole
2. Spray nozzle
3. Variable steam dial
4. Spray button
5. Burst of steam button
6. Auto shut-off light and reset button
7. See-through water reservoir
8. Pivot cord
9. Power on/ready light
10. Temperature control dial
11. Non-stick soleplate
USING YOUR IRON
Note: Before you use your iron for the first time, you should flush the sole-
plate steam vents to ensure that no stain is transferred onto fabric from
residue possibly left in the vents from the manufacturing process. To do this,
see SELF-CLEANING/FLUSHING.
For best results, check garment labels for the temperature and steam setting
recommended by the fabric manufacturer, or consult the enclosed garment
care tips pamphlet for additional information.
To prevent damaging garments from too hot of an iron, it is best to first iron
garments that require a low temperature. If you should need to switch from
a high setting to a lower temperature, for example Cotton
to Nylon, allow the iron about 5 minutes to reach the lower
temperature.
Tips: If you are unsure of a garment’s fabric content, start on a low setting
and test the iron on an area of the garment that does not show, such as a
seam. Gradually increase the heat setting until wrinkles remove without
damaging the fabric.
3