2
4
5
6
3
10
9
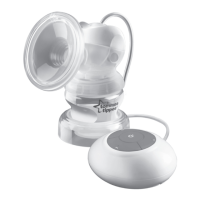
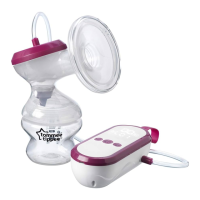
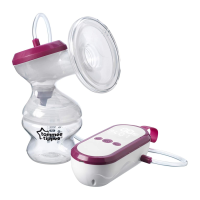
Putting your pump together
Each time you use your breast pump,
check all parts of the pump for any
damage.
Wash your hands with soap and
water and dry thoroughly before
handling your breast pump.
1.
Make sure that all parts of the pump
have been washed and sterilized.
2. Push the connector rod
through the bottom of
the diaphragm.
3. With two hands gently
squeeze the bottom of
the diaphragm over the
ring in the base of the
connector rod. The rod
should be securely held
by the diaphragm.
4. Place the diaphragm
in the top of the pump
body and push the
diaphragm edge down
around the whole
circumference of the
pump body to make
a good seal.
5. Pick up the pump body
and, from the side, slide
the handle onto the body,
so that the clips on the
top slide onto the top of
the connecting rod, and
the two clips at the side
snap onto the back of the
pump body.
6. The handle should now
freely move up and down
and you should see the
diaphragm lift up when
you press the handle
down.
7. Push the soft, silicone
cup into the widest
part of the horn and
smooth its lip evenly
over the edge. Work
your way all around
the rim to make sure
the cup fits smoothly,
evenly and securely. The
two dimples in the cup
should be clear to allow
air into the horn.
8. Now smooth the lip of
the silicone cup around
the narrow end of the
horn in the same way.
9. Push the horn with cup
attached onto the body
until it’s fully engaged
and secure.
Turn your
pump upside down.
10. Insert the duck-bill valve.
Gently squeeze the sides
of the valve to make sure
it opens.
11. Screw in a Tommee
Tippee Closer to Nature
or Advanced Anti-Colic
bottle. This breast pump
is designed to fit all
Tommee Tippee Closer
to Nature and Advanced
Anti-Colic bottles and
Express & Go / Pump &
Go milk pouches with
adaptor rings (excludes
glass bottles).
12. Place the assembled
pump on a flat surface.
Once fitted, you don’t have to take the
silicone cup out of the horn unless milk or
dirt becomes trapped inside. Then you can
ease the edges of the cup from the horn and
gently pull them apart for cleaning.
7
8
11
3
 Loading...