Bracket Installation
3
www.tommydocks.com
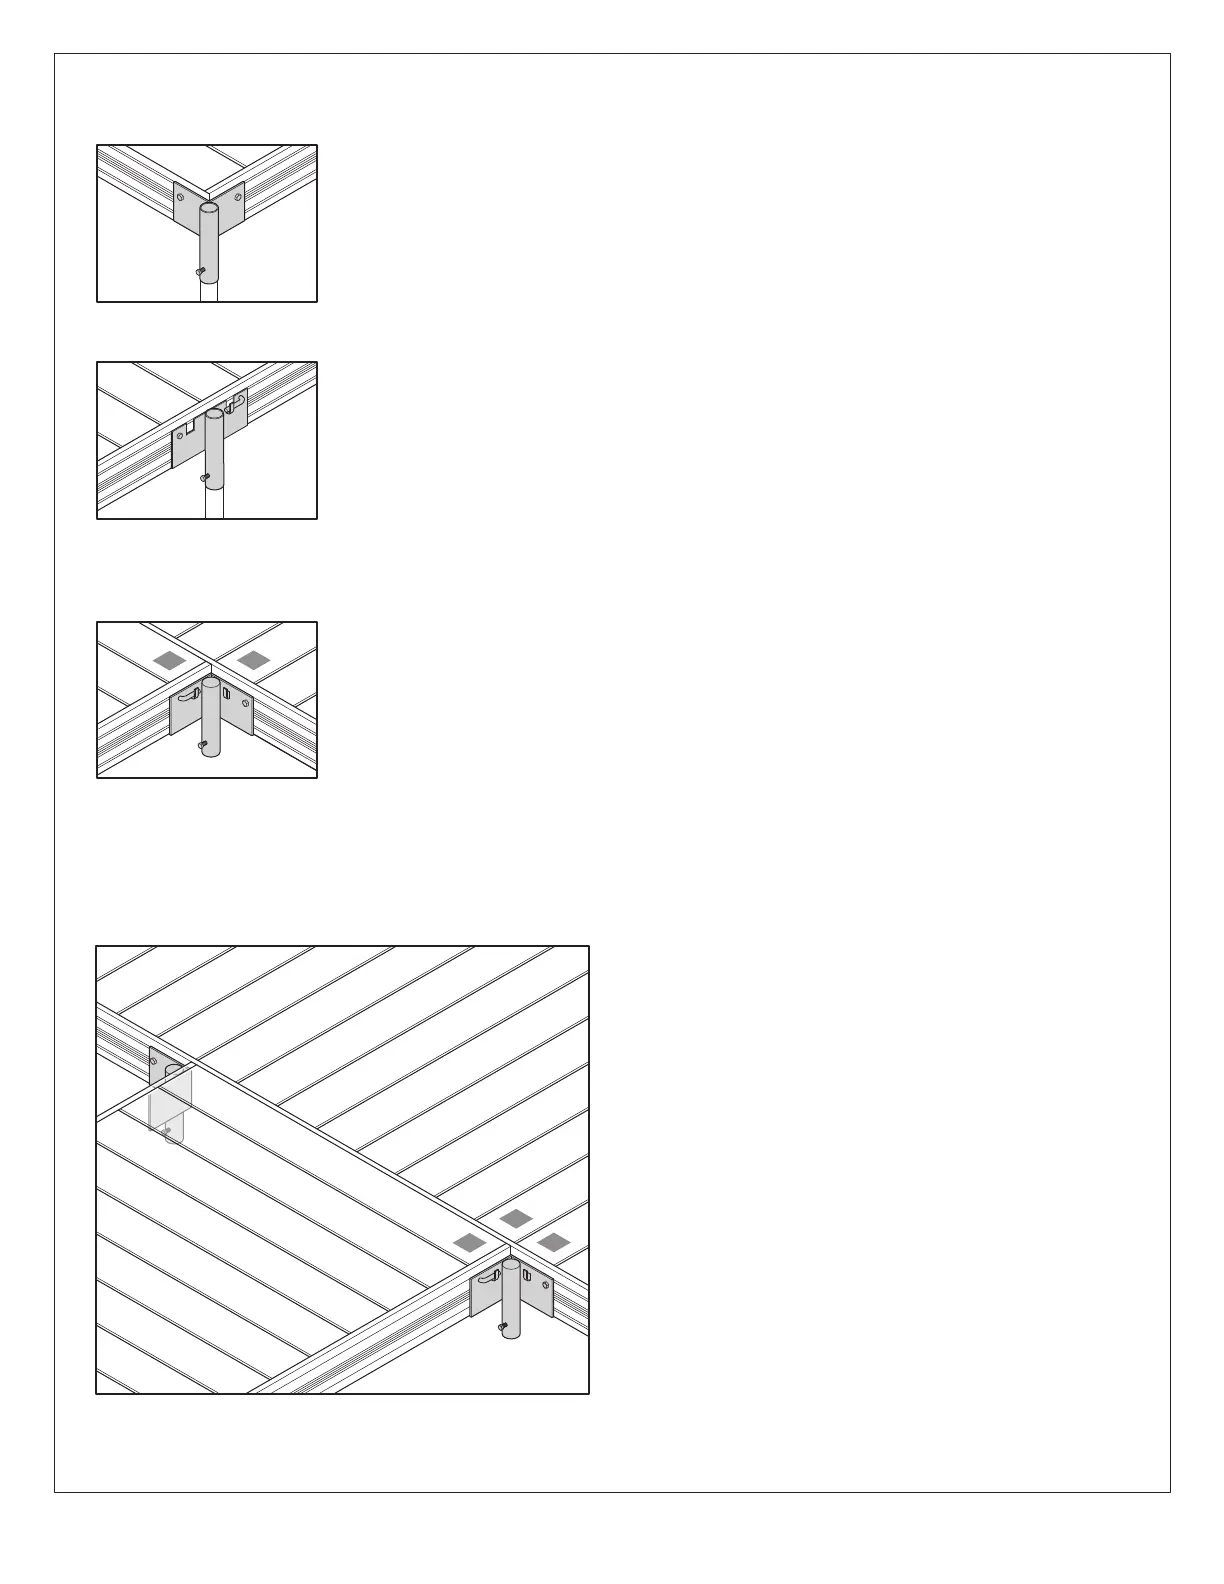
A-Bracket (outside corner)
1. Position A-Bracket (refer to dock layout) making sure that both dock frames are seated
completely in the saddle of the A-Bracket.
2. Install two (2) 1/2” x 2-1/4” bolts, washer and nuts. The nuts are positioned on the inside
of the dock’s frame.
B-Bracket (straight side)
1. Position B-Bracket (refer to dock layout) making sure that dock’s frame is seated
completely in the saddle of the B-Bracket.
2. Install one (1) 1/2”-13 x 2-1/4” bolt, washer, and nut. The nut is positioned on the inside of
the dock’s frame.
C-Bracket (2-way inside corner)
For connecting two dock sections
1. Position C-Bracket (refer to dock layout) making sure that dock’s frame is seated
completely in the saddle of the C-Bracket. Header frame must not protrude past the
angle plate or the next dock section will hit.
2. Install one (1) 1/2”-13 x 2-1/4” bolt, washer and nut. The nut is positioned on the inside of
the dock’s frame.
D-Bracket (3-way inside corner)
For connecting three dock sections
1. Position D-Bracket (refer to dock layout) making sure
that dock’s frame is seated completely in the saddle of
the D-Bracket. Header frame must not protrude past
the angle plate or the next dock section will hit.
2. Install one (1) 1/2”-13 x 2-1/4” bolt, washer and nut. The
nut is positioned on the inside of the dock’s frame.
A-Bracket (outside corner)
B-Bracket (straight side)
C-Bracket (2-way inside corner)
D-Bracket (3-way inside corner)
1
2
1
3
2
 Loading...