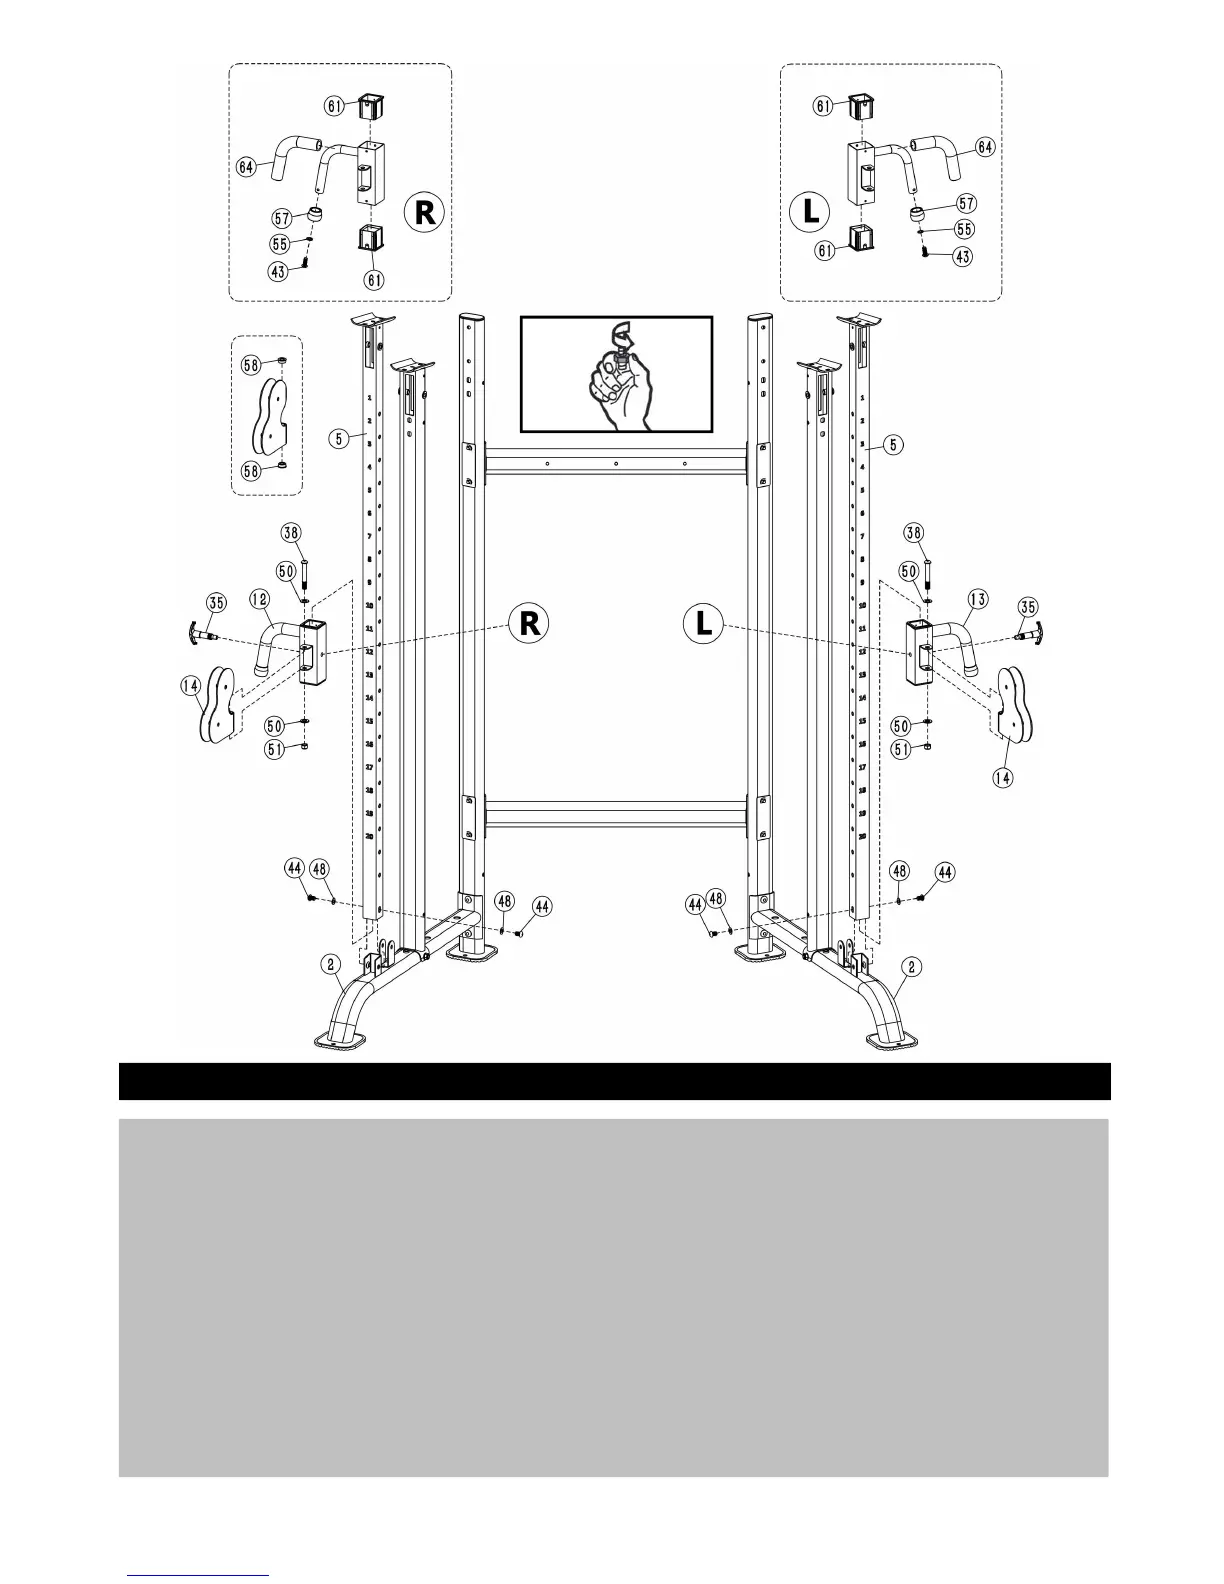
1. Put 2 x Guide Tube (5) through the L&R Sliding Frames (12, 13), and respectively screw 1 x
M18×1.5×φ12 T-shaped Pin (35) in the bolts of the L&R Sliding Frame (12, 13), then secure the
M18×1.5×φ12 T-shaped Pin (35) to facilitate the L&R Sliding Frame (12) are adjustable on the Guide
2. Put the U-shaped brackets of 2 x Base Frame (2) through 2 x Guide Tube (5) respectively, and then fix
2 x Guide Tube (5) to 2 x Base Frame (2) respectively using 2 x M10×16 Allen Bolts (44) and 2 x
3. Fix 2 x Double Floating Pulley Bracket (14) to the L&R Sliding Frame (12, 13) using 1 x M12×90mm
Allen Bolts (38), 2 x φ12mm Washers (50) and 1 x M12 Aircraft Nut (51).
Notes: Parts (43, 55, 57, 58, 61, 64) are pre-assembled.